


When you’re craving that perfect curry accompaniment, nothing crushes the mood faster than serving up stiff, dry flatbread that feels like it came straight out of a plastic bag. Been there, done that, ordered the emergency takeout. That’s why Noah and I spend so much time fixing these recipes! We took this concept—making incredible, soft, chewy, restaurant-style homemade naan bread—and threw out everything that made it complicated. Forget the tandoor; we’re smashing this out on a regular old skillet. This method works, and it delivers that fluffy texture you truly deserve. We promise, this is the recipe rescue you’ve been looking for. Check out the other broken recipes we’ve fixed over on our About Us page!
Why This Is The Best Homemade Naan Bread Recipe
You know how most online recipes for naan bread look amazing but taste like stiff cardboard when you actually make them? We fixed that! This recipe focuses entirely on delivering true Soft and Chewy Naan without any fancy equipment. Seriously, you’re going to get that amazing Restaurant Style Naan texture using nothing more than your stovetop. This is the bread that makes people think you’re a secret baker, and trust me, we love that effect, which you can read more about here!
Achieving That Perfect Puffy Flatbread Texture
The secret sauce here isn’t a hidden spice; it’s the baking science we applied. By using active yeast combined with full-fat plain yogurt, we kickstart fermentation while adding necessary acidity for tenderness. That combination is the key step in our quick Puffy Flatbread Tutorial. It ensures reliable bubbles and that beautiful internal structure every single time you try this simple stovetop bread.
Ingredients for Your Soft and Chewy Naan Bread
Okay, let’s look at what you need to pull off this magic trick! The great news is that everything required for this homemade naan bread is likely already sitting in your pantry or fridge. We aren’t dealing with any obscure ingredients here, which is why this is such an easy option for dinner!
- 1 cup warm water (We’re aiming for 105–115°F—not too hot, or you’ll kill the yeast, which is a rookie mistake we all make once!)
- 1 teaspoon granulated sugar
- 2 1/4 teaspoons active dry yeast
- 3 cups all-purpose flour, plus more for dusting
- 1 teaspoon salt
- 1/2 cup plain yogurt, make sure it’s full fat for the best chewiness
- 2 tablespoons olive oil, plus more for brushing later
- 2 tablespoons melted butter, this is for brushing right off the heat
- 1 clove garlic, minced (optional, but you know you want it for the topping!)
Ingredient Notes and Substitutions for Homemade Naan Recipe
Listen, the yeast activation step is non-negotiable if you want that great rise. If your water is too cold, the yeast just sleeps. If it’s too hot, it dies. We need that foamy cap after about five minutes—that’s the sign Noah says the yeast is ready to work its magic. Also, don’t skimp on the full-fat yogurt; the milk solids help tenderize the dough beautifully, making it so soft. If you are in a total rush and want a No Yeast Naan Option, you can skip the yeast/sugar/water part and use 1 cup of yogurt mixed with 1 teaspoon of baking powder instead, but the texture won’t be quite as supple as this full homemade naan bread recipe delivers.
How to Make Homemade Naan Bread From Scratch (No Tandoor Naan)
Alright, this is where the fun really begins! Making the dough for the homemade naan bread is surprisingly straightforward, but you have to treat it right. We are officially starting the process to make delicious Naan from Scratch, and trust me, smelling this rising dough is half the reward. You just need to follow these steps logically, paying attention to how the dough feels in your hands. If you ever want to see other recipes we’ve rescued and perfected, you can check out our main Blog!
Preparing and Rising the Quick Naan Dough
First things first, wake up the yeast! Mix that warm water, sugar, and yeast, and let it sit. If it doesn’t get foamy on top in about five minutes, dump it and start over with warmer water—that first activation is so crucial for this Quick Naan Dough. Once it’s bubbly, dump in your flour, salt, that lovely yogurt, and the olive oil. It’s going to look messy at first, like a shaggy monster of dough. Don’t panic! That’s perfectly normal. Turn it out onto your counter and get ready to knead. You need about five to seven minutes of honest kneading until the dough smooths out and feels elastic, almost like playdough that’s been warmed up. Then, plop it into an oiled bowl, cover it tightly, and put it somewhere warm. Seriously, find a warm spot—like near a radiator or in a slightly warm (but turned off!) oven. You need that dough to double in size, which takes about an hour and a half. Patience here equals fluffy success later!
The Skillet Method for Fluffy Indian Flatbread
This is the part where we conquer the Tandoor problem! Forget about it. We are using a very heavy skillet—cast iron works like a dream—and we need to get it screaming hot over medium-high heat. And I mean H-O-T. Do not add any oil to the pan; we want raw, direct heat for the authentic char! Once the pan is ready, gently flatten one of your dough balls into an oval, about skinning-thin, maybe an eighth of an inch. Toss it onto that bare hot skillet. Watch closely! After maybe 90 seconds, you’ll see big bubbles forming. Flip it! The second side only needs a minute or so, and you should see deep brown or even black charred spots appearing—that’s flavor, my friends. If the whole thing puffs up like a balloon, gently press the top with a spatula to encourage the air to spread out and cook the whole thing evenly. That’s how we guarantee that perfectly cooked, Fluffy Indian Flatbread without roasting it in a brick oven!
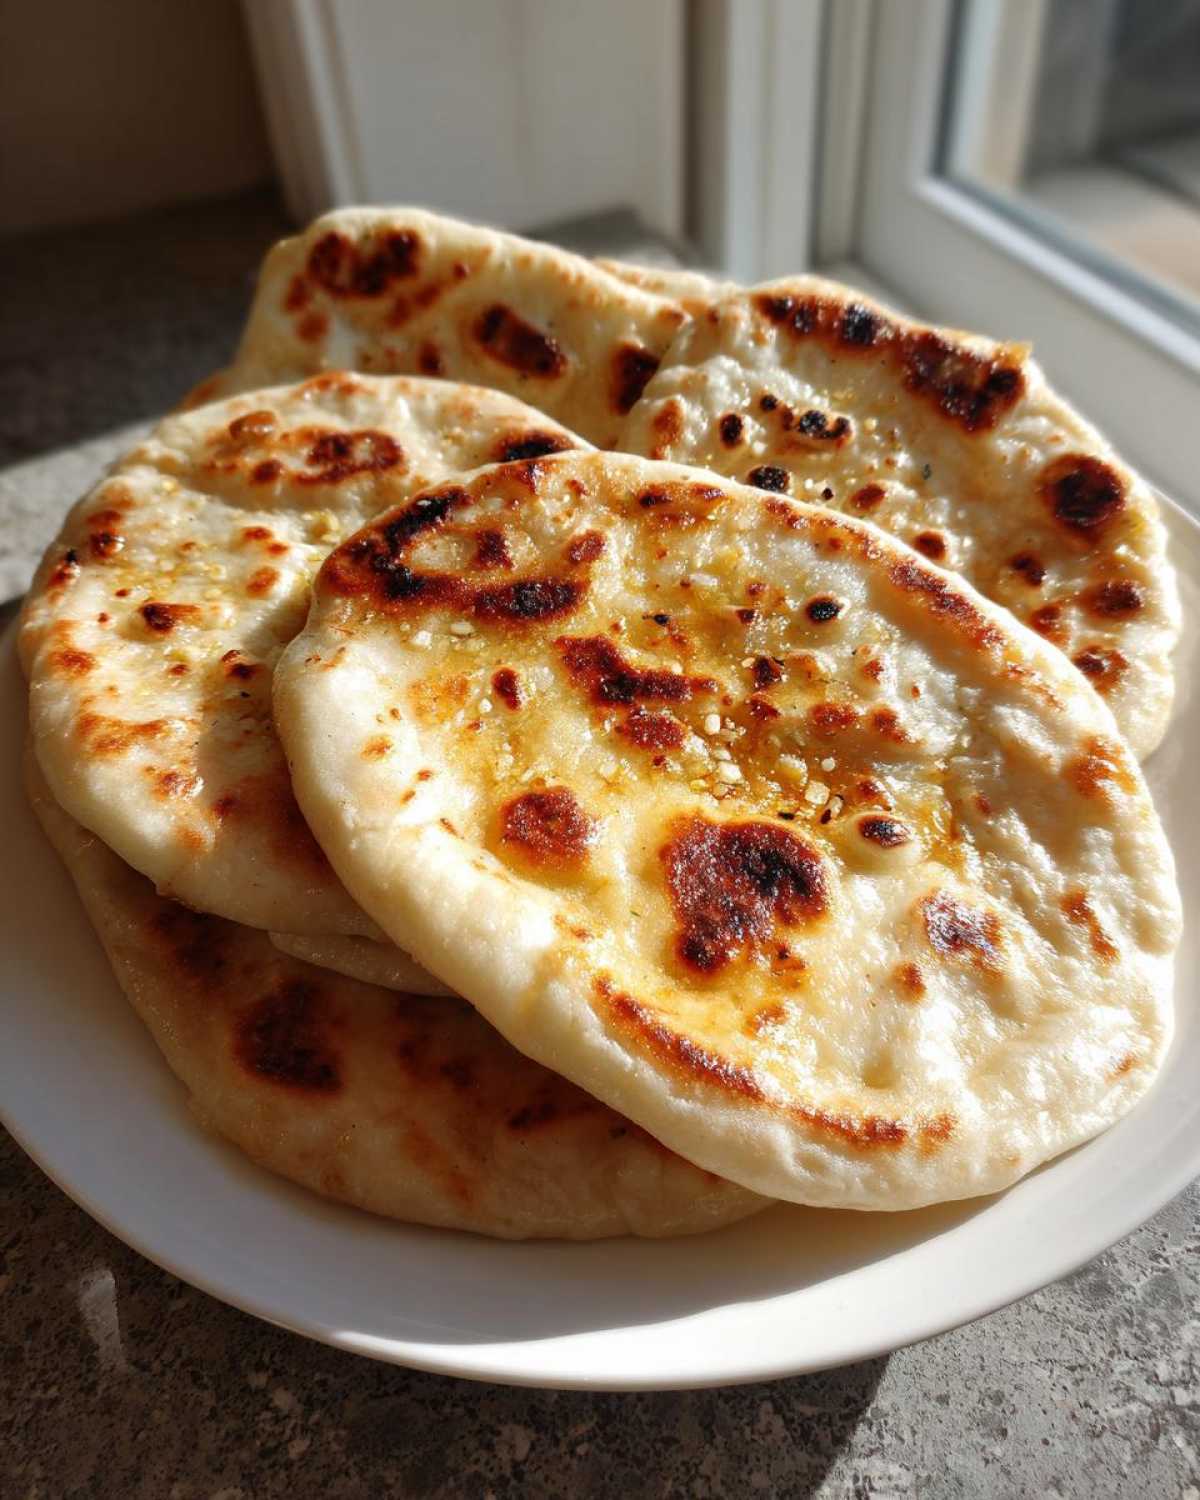
Finishing Your Buttery Flatbread: The Flavor Boost
Whew! You just conquered the hardest part. Now, we add the luxurious finish that takes this bread from “good homemade bread” to “I’m never buying naan again” status. The moment that hot naan comes off the skillet, you need to work fast. Grab that little bowl of melted butter—seriously, don’t wait! Brush it liberally all over the top surface. The heat of the bread instantly melts and absorbs that glorious fat, giving you the unmistakable richness we associate with great Buttery Flatbread.

I actually have to stop myself from eating the first one straight off the cooling rack every time we make this. The smell of char meeting pure melted butter? It’s intoxicating. It fills the whole kitchen and suddenly makes whatever curry you’re planning seem ten times better. If you’re not making the garlic version, just brush it and toss it into a stack covered with a clean tea towel to keep it warm and soft until serving. If you want to see another recipe where butter plays the absolute star of the show, check out my thoughts on amazing dinner rolls!
Variations: Making Garlic Naan Bread
Okay, I know I keep saying this, but honestly, the best way to eat this bread is slathered in garlic butter. It’s just not optional for me! If you want to elevate your game from just plain homemade naan bread to something truly spectacular—the kind you fight your spouse over in the kitchen—you have to make the garlic version. This targets that coveted Garlic Naan Bread experience that puts restaurant bread to shame.
The timing on this matters a lot, just like everything else we do here. You absolutely cannot mix the garlic into the dough before cooking. Why? Because that minced garlic will burn black on the hot skillet before the dough even cooks through. That leaves you with bitter black bits, and we fixed broken recipes here, we don’t *make* them!
Here is the method Ben and I swear by: wait until the naan finishes cooking on both sides—it has to be completely done and off the heat. Then, immediately melt a tablespoon of butter in a tiny saucepan—maybe add a pinch of flaky salt if you want to be fancy—and toss in your minced garlic. Let it sizzle for just ten seconds, no longer, then pull it off the heat immediately. Now, brush that fragrant garlic butter all over the warm naan. The residual heat blooms the garlic flavor perfectly without actually burning it. It makes the bread smell incredible!
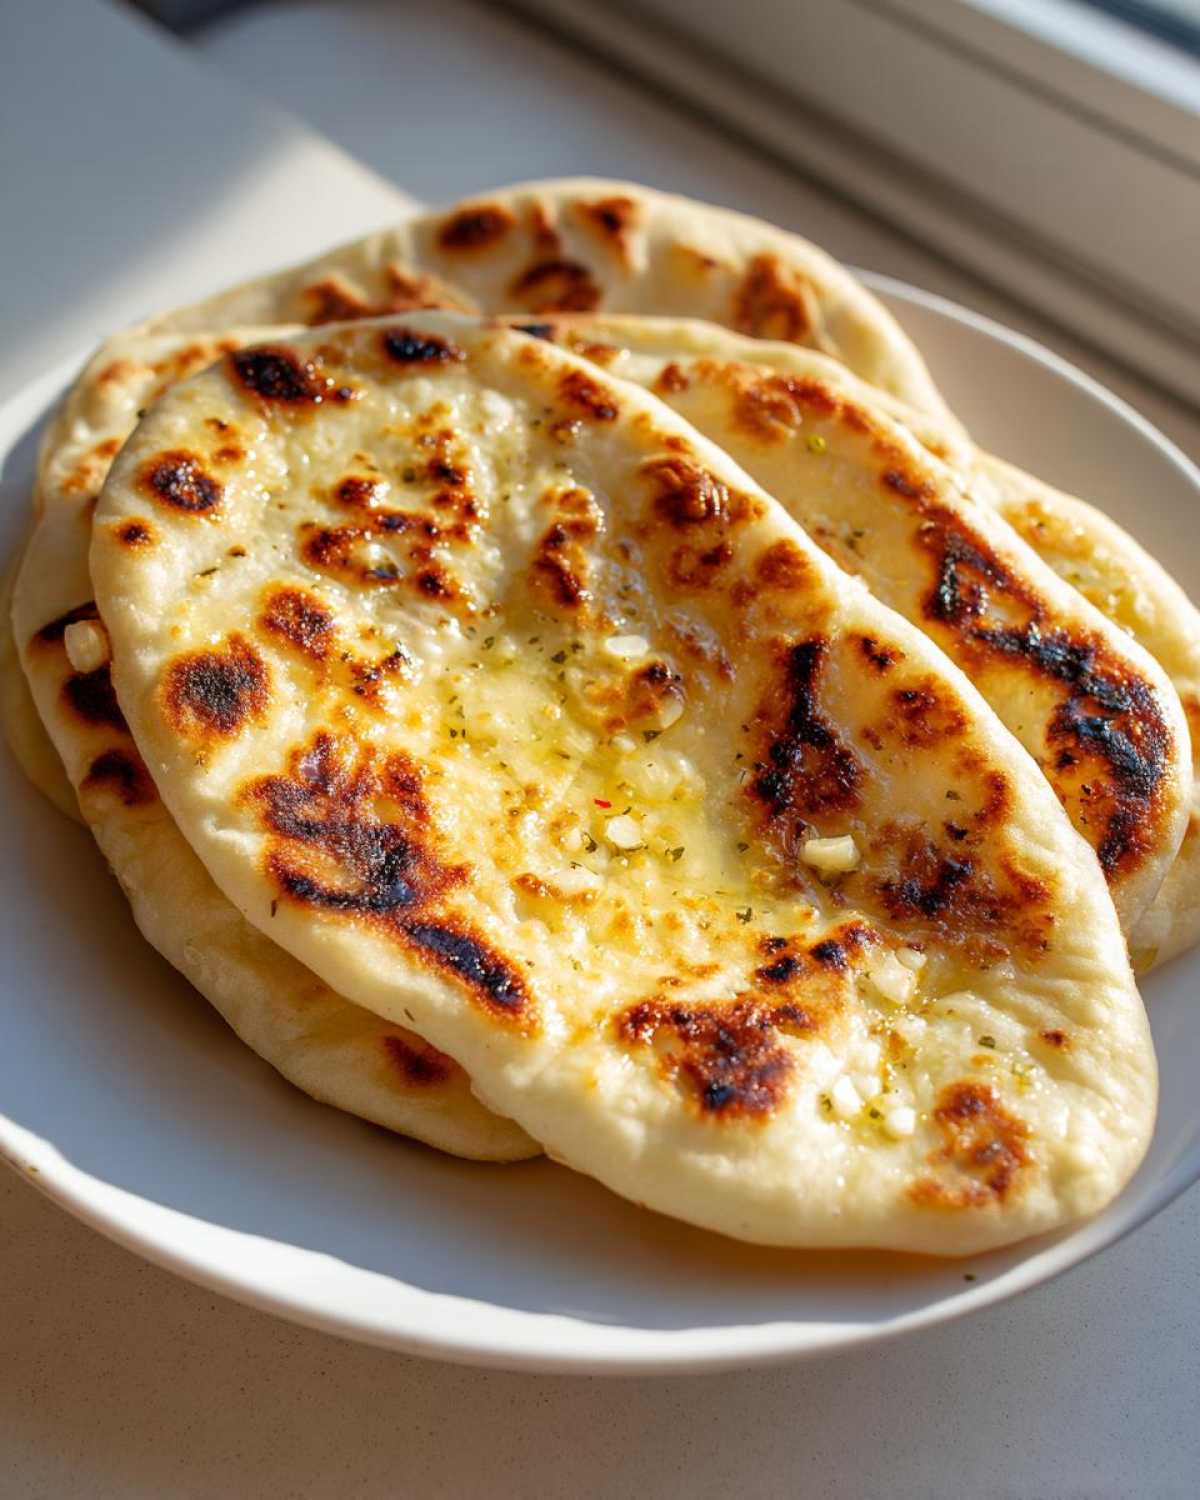
If you are feeling truly wild, you can also use the same melted butter technique to brush herbs like cilantro or even make a little Naan Pizza Base later. But for now, just bask in the glory of fresh garlic coating your skillet bread!
Tips for Perfect Homemade Naan Bread Every Time
Even though this is truly a foolproof recipe, sometimes the universe throws us a wrench, right? That’s why Noah and I always include a detailed troubleshooting guide. We want your experience making homemade naan bread to be a success story, not another broken promise. If you’ve followed the steps but things still feel slightly off—maybe not quite as soft as we described—here are the little fine-tuning points that make all the difference. For more deep-dive fixes on other recipes, check out how we handled chili garlic noodles!
Troubleshooting Common Homemade Naan Issues
If your dough isn’t rising the way it should after that hour and a half, stop and check the temperature of your water again. That’s the number one culprit. If the yeast didn’t foam up initially, the dough won’t double. That’s Noah’s science telling us the yeast population just isn’t active enough to create the lift we need for that airy, pillowy texture.
Now, what if your naan isn’t puffing up on the hot skillet? I’m going to tell you straight: your pan isn’t hot enough. Period. You need that violent, immediate contact between the dough’s surface and the metal to create that steam explosion that separates the layers. If it’s just gently sizzling, you’re basically baking a flat pita instead of a puffy delight. Turn that heat up—remember, we want char marks!
Another common issue I see online is people ending up with tough naan. If that happens, it usually means one of two things from the kneading stage. Either you overworked the dough past the point of being smooth and elastic, developing too much gluten, or you used too much flour when you were rolling out your individual pieces. Don’t dust the counter with flour like you’re making pasta! Just a light sheer coating is all you need. Keep the dough hydrated and handle it gently when shaping it, and you’ll avoid that tough chewiness.
Serving Suggestions for Your Easy Naan Bread
Look, this fluffy bread is amazing on its own, brushed with butter, but let’s be real—it’s designed to be a vehicle for flavor! We need to talk about exactly what you’re going to use this incredible Easy Naan Bread for. If you’ve made this batch and you’re now wondering what to pull out of the freezer for dinner, I have suggestions!
The absolute classic pairing is, of course, grabbing the richest, sauciest curry you can find. Whether it’s a bright lentil dahl or a thick butter chicken, this bread is your perfect utensil. It’s strong enough to handle heavy sauce but soft enough to tear apart with just a gentle pull. This is truly the ultimate Easy Flatbread for Curry because it doesn’t crumble halfway through dinner!

But don’t limit yourself! This bread is just as fantastic when it’s used for dips. Think about whipping up a thick hummus or maybe a spicy yogurt raita; you want something pliable and soft that scoops it all up without breaking. My personal favorite cheat, though? We sometimes turn leftover naan into quick pizza bases. If you check out our creamy tomato tortellini skillet recipe, you can use a piece of this naan as a base, top it with some leftover sauce, cheese, and bake it for five minutes. It’s ridiculously good—way better than any store-bought base!
So, whether you’re mopping up sauce, dipping into olive oil, or turning it into a weeknight quick meal, don’t let this bread sit around plain. It deserves to be the star side dish!
Storing and Reheating Your Fluffy Indian Flatbread
One of the great joys of making a big batch of this bread is knowing you have leftovers for lunch the next day! But we absolutely cannot let that soft texture disappear. If you make this Fluffy Indian Flatbread, you need to store it correctly so it’s still pliable when you reheat it. This is key to making sure your hard work pays off over a couple of days.
First, let the naan cool down almost completely after you brush it with the butter (or garlic butter). If you trap too much initial steam inside a container, they’ll get soggy fast—and nobody wants a wet naan! Once they are just warm to the touch, stack them up. I wrap my stack tightly in plastic wrap first, and then I tuck that whole package into a large, sturdy zip-top bag or an airtight container. This keeps the air out and locks in that crucial moisture we worked so hard to create!
Now, about reheating. If you toss cold naan into the microwave, you’re running a huge risk of turning it rubbery almost instantly. That’s a fast track back to a broken recipe promise, and we don’t stand for that here! The microwave should only be used if you’re desperate and you only need about ten seconds to warm it up for a very speedy meal.
The *real* way to bring it back to life is to put it back on the heat. Take your skillet—the same one you cooked it on—and get it ripping hot again over medium-high heat. Dry pan, no oil! Slap that cold naan right onto the dry skillet for about 20 to 30 seconds per side. You’ll see it start to soften and possibly even puff up again slightly as the heat penetrates. That little bit of toasting brings back that slight crispness on the outside while keeping the inside perfectly soft and chewy. It’s honestly like it just came off the line fresh, ready for dipping!
Frequently Asked Questions About Homemade Naan Bread
We get tons of questions whenever we post this recipe—which is a good sign, right? It means people are trying to make amazing homemade naan bread! Here are the common things we get asked about that don’t fit neatly into the step-by-step guide. If you have more questions, don’t hesitate to reach out on our Contact page!
Can I use this Yogurt Naan Recipe for Naan Pizza?
Absolutely, yes! This Yogurt Naan Recipe is perfect for turning into an instant pizza base. Because we use yogurt and a little fermentation time, the dough has enough structure to hold up toppings without getting soggy, especially if you pre-bake the base slightly!
If you are making Naan pizza, I recommend rolling the dough just a tiny bit thinner than you would for scooping curry—maybe a hair thinner than the 1/8 inch we suggest. Cook it on the skillet until you see good bubbles and some charring, but pull it off before the second side is fully done. Then, top it with sauce, cheese, and whatever you like, and slide it under the broiler for just two minutes until the cheese melts. It’s a game-changer when you need a super fast dinner!
What is the difference between Naan and Pita bread?
This is a great question people ask when they are looking for alternative Indian Bread Recipes! The biggest difference comes down to two things: fat and cooking heat. Naan is traditionally richer because we use yogurt and often brush it generously with butter or ghee, which keeps it soft and pliable. Pita bread, on the other hand, is usually leaner and relies purely on steam (from being cooked at extremely high heat) to puff into its signature pocket.
Our method here leans toward naan because we use yogurt and oil in the dough, and we finish it with butter. If you cooked this same dough on the highest possible heat, you might get a puff, but the addition of that fat content really pushes it into the soft, chewy naan category, giving you that beautiful Buttery Flatbread result!
Can I make this a quick naan bread recipe by skipping the yeast?
Yes, you totally can shortcut the rise time if you are truly desperate, like I was last Tuesday! If you want a truly Quick Naan Bread experience, you can swap the yeast/water/sugar combination for 1 cup of yogurt mixed with 1 teaspoon of baking powder. You skip the whole 90-minute rising time, which is amazing.
However, Noah always reminds me that this isn’t the same structurally. You won’t get the same deep, chewy texture that the yeast fermentation provides. It will be softer, closer to a traditional flatbread, but it won’t have that amazing pull. It’s a decent trade-off in a pinch, but for the absolute best result, let the yeast do its job!
How do I get those dark char spots on my skillet-cooked bread?
Those spots are pure flavor, and they tell me you are successfully making Restaurant Style Naan! The key clue here is heat management. You need your cast iron or heavy skillet smoking hot *before* the dough touches it. If the pan is merely warm, the dough will dry out slowly before it has a chance to aggressively bubble and blister. A super hot base instantly cooks the bottom, creating those air pockets and the tell-tale dark spots simultaneously. Don’t be shy with the heat underneath that skillet!
PrintThe Best Easy Homemade Naan Bread (Soft, Chewy, No Tandoor Required)

You can achieve soft, chewy, restaurant-style naan bread right in your home kitchen without a tandoor. This foolproof recipe delivers fluffy results perfect for serving with your favorite curries.
- Prep Time: 25 min
- Cook Time: 15 min
- Total Time: 1 hour 55 min
- Yield: 8 servings
- Category: Side Dish
- Method: Stovetop Skillet
- Cuisine: Indian
- Diet: Vegetarian
Ingredients
- 1 cup warm water (about 105-115°F)
- 1 teaspoon granulated sugar
- 2 1/4 teaspoons active dry yeast
- 3 cups all-purpose flour, plus more for dusting
- 1 teaspoon salt
- 1/2 cup plain yogurt, full fat
- 2 tablespoons olive oil, plus more for brushing
- 2 tablespoons melted butter, for brushing
- 1 clove garlic, minced (optional, for topping)
Instructions
- Activate the yeast: In a large bowl, combine the warm water, sugar, and yeast. Let this mixture sit for 5 to 10 minutes until it becomes foamy. This shows the yeast is active.
- Mix the dough: Add the flour, salt, yogurt, and 2 tablespoons of olive oil to the yeast mixture. Mix with a wooden spoon or stand mixer until a shaggy dough forms.
- Knead the dough: Turn the dough out onto a lightly floured surface. Knead for 5 to 7 minutes until the dough is smooth and elastic. It should feel soft.
- First rise: Lightly oil a clean bowl. Place the dough in the bowl, turning it once to coat. Cover the bowl with plastic wrap or a clean kitchen towel. Let the dough rise in a warm spot for 1 to 1.5 hours, or until it has doubled in size.
- Divide the dough: Gently punch down the risen dough. Divide it into 8 equal pieces. Roll each piece into a smooth ball. Cover the balls and let them rest for 15 minutes.
- Shape the naan: On a lightly floured surface, use a rolling pin to roll each dough ball into an oval or teardrop shape, about 1/8 inch thick.
- Cook the naan (Skillet Method): Heat a heavy-bottomed skillet or cast-iron pan over medium-high heat until it is very hot. Do not add oil to the pan.
- Cook the first side: Place one piece of rolled dough onto the hot, dry skillet. Cook for 1 to 2 minutes until bubbles start to form on the surface and the underside has golden-brown spots.
- Cook the second side: Flip the naan. Cook the second side for about 1 minute until it puffs up slightly and develops more charred spots. If it puffs significantly, gently press down on the bubbles with a spatula to help it cook evenly.
- Finish and serve: Remove the naan from the skillet and immediately brush the top generously with melted butter. If making garlic naan, sprinkle minced garlic over the butter while it is hot. Repeat with the remaining dough pieces.
Notes
- For the softest naan, ensure your yogurt is at room temperature before adding it to the dough.
- If you want a quick naan bread recipe without yeast, you can substitute the yeast, water, and sugar with 1 cup of plain yogurt and 1 teaspoon of baking powder, but the texture will be slightly less chewy.
- To achieve restaurant-style charring, make sure your skillet is hot enough before placing the dough down.
Nutrition
- Serving Size: 1 piece
- Calories: 210
- Sugar: 1
- Sodium: 250
- Fat: 5
- Saturated Fat: 2
- Unsaturated Fat: 3
- Trans Fat: 0
- Carbohydrates: 37
- Fiber: 2
- Protein: 6
- Cholesterol: 5