

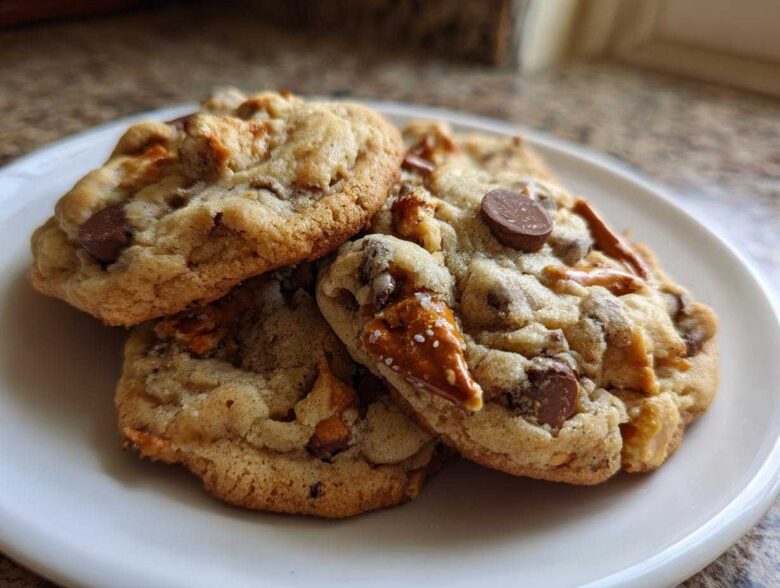
Forget your standard chocolate chip routine; we’re leveling up cookie night in a massive way today! If you thought cookies couldn’t possibly get any better, let me introduce you to my absolute favorite creation: Brown Butter Kitchen Sink Cookies. Seriously, the moment that butter starts sizzling and turning that gorgeous amber color, you know you’ve unlocked a secret level in baking. I started making these years ago when I wanted a truly gourmet experience but still wanted the fun, leftover-stash chaos of a kitchen sink cookie.
This recipe takes everything great about those jam-packed cookies—the crunch, the chewiness, the surprises—and gives it this incredible, deep, nutty backbone that regular butter just can’t touch. Trust me, once you experience that complex flavor, you’ll never go back to plain melted butter. It’s my go-to for potlucks because they always disappear first, and everyone asks what my secret is regarding the cookies that always win bake sales. Well, today, I’m sharing it all with you!
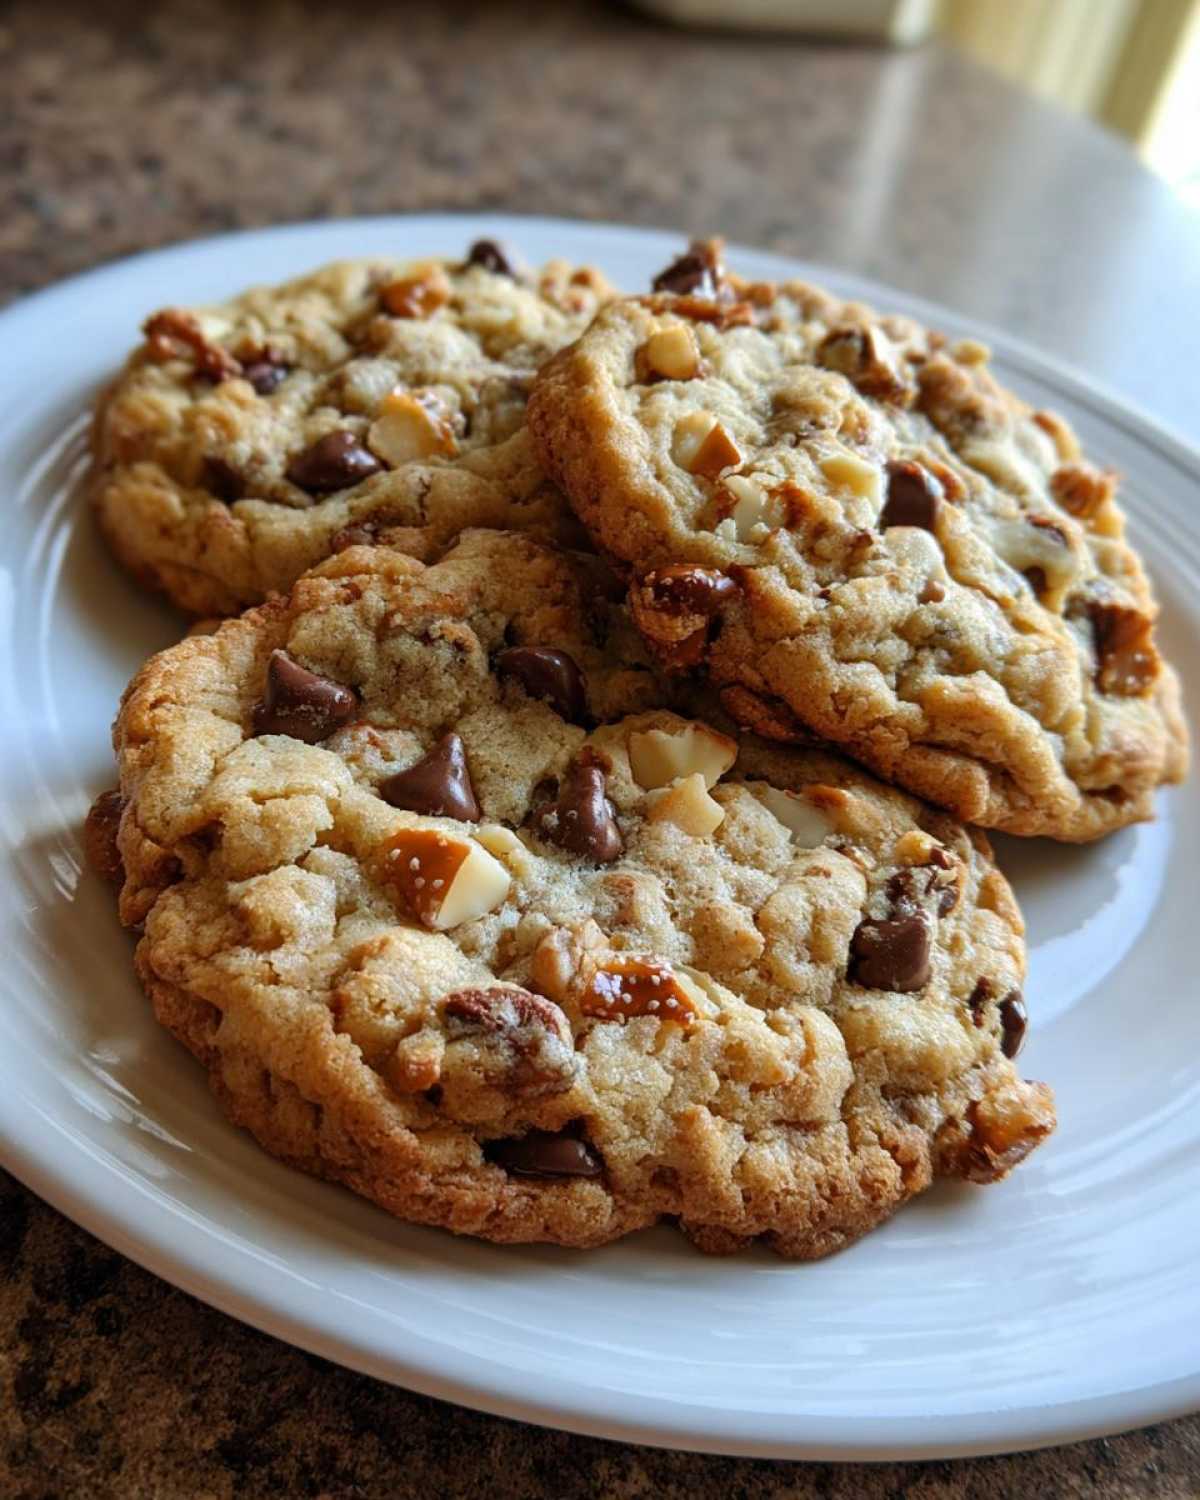
Why You Will Love These Brown Butter Kitchen Sink Cookies
You might be wondering why I insist on taking the extra five minutes to brown the butter. I promise you, it’s the single best thing you can do for your cookie game! Here is why this particular recipe is going straight into your ‘Favorites’ folder:
- That Deep, Nutty Flavor: Browned butter brings a complex, toffee-like background note that elevates every single mix-in. It’s gourmet without the fuss!
- Perfectly Chewy Edges: The way the cooled brown butter interacts with the sugars creates cookies that stay delightfully chewy, not just around the edges, but throughout the center.
- The Ultimate Mix-In Party: Because this is a kitchen sink style, you can throw in whatever you have on hand! Chips, nuts, pretzels—if you love it, it goes in. See my combo suggestions later on.
- Bakery Style Texture: These aren’t thin, crispy wafers! They are thick, substantial, and soft in the middle, just like the ones from the fancy bakeries.
- Easy To Make Ahead: The dough *loves* to chill. This means you can prep a massive batch, pop it in the fridge, and bake fresh cookies whenever the craving hits. Check out my tips for keeping cookies soft for more on this!
- They Look Impressive: Honestly, the slightly uneven browning from the butter scraps stuck in the dough just makes them look rustic and unbelievably homemade.
Essential Ingredients for Gourmet Brown Butter Kitchen Sink Cookies
When we’re aiming for that gourmet, deep-flavor cookie, the ingredients list matters a lot—especially the butter! You need good quality stuff here because we are really going to highlight its natural flavors. This isn’t the time to skimp. My biggest rule? Always use unsalted butter. Since we are adding salt separately, using salted butter throws off the balance of the whole recipe. You’re in complete control of the saltiness this way!
For the Brown Butter Base
This is where the magic starts. You need the full two sticks of butter, which measures out to one cup. Pay attention to packing that brown sugar—we want lots of molasses flavor to complement the nutty butter. Don’t just scoop it; pack it tight into your measuring cup!
- 1 cup (2 sticks) unsalted butter
- 1 cup packed light brown sugar
- 1/2 cup granulated sugar
Dry Ingredients and Flavorings
These are standard pantry staples, but we are being very clear on the leavening to ensure we get that perfect thick texture. Make sure your baking soda is fresh!
- 2 large eggs
- 1 tablespoon vanilla extract
- 2 1/4 cups all-purpose flour
- 1 teaspoon baking soda
- 1/2 teaspoon salt
Kitchen Sink Mix-Ins (Customize Your Brown Butter Kitchen Sink Cookies)
Okay, the fun part! This is the ‘kitchen sink’ element, so feel free to swap things out based on what you love. However, I stick close to this initial combo because the mix of salty pretzels, rich chocolate, and crunchy nuts is just perfect. Remember, you’re aiming for about 2.5 cups of total crunch and chewiness.
- 1 cup semi-sweet chocolate chips
- 1/2 cup milk chocolate chips
- 1 cup crushed pretzels
- 1/2 cup chopped pecans or walnuts
- 1/2 cup toffee bits or chopped candy bar pieces
You can check out some of my favorite variations on mix-ins over at my guide about baking with browned butter secrets!
How to Make Brown Butter Kitchen Sink Cookies Step-by-Step
Okay, buckle up, because this is where we turn good ingredients into the absolute best Brown Butter Kitchen Sink Cookies you’ve ever tasted. The process is super straightforward, but pay close attention during that butter step because it rewards your focus big time! Most of the magic happens before we even touch the flour. This is the section where we really nail down the technique, so make sure you have the full recipe list handy!
Browning the Butter: The Deep Flavor Secret
First things first: brown that butter! Take your full cup of butter and melt it down in a light-colored saucepan—you really need to see the color change. It’s going to foam up like crazy, then the foaming subsides. That’s your cue to give it a constant, gentle stir. You’re looking for tiny brown specs collecting at the bottom, and the whole kitchen should smell wonderfully nutty, like toasted hazelnuts. The second it hits that perfect nutty aroma, yank the pan off the heat! Pour that liquid gold immediately into a heatproof bowl, scraping every last dark bit in there. It needs to cool down for about 15 minutes before we mix anything else in. This cooling time is non-negotiable, or you’ll scramble those eggs! For more on this vital step, check out my guide on how to make brown butter for cookies.
Mixing the Dough for Perfect Brown Butter Kitchen Sink Cookies
Once the butter is cool enough to touch, whisk in both the brown and granulated sugars until they are completely blended with the nutty butter. Then, add those two eggs, one at a time, making sure the first one is fully incorporated before you drop in the second. Don’t forget the vanilla! In a separate bowl, just give that flour, baking soda, and salt a quick whisk to combine them. Now, add the dry ingredients to the wet stuff. Mix slowly on low speed, and stop mixing the second you see the last streak of flour disappear. I cannot stress this enough: do not overmix after the flour goes in, or you’ll develop too much gluten and lose that chewy texture we worked so hard for!
Chilling and Baking Your Loaded Kitchen Sink Cookie Dough
Time for the payoff! Gently fold in all those delicious mix-ins—the chocolate, the toffee, the salty pretzels. Now, cover that beautiful, loaded dough and chill it for at least 30 minutes. Seriously, though, if you can swing a full 24 hours, the true, deep flavor comes out. When you’re ready to bake, preheat your oven to 350°F (175°C) and line those sheets with parchment paper. Scoop generous tablespoons of dough onto the sheets, making sure they have about two inches of space to spread out. Bake them for just 10 to 13 minutes. You want the edges to look golden brown, but the centers should still look just a tiny bit soft or underdone—that’s how you get cookies that stay soft for days! Let them sit on the hot sheet for five minutes before moving them to a rack. They firm up perfectly as they cool.

Tips for Thick and Chewy Brown Butter Cookies with Mix Ins
Achieving that perfect texture—crisp edges hugging a gooey, soft center—is the holy grail of cookie baking, right? With these Thick and Chewy Brown Butter Cookies with Mix Ins, the structure is already set up for success because we used cooled brown butter instead of simple melted butter. But we can still optimize things!
My absolute number one tip for thickness is chilling time. If you are in a rush, 30 minutes in the fridge is enough to make the dough set up, but trust me on this: if you can let it hang out overnight, the texture becomes substantially better—chewier, deeper flavor, and much less spreading. The fats firm up again, locking in that incredible brown butter taste.
Another thing that helps build height is how you scoop. Don’t flatten the dough balls! Use a sturdy cookie scoop, about a tablespoon or maybe a bit more, and roll it gently in your hands to form a ball. Place it on the sheet as a little dome. They’ll flatten out enough during baking, but keeping that height going in prevents them from becoming flat wafers.
Temperature management is crucial too. Make sure your oven thermometer is accurate! If your oven runs cool, you’ll bake them too long trying to get that golden color, and they’ll dry out. If you notice your cookies spreading too much too fast, try lowering the oven temperature by about 10 degrees, which gives the dough a chance to firm up before the butter melts completely. You can find more insight into making great bases like this in my guide on baking with browned butter secrets.
My little secret for extra-chewy edges? Right when the cookies come out of the oven at the 11-minute mark, I take a round biscuit cutter (or even a large glass rim) dipped in sugar, and I gently nudge the edges of the hot cookies into a perfect circle just before they set forever on the pan. It takes one second, and they look like they came straight from a bakery case!
Kitchen Sink Cookie Add Ins Combinations for Your Brown Butter Kitchen Sink Cookies
The whole point of a kitchen sink cookie, right? It’s the glorious balancing act! You can’t just throw every sweet thing in the pantry into the dough; otherwise, it turns into a sugary mess that burns before the center cooks. The secret to great kitchen sink cookie add ins combinations is to make sure you have sweet, salty, and something crunchy to give it textural contrast.
Since these cookies already have that amazing, deep caramel flavor from the brown butter, we need components that play nicely with that richness. Don’t go over about 2.5 cups of total add-ins; remember that your chips and pretzels are taking up space that the dough needs to puff up just a little bit.
If you want to venture outside the main recipe (which includes chocolate, pretzels, nuts, and toffee—a fantastic start!), try one of these combinations next time you make these Brown Butter Kitchen Sink Cookies:
- Tropical Crunch: Swap out the toffee for toasted coconut flakes and use white chocolate chips instead of semi-sweet. Add in some dried pineapple chunks for a sweet-tart element. That brown butter pairs beautifully with coconut!
- Oatmeal Raisin Remix: For a chewier profile, add 1/2 cup of quick oats and replace the pretzels with slightly chopped dried cherries. Use dark chocolate chunks here for a more intense flavor profile.
- The Candy Bar Dream: If you’re feeling extra decadent, use chopped-up peanut butter cups (the mini ones work great) along with butterscotch chips instead of toffee bits. Make sure you chill this dough extra long, though, because candy has a lower melting point!
Experimenting with these Kitchen Sink Cookie Add Ins Combinations is half the fun. Just make sure you keep that salty/crunchy element—the pretzels are what stop these cookies from tasting too heavy!
Storage and Reheating Instructions for Brown Butter Kitchen Sink Cookies
Now, this is where most people get nervous: how long will these beauties actually last? Since we used brown butter, they have a fantastic flavor depth that actually seems to deepen overnight, but we need to store them right to protect that chewy texture.
The key is keeping them at room temperature in an airtight container. Seriously, skip the fridge! Putting cookies in the fridge is the fastest way to dry them out and make them hard. If you store them correctly, these Brown Butter Kitchen Sink Cookies will stay soft and chewy for a good solid week. I try to layer mine with parchment paper if I stack them, just to make sure that salty pretzel crunch doesn’t transfer onto the chocolate tops of the cookies underneath, though they usually never last that long anyway!
What if you pull one out on day four and it feels a little stiff? Don’t worry! I have the perfect little trick for getting that fresh-from-the-oven experience back instantly. Just pop the cookie in the microwave for about 8 to 10 seconds. That little burst of heat melts the chocolate just enough and brings the brown butter flavor right back to the forefront. It feels like cheating, but it works every time! For more general advice on keeping any baked good soft, check out my secrets on how to keep cookies soft.
If you made a triple batch (and you absolutely should have!), you can freeze the extra dough balls. Scoop them onto a parchment-lined baking sheet, freeze them solid for an hour, then transfer them to a heavy-duty zip-top bag. When you want a fresh cookie later, just toss one or two frozen dough balls onto a prepared sheet and add about 3 to 4 extra minutes to the baking time. Perfection!
Frequently Asked Questions About Brown Butter Kitchen Sink Cookies
I get so many questions about this recipe because figuring out that brown butter consistency can feel a little intimidating at first. But don’t worry, these are some of the things I worried about when I was first perfecting my ultimate kitchen sink cookie guide!
Can I skip chilling the dough for these Chewy Brown Butter Cookies with Mix Ins?
You absolutely *can* skip it if you’re desperate right now, but I heavily advise against it! Chilling is what sets the fats, prevents major spreading, and really lets those brown butter flavors meld into everything. If you skip the chill time, you’re going to end up with much flatter cookies, and they won’t have that desirable chewy texture. Give them at least 30 minutes!
What happens if I burn the brown butter?
Oh man, this has happened to me! If you see the butter turn black instead of that lovely amber-brown color, or if it starts smoking aggressively past the point of being nutty, you have to stop and start over. Burnt butter tastes bitter and acrid, and there’s no saving it once it hits that stage. It will completely ruin the deep flavor profile of your Brown Butter Kitchen Sink Cookies. Watch the pan closely—the difference between perfect and burnt is maybe ten seconds!
Can I use melted butter instead of browning it?
Sure, you *can* use plain melted butter, and they will still be good cookies thanks to all those awesome mix-ins. But if you skip the browning step where we get those gorgeous nutty, toffee notes, you lose the entire point of this gourmet recipe! It becomes a standard loaded cookie rather than a true Gourmet Brown Butter Cookie Recipe. I’ve got a whole post about how to make brown butter for cookies if you want reassurance on the method!
Can I use store-bought pretzels, or should they be fresh?
Use whatever pretzel—rods or twists—you have! The important thing is crushing them up relatively small, so you get little bursts of saltiness in every bite rather than huge chunks that fall out. Freshness doesn’t really matter for pretzels; they are sturdy enough to hold up to baking just fine.
Do I need to use both semi-sweet and milk chocolate chips?
Nope, this recipe is highly adaptable! If you only have one kind, use two cups of that one kind. I like using both because it offers a complex chocolate experience—the semi-sweet gives me that familiar base cookie flavor, and the milk chocolate melts into those pools of creamy goodness. But if you’re a dark chocolate or a white chocolate purist, go for it!
Nutrition Estimates for This Deep Flavor Cookie Recipe
So, these are cookies, right? They are loaded with butter, sugar, and all those wonderful mix-ins. Because of that, you know they aren’t exactly counting as diet food, but I figured you’d want the ballpark figures anyway! These estimates are based on exactly what I listed for the Brown Butter Kitchen Sink Cookies batch of 24, but please remember, if you swap pretzels for potato chips or add extra peanut butter cups, these numbers are going to jump a bit!
- Serving Size: 1 cookie
- Calories: 220
- Sugar: 18g
- Fat: 13g
- Carbohydrates: 25g
It’s all about balance in life, and these totally count as a necessary treat when you’ve made such a big effort on that brown butter dough!
Share Your Ultimate Kitchen Sink Cookie Creations
Well, that’s it! You now have everything you need to bake what I think is the most flavor-packed, textural masterpiece of a cookie out there: the Brown Butter Kitchen Sink Cookie. I truly hope you love the depth the browned butter brings to the party; it makes such a huge difference, doesn’t it?
Now that you’ve put in the effort—especially nailing that perfect nutty aroma from the butter—I absolutely need to hear about it! Did you stick to my recommended chocolate/pretzel combo, or did you go absolutely wild with your own kitchen sink creation? Tell me your favorite mix-ins and what you substituted!
Please leave a rating for the recipe—if you loved how chewy they turned out, give it five stars! And if you took a picture of that gorgeous, craggy topside full of chocolate and pretzel bits, please share it on social media and tag me! I live for seeing your baking successes. You can find us over on the main site index if you need to look up techniques again. Happy baking, my friends!
PrintBrown Butter Kitchen Sink Cookies

Make rich, chewy cookies using browned butter for a deep, nutty flavor base, loaded with your favorite mix-ins.
- Prep Time: 20 min
- Cook Time: 13 min
- Total Time: 33 min
- Yield: 24 cookies
- Category: Dessert
- Method: Baking
- Cuisine: American
- Diet: Vegetarian
Ingredients
- 1 cup (2 sticks) unsalted butter
- 1 cup packed light brown sugar
- 1/2 cup granulated sugar
- 2 large eggs
- 1 tablespoon vanilla extract
- 2 1/4 cups all-purpose flour
- 1 teaspoon baking soda
- 1/2 teaspoon salt
- 1 cup semi-sweet chocolate chips
- 1/2 cup milk chocolate chips
- 1 cup crushed pretzels
- 1/2 cup chopped pecans or walnuts
- 1/2 cup toffee bits or chopped candy bar pieces
Instructions
- Melt the butter in a light-colored saucepan over medium heat. Continue cooking, stirring occasionally, until the butter foams, then subsides, and brown bits form at the bottom. The butter will smell nutty. Immediately pour the brown butter into a heatproof bowl, scraping in the browned bits. Let cool for 15 minutes.
- In a large bowl, whisk the cooled brown butter with the brown sugar and granulated sugar until well combined.
- Beat in the eggs one at a time, mixing well after each addition. Stir in the vanilla extract.
- In a separate bowl, whisk together the flour, baking soda, and salt. Gradually add the dry ingredients to the wet ingredients, mixing on low speed until just combined. Do not overmix.
- Gently fold in the chocolate chips, crushed pretzels, nuts, and toffee bits.
- Cover the dough and chill for at least 30 minutes, or up to 24 hours for best flavor development.
- Preheat your oven to 350°F (175°C). Line baking sheets with parchment paper.
- Scoop rounded tablespoons of dough onto the prepared sheets, leaving about 2 inches between cookies.
- Bake for 10 to 13 minutes, or until the edges are golden brown and the centers look slightly underdone.
- Let the cookies cool on the baking sheet for 5 minutes before transferring them to a wire rack to cool completely.
Notes
- To brown butter, watch it closely after it stops foaming; the transition from golden brown to burnt happens quickly.
- For thicker cookies, chill the dough longer or use a cookie scoop for uniform size.
- You can substitute any combination of chips, dried fruit, or cereal for the mix-ins listed. Aim for about 2.5 cups of total add-ins.
Nutrition
- Serving Size: 1 cookie
- Calories: 220
- Sugar: 18g
- Sodium: 110mg
- Fat: 13g
- Saturated Fat: 8g
- Unsaturated Fat: 5g
- Trans Fat: 0g
- Carbohydrates: 25g
- Fiber: 1g
- Protein: 3g
- Cholesterol: 40mg