

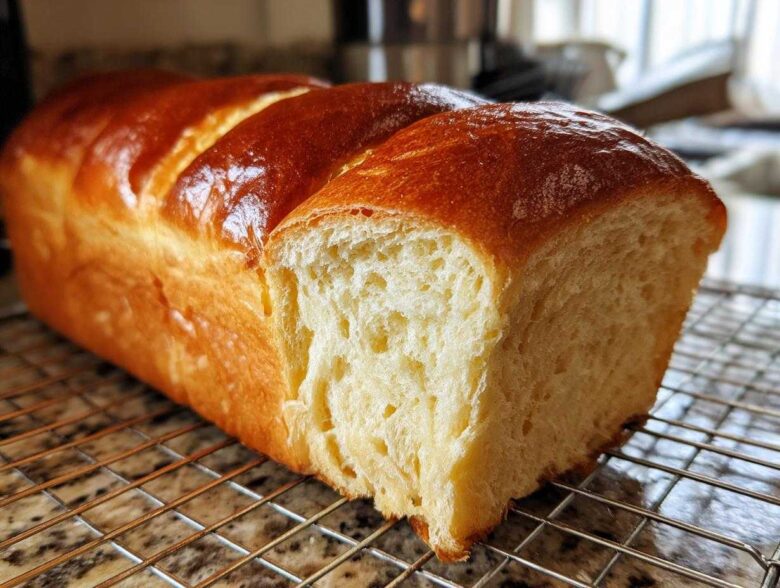
Have you ever tried to make bread at home only to end up with something dense, crumbly, or just… fine? I get it! Finding that truly cloud-like, unbelievably soft bread texture that melts in your mouth feels impossible outside of a professional bakery. Well, stop looking, because I finally cracked the code. This japanese milk bread recipe is a game-changer. It uses the legendary Tangzhong method, and trust me, once you master that little starter paste, you’ll be turning out loaves that everyone will swear you bought from a specialty shop. I spent weeks testing hydration levels and kneading times before I swore this was the most foolproof way to get that signature, pillowy soft quality. You have to try this!
I learned that the secret isn’t just in the ingredients; it’s in that initial step that seems fussy but honestly makes all the difference. If you want to see the absolute best results for the texture you’ve been chasing, check out my full guide on how to bake bread that wows everyone. It’s all about preparation!
Why This Japanese Milk Bread Recipe Delivers Ultimate Fluffiness
When you’re chasing that perfect cloud-like crumb, you need more than just a good recipe—you need a technique that locks in moisture like nothing else. That’s what makes this japanese milk bread recipe a winner every single time. It solves the biggest problem bakers face: bread that goes stale overnight!
- It stays incredibly soft and pliable for three days, minimum. Seriously, it’s amazing.
- The crumb is open, airy, and truly pillowy—perfect for a thick slice of toast.
- You get that unmistakable rich flavor from the heavy cream and extra milk fat.
If you want to skip the basic baking stuff and jump straight into the good stuff, you can check out my main baking resources area right here for more tips!
The Magic of the Tangzhong Method Bread
Okay, let’s talk about the star: the Tangzhong. Don’t let the fancy name scare you! It’s just a small starter of flour cooked with liquid until it gets thick, like a loose pudding. This process is what truly gelatinizes the starches in your flour. Think of it like a moisture magnet! Because of this little pudding, the dough can actually hold way more liquid than it normally would. More liquid means an unbelievably soft texture that stays fresh longer. It’s simple science, but it makes the best tangzhong method bread you’ll ever taste.
Achieving Bakery Style Bread at Home
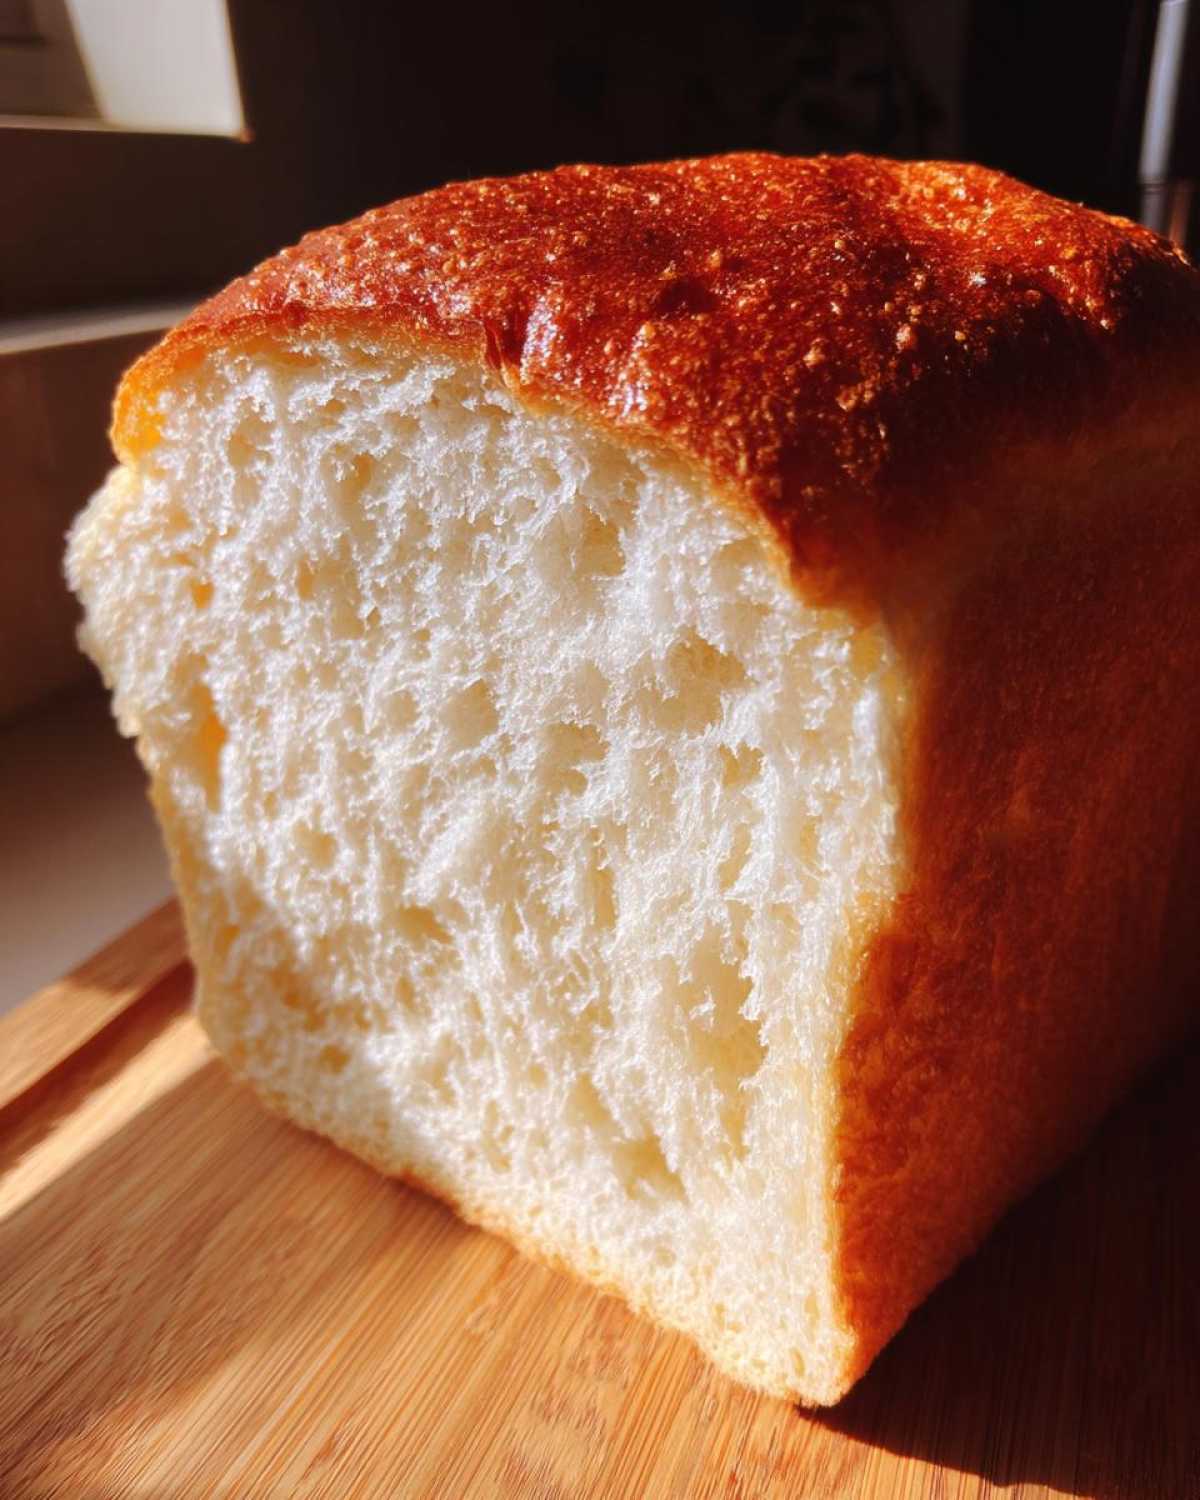
People always ask me if they need special equipment, and the answer is no! You just need patience with the kneading. The high-fat dairy content combined with the Tangzhong means you have a dough that can take a really good beating during kneading. When you nail the dough consistency, you are steps away from true bakery style bread at home. It’s all about those high-fat ratios working with the starter to create that lofty structure.
Ingredients for Your Perfect Japanese Milk Bread
Look, assembling the ingredients is the easiest part, but getting the details right here sets you up for success later on. We aren’t throwing things into a bowl willy-nilly! Everything needs to be measured precisely, especially for this delicate dough. You’ll need the milk and flour needed for your Tangzhong starter first, followed by the remaining dough ingredients (flour, sugar, salt, milk, heavy cream, egg, and the butter). Remember, the butter has to be nice and soft—not melted, just easily pressed in. If you need inspiration for other soft doughs, check out these buttery dinner rolls; the focus on soft fats is similar!
Don’t forget that little pinch of sugar you keep aside for the yeast to wake up! It’s a tiny detail, but it ensures a strong rise.
Ingredient Notes and Substitutions
This is where I guard the recipe fiercely! For this japanese milk bread, you absolutely cannot skimp on the flour type. You MUST use Bread Flour. It has the higher protein content necessary to handle all that moisture we lock in with the Tangzhong, which gives you that amazing stringy pull and structure. All-purpose flour just won’t cooperate when it comes to the windowpane test.
Also, notice the heavy cream? That’s intentional! The higher fat content isn’t just for taste; it keeps the cells of the bread super tender and rich, making this loaf infinitely softer than using just regular milk throughout. It’s what pushes this recipe firmly into the “amazing, not just good” category.
How to Prepare Japanese Milk Bread Using the Tangzhong Method
Okay, deep breaths! This is the main event, where we turn simple ingredients into that fluffy dream bread. Since this is a process that really demands attention to timing, I wrote out the steps clearly for you. Don’t rush the cooling or the kneading; that’s where the magic happens for this japanese milk bread. Before you even start, make sure you have a clean workspace, maybe put on some good music, and pre-measure everything. I promise, you’re going to love the texture we achieve!
If you love learning the ‘why’ behind the recipe, you should check out my thoughts on why some baked goods just win every time. Knowing the science helps!
- Prepare the Tangzhong: Whisk together your 15g bread flour and 60g milk right in a small saucepan. Heat this mixture slowly over medium-low heat. You have to stir constantly, absolutely constantly, until it thickens up into a paste. It should look like thick baby food and coat the back of your spoon perfectly. This happens around 170°F (77°C). After that, pull it off the heat, cover the surface *directly* with plastic wrap to stop a skin from forming, and let it cool down completely before we use it.
- Activate Yeast: While the starter cools, wake up your yeast! Mix the 30g whole milk (make sure it’s lukewarm, not hot!), the yeast, and a tiny bit of the dough sugar. Let it sit for about five minutes until it gets foamy and bubbly. If it doesn’t foam, your yeast is dead, so start over with fresh yeast!
- Mix Dry Ingredients: In your big mixing bowl, just whisk together the 150g bread flour, the rest of the sugar, and the salt. Give it a good swirl so everything is distributed evenly.
- Combine Dough: Now, add the cooled Tangzhong (it should be room temp or cool), the bubbly yeast mix, the heavy cream, and the egg right into your dry ingredients. Mix it on the lowest setting until it looks shaggy, like rough crumbs clinging together.
- Knead: This is where we develop the structure! Increase your speed to medium-low and knead for about 5 to 7 minutes until the dough starts looking cohesive. Now, add your softened butter, just a little bit at a time, letting it incorporate completely before adding the next piece. Continue kneading for another 10 to 15 minutes. Don’t panic if it feels sticky at first; it will come together.
- First Proof: Lightly oil a clean bowl, slap your smooth dough in there, turn it once to coat, cover it tight, and let it rest somewhere warm until it has doubled. This usually takes 1 to 1.5 hours depending on your kitchen temperature.
- Shape: Gently punch the air out—don’t overdo it! Divide that beautiful dough into three equal pieces. Roll each piece into a tight, uniform log. Pinch the seams closed tightly, and line them up seam-side down in your greased loaf pan (I always use an 8×4 inch pan for this).
- Second Proof: Cover the pan loosely and let it rise again in a warm spot. We are looking for the dough to be almost double again, cresting about an inch above the rim of the pan. This takes about 45 to 60 minutes. Preheat your oven to 350°F (175°C) during the last 15 minutes of this rest.
- Bake: Bake for 30 to 35 minutes until the top is gorgeous and golden brown. Stick a thermometer in there—we’re looking for 200°F (93°C) inside. If the top starts looking way too dark before the inside is done, just loosely drape a piece of aluminum foil over it.
- Cool: This is important! Pull that loaf out immediately and turn it out onto a wire rack. Let it cool completely before you slice it. I know, waiting is the hardest part!
Mastering the Tangzhong (Yudane bread technique)
You need to know what the perfect Tangzhong and feels like. If you are using a thermometer, aim for 170°F (77°C) when you pull it off the heat. Seriously, that’s the temperature where the starch is perfectly hydrated. If you don’t have a thermometer, use this visual check: Stir it constantly, and when it gets thick, lift your spoon. If the paste holds its shape on the back of the spoon and you can draw a clear line through it that doesn’t immediately run back together, it’s ready. If it’s runny past that point, it might be overcooked, but don’t sweat it too much for your first time!
Kneading for a Pillowy Soft Loaf
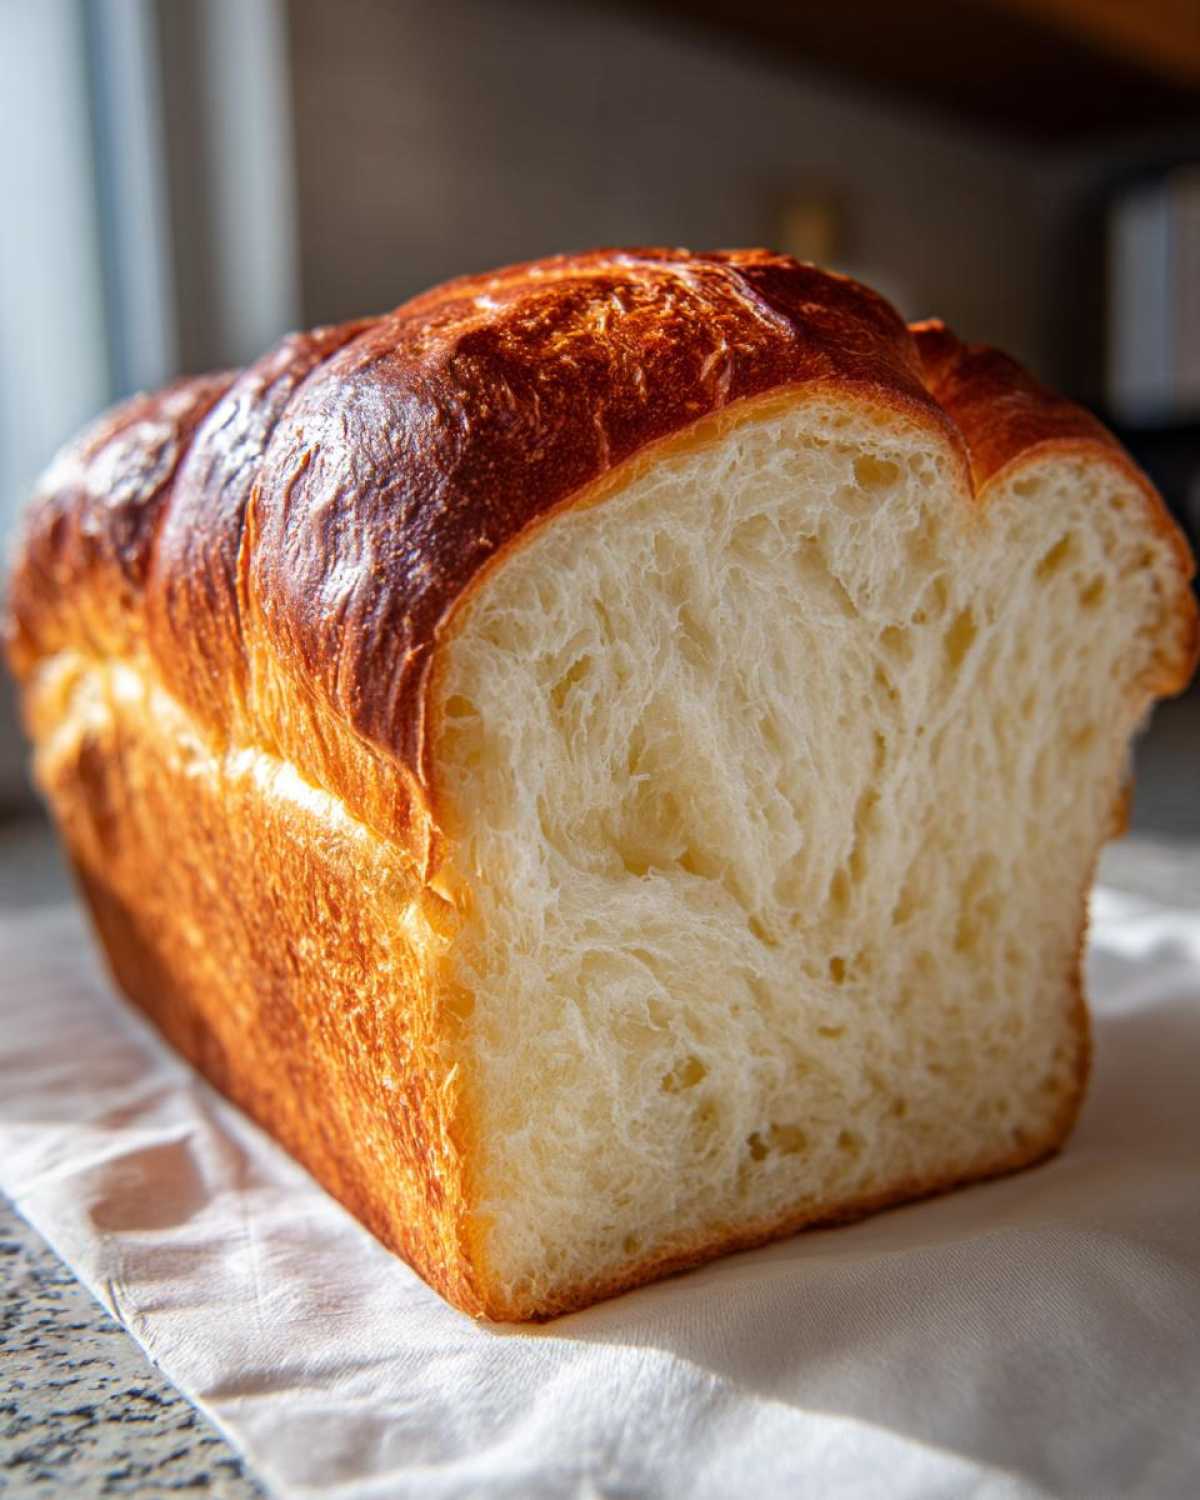
The windowpane test is non-negotiable for that pillowy soft loaf texture. When you think you’ve kneaded enough—and you’ve incorporated all that butter—take a small piece of dough and gently stretch it out between your fingers. You should be able to stretch it thin enough to see light through it, like a sheer windowpane, without it tearing right away. If it tears immediately, keep kneading! This elasticity is what gives the bread the strength to hold all the air bubbles created by the yeast and the moisture from the Tangzhong.
Proofing and Baking Your Homemade Milk Bread
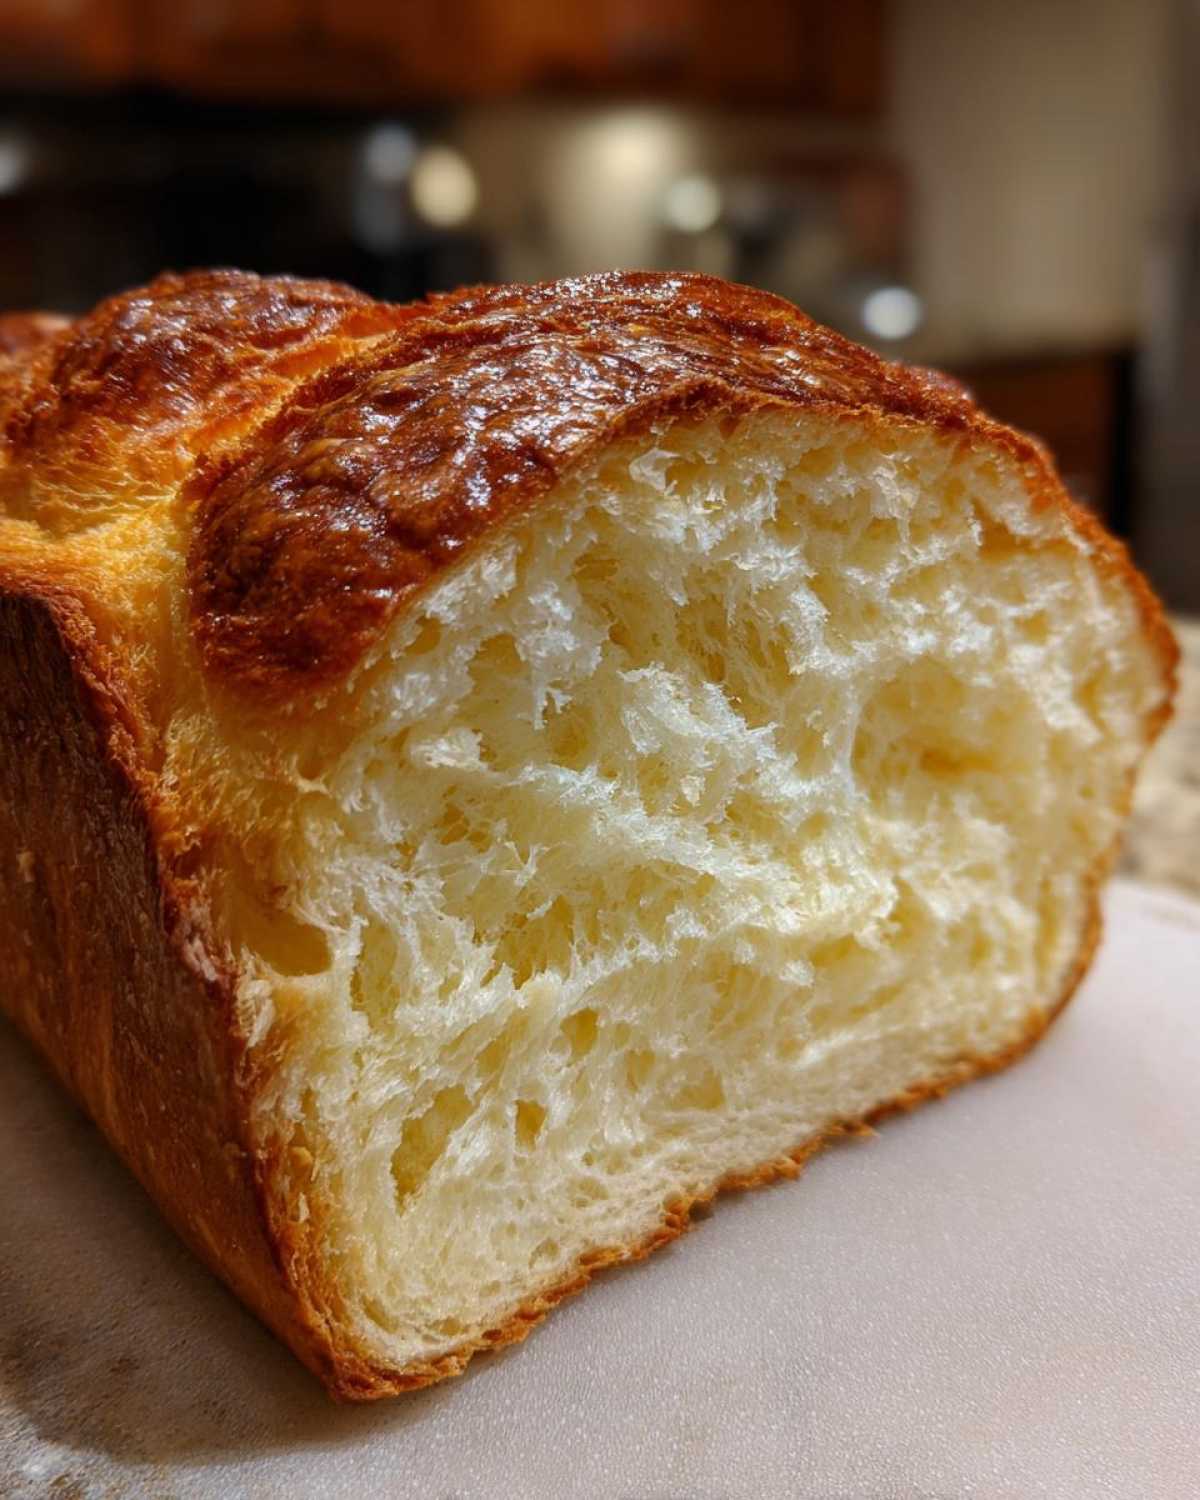
Proofing is crucial here because the dough is rich and heavy—it needs a little guidance. The first rise gets it big, but the second rise is what creates volume in the pan. For the best shaping and oven spring, I watch mine closely. When the dough has risen so much that the surface is domed and starts looking stretched, and it’s coming up about an inch or so over the top edge of your 8×4 loaf pan, it’s ready for the oven. If you notice the top is browning too fast—like, really dark golden brown after only 15 minutes—just grab some aluminum foil and loosely tent it over the top. This keeps the heat gentle while the inside finishes cooking.
Tips for Success Making Soft Japanese Bread
When you pull that beautiful loaf out of the oven, the hardest part begins: waiting! If you are impatient—and believe me, I’ve been there—you will try to slice this soft japanese bread while it’s still piping hot. Don’t do it! The structure hasn’t fully set yet because those steam pockets inside are still contracting. If you slice it hot, the crumb will look gummy, it might collapse, and you’ll crush that perfect pillowy texture we worked so hard for.
My best tip is to leave it completely alone on the wire rack for at least two hours, or until it’s barely warm to the touch. Seriously, slice it cool! Also, if you are using a square Pullman pan (the kind that bakes perfectly flat), you can try dusting the top with powdered sugar immediately after it comes out of the oven, which adds a tiny bit of moisture to the crust as it cools. For more baking wisdom that keeps your food fresh and delicious, check out my favorite ways to season chili garlic noodles—it’s all about technique!
Storage and Reheating Instructions for Your Japanese Milk Bread
This is where the payoff from all that Tangzhong work really shines! Because we trapped so much moisture in this japanese milk bread, it truly keeps well. But you have to store it right, or you’ll ruin the effect. My number one rule? Never, ever put this bread in the refrigerator!
Refrigeration is the enemy of soft bread. It causes something called starch retrogradation, which makes even the best loaves go stale and hard super fast. You want this bread to stay *bread*—soft and pliable—so it has to stay at room temperature.
Keep it stored tightly wrapped in plastic wrap, and then place that plastic-wrapped loaf inside a sturdy, Ziploc-style bag with all the air squeezed out, or an airtight container. If you do that, it will stay wonderfully soft at room temperature for a solid three days. I keep mine on the counter, because I have faith in my Tangzhong!
If you’re looking for other ways to make your dinners last longer or taste better, you should check out my tips for making one-skillet beef stroganoff; sometimes the easiest cooking methods give you the best results for leftovers, too!
Now, what about day three when it’s *slightly* less cloud-like? No problem! You don’t need to reheat the whole loaf. Just slice off what you want. If you’re having it for toast, just a quick pop in the toaster works wonders. But if you want that fresh-out-of-the-oven tenderness again, here’s my trick for reviving a slice:
- Lightly brush both sides of the slice with milk or water—just a whisper, don’t soak it!
- Wrap that damp slice loosely in aluminum foil.
- Heat it in a 300°F (150°C) oven for about 5 to 8 minutes.
That steam trapped in the foil will soften up the crumb beautifully, and it will taste like you just pulled the loaf out of the oven yesterday morning. Enjoy that lasting softness!
Variations on the Classic Japanese Milk Bread
Once you have mastered the basic loaf of japanese milk bread, you’ll realize how easy it is to make small tweaks that totally change the final product. You’ve built the perfect fluffy foundation using the Tangzhong, so these next steps are just playing around with flavor! I love that this recipe is so versatile; you can treat it almost like a slightly sweeter, richer dough base.
My favorite adaptation, especially when I want something that feels a little more like a holiday treat, is transforming the texture inside. If you’re looking for ideas on building flavor profiles in doughs, you might want to look at how I approach flavor layering in my honey butter chicken biscuits; the concept of adding something rich and sweet works wonderfully here too!
Here are two simple ways you can switch things up without losing that signature pillowy texture:
Making Soft Milk Bread Rolls
If you don’t want to commit to a full loaf, making rolls is super fast! After the dough finishes its first rise, skip the shaping for the loaf pan. Instead, divide the dough up into 12 or 16 equal pieces—use a scale if you want them perfectly consistent. Roll each piece into a tight little ball. You can bake these right on a parchment-lined baking sheet or arrange them tightly in a square pan so they bake up soft and pull-apart style. Since the rolls are smaller, they bake way faster! Keep an eye on them; they might only need 20 minutes at the same temperature.
Cinnamon Swirl for Japanese Sweet Bread
If you want to lean into the japanese sweet bread side of things, the cinnamon swirl is my go-to! You need to do this after you’ve kneaded the dough and before the first rise. Punch the dough down gently, roll it out into a large rectangle—think about the size of a jelly roll pan. Brush the entire surface generously with melted butter, then sprinkle on a mixture of brown sugar and cinnamon. Roll it up tightly from the longest side, just like you’re making cinnamon rolls. Pinch the end shut, and then proceed with the first rise according to the main recipe. When you go to shape it in Step 7, you are just gently rolling that swirled log up and placing it seam-side down in the pan. The swirl opens up beautifully during the second proof and baking, giving you little pockets of sweet spice in every bite!
Serving Suggestions for Milk Bread for Sandwiches and Toast
Now that you’ve put in the work to achieve this incredibly fluffy Shokupan recipe, you deserve to enjoy it in the very best ways. Honestly, sometimes I just stand by the cooling rack and rip off warm chunks—but I try to stop myself!
This bread shines when treated like a premium ingredient. Ditch your regular white bread for sandwiches; the richness of this milk bread takes deli lunch meat, or even just cream cheese and jam, to a whole new level. For toast, you *must* slice it thick—I mean, half-inch thick slices! Toast it lightly until just golden, and spread it immediately with high-quality salted butter. The way that butter melts into the open structure is pure heaven. If you’re looking for other decadent dessert ideas that hit that sweet spot, you have to try my churro cheesecake bars!
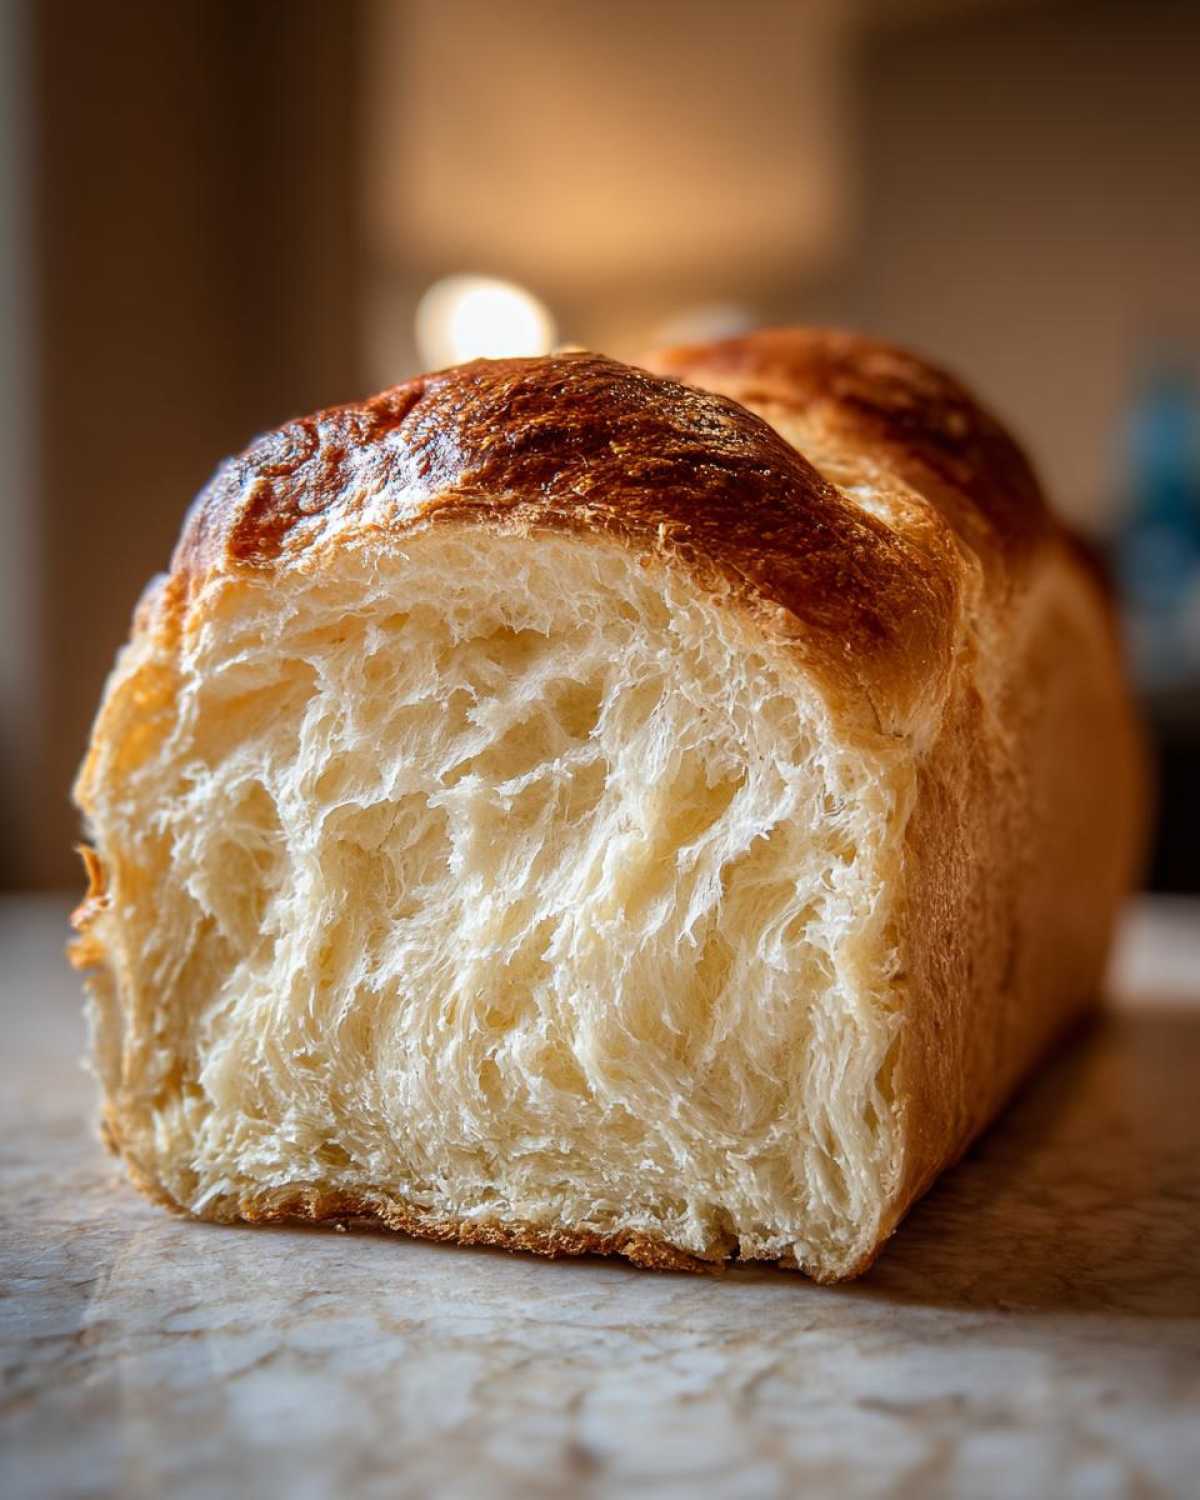
If you’re feeling extra inspired, this bread makes the most amazing high-end French toast you can imagine. Just don’t burn the edges!
Frequently Asked Questions About Making Shokupan Recipe
I know baking can bring up a ton of questions, especially when we are dealing with special techniques like Tangzhong! It’s totally normal to wonder about ingredient swaps or troubleshooting when you’re aiming for that perfect, soft texture. I tried to cover the things that tripped me up when I first started making this Shokupan recipe. If you’re new to yeasted baking, don’t worry; this recipe actually makes a surprisingly beginner bread recipe soft!
If you’ve ever wondered about related styles, like the famous Hokkaido milk bread, I get asked about that a lot. The main difference usually comes down to the precise amount of dairy fat used and sometimes whether they use Tangzhong or Yudane, but the goal—that incredible airiness—is the same!
Can I use the Yudane bread technique instead of Tangzhong?
Yes, you absolutely can! The Yudane method is just the Japanese cousin to the Tangzhong starter, and honestly, it gives you an almost identical result. The main difference is purely tactical: Tangzhong uses milk or water cooked with flour, whereas Yudane uses hot or boiling water poured straight over the flour. Both techniques cook the starch so it can absorb more moisture. I prefer Tangzhong because I think the slight fat in the milk gives the crust a tiny bit more color and richness, but Yudane is faster since you don’t have to cool it on the stovetop as long.
My bread didn’t rise fully, what went wrong?
Oh, the dreaded flat loaf! This almost always comes down to either the temperature of your water/milk or old yeast. For the yeast activation, your liquid needs to be lukewarm—think bathwater temperature, not hot tap water. If it’s too cold, the yeast just sleeps. If it’s too hot (over 130°F), you kill them off completely. Also, check the date on your yeast packet! Old yeast simply won’t have the strength to push up a rich, heavy dough like this one. Check your warming spot too; a cold kitchen inhibits rising.
How is this different from standard white sandwich bread?
It’s night and day, honestly! Standard white bread recipes rely on basic yeast action and hydration, which usually results in a bread that’s good for one day. The core difference here is twofold. First, the Tangzhong method locks in moisture, meaning the bread stays soft for days. Second, our use of heavy cream and maybe even a bit of extra butter elevates the fat content way above a typical sandwich bread. That extra fat keeps the crumb from setting up hard, giving you that distinct, tender pull you only usually find in high-end Asian bakeries.
Nutritional Estimates for Homemade Milk Bread
Okay, now let’s talk numbers for a second! Since this is homemade japanese milk bread and we used things like heavy cream and butter to get that luxurious flavor and texture, the nutritional profile is certainly richer than a plain white loaf. I always tell people that baking things like this in small batches lets you control what goes in, which is fantastic, but it also means you have to be realistic about the sugar and fat.
Everything listed below is just an estimate based on the ingredients I use and dividing the whole loaf into 12 equal slices. If you slice yours bigger or smaller, the numbers will change, of course! For inspiration on making other recipes taste lighter, I use similar trimming techniques when I make my Mexican street corn dip to keep it from getting too heavy.
Here are the general estimates per slice:
- Serving Size: 1 slice
- Calories: 180
- Carbohydrates: 28g
- Sugar: 6g
- Protein: 5g
- Fat: 5g (with about 3g being Saturated Fat)
- Sodium: 150mg
- Fiber: 1g
It’s a treat, for sure, but it’s a treat that stays soft and tastes incredible for days!
PrintFoolproof Japanese Milk Bread (Shokupan) with Tangzhong Method
Make incredibly soft, fluffy, and pillowy Japanese Milk Bread using the Tangzhong method for a texture that stays fresh for days.
- Prep Time: 30 min
- Cook Time: 35 min
- Total Time: 3 hr 5 min
- Yield: 1 loaf
- Category: Bread
- Method: Baking
- Cuisine: Japanese
- Diet: Vegetarian
Ingredients
- 60g Milk
- 15g Granulated Sugar
- 2g Instant Dry Yeast
- 15g Bread Flour (for Tangzhong)
- 150g Bread Flour (for dough)
- 30g Granulated Sugar (for dough)
- 3g Salt
- 30g Whole Milk (for dough)
- 30g Heavy Cream
- 25g Unsalted Butter, softened
- 1 Large Egg
Instructions
- Prepare the Tangzhong: Whisk 15g bread flour and 60g milk in a small saucepan. Heat over medium-low, stirring constantly until the mixture thickens to a paste (about 170°F or 77°C). It should coat the back of a spoon. Remove from heat, cover the surface with plastic wrap, and let it cool completely.
- Activate Yeast: In a small bowl, combine the 30g whole milk, 2g yeast, and a pinch of the dough sugar. Let stand for 5 minutes until foamy.
- Mix Dry Ingredients: In a large mixing bowl, whisk together the remaining 150g bread flour, 30g sugar, and salt.
- Combine Dough: Add the cooled Tangzhong, activated yeast mixture, heavy cream, and egg to the dry ingredients. Mix on low speed until a shaggy dough forms.
- Knead: Increase speed to medium-low and knead for 5-7 minutes until the dough starts to come together. Add the softened butter slowly, a piece at a time. Continue kneading for another 10-15 minutes until the dough is smooth, elastic, and passes the windowpane test.
- First Proof: Place the dough in a lightly oiled bowl, cover, and let it rise in a warm place until doubled in size (about 1 to 1.5 hours).
- Shape: Gently deflate the dough. Divide it into three equal pieces. Roll each piece into a tight log. Place the three logs seam-side down into a greased 8×4 inch loaf pan.
- Second Proof: Cover the pan loosely and let it rise again until the dough has nearly doubled and crests about 1 inch over the top of the pan (about 45-60 minutes). Preheat your oven to 350°F (175°C) during the last 15 minutes of the second proof.
- Bake: Bake for 30-35 minutes, or until the top is golden brown and the internal temperature reaches 200°F (93°C). If the top browns too quickly, loosely tent it with foil.
- Cool: Immediately remove the bread from the pan and cool completely on a wire rack before slicing.
Notes
- For an extra shiny crust, brush the top of the loaf with an egg wash (one egg beaten with 1 teaspoon of water) just before baking.
- This bread is best sliced after it has cooled completely, allowing the internal structure to set.
- Store cooled bread in an airtight container at room temperature for up to 3 days to maintain softness.
Nutrition
- Serving Size: 1 slice
- Calories: 180
- Sugar: 6
- Sodium: 150
- Fat: 5
- Saturated Fat: 3
- Unsaturated Fat: 2
- Trans Fat: 0
- Carbohydrates: 28
- Fiber: 1
- Protein: 5
- Cholesterol: 30