

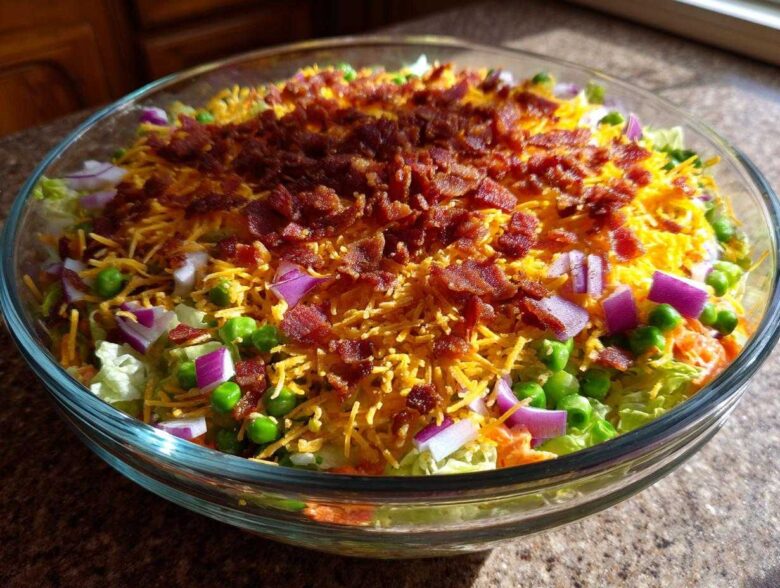
Oh, honey, if there is one dish that instantly screams ‘summer potluck’ or ‘holiday spread,’ it has to be the magnificent, towering, retro 7 layer salad! I swear, my family expects this dish at every single gathering now, and honestly, I wouldn’t dare show up without it. It’s absolutely the best part of the buffet table because it looks incredible—all those colorful stripes shining through the glass. You get crunch, creamy dressing, savory bacon, and fresh veggies, all in one glorious scoop. I’ve been perfecting my specific 7 layer salad recipe for years now, and trust me, the secret is keeping every single layer separate until serving time. It’s incredibly satisfying to make ahead, too! For more about my philosophy on community cooking, check out our story here.
Why You Will Love This Classic 7 Layer Salad (Potluck Salad Recipes)
Listen, I know we all get tired of the same old heavy sides, right? That’s why this classic 7 layer salad is my secret weapon for any event. It’s famous for a reason! People gather around the bowl just to admire the stripes before they dig in. It’s the ultimate grab-and-go dish because you prep it all the day before.
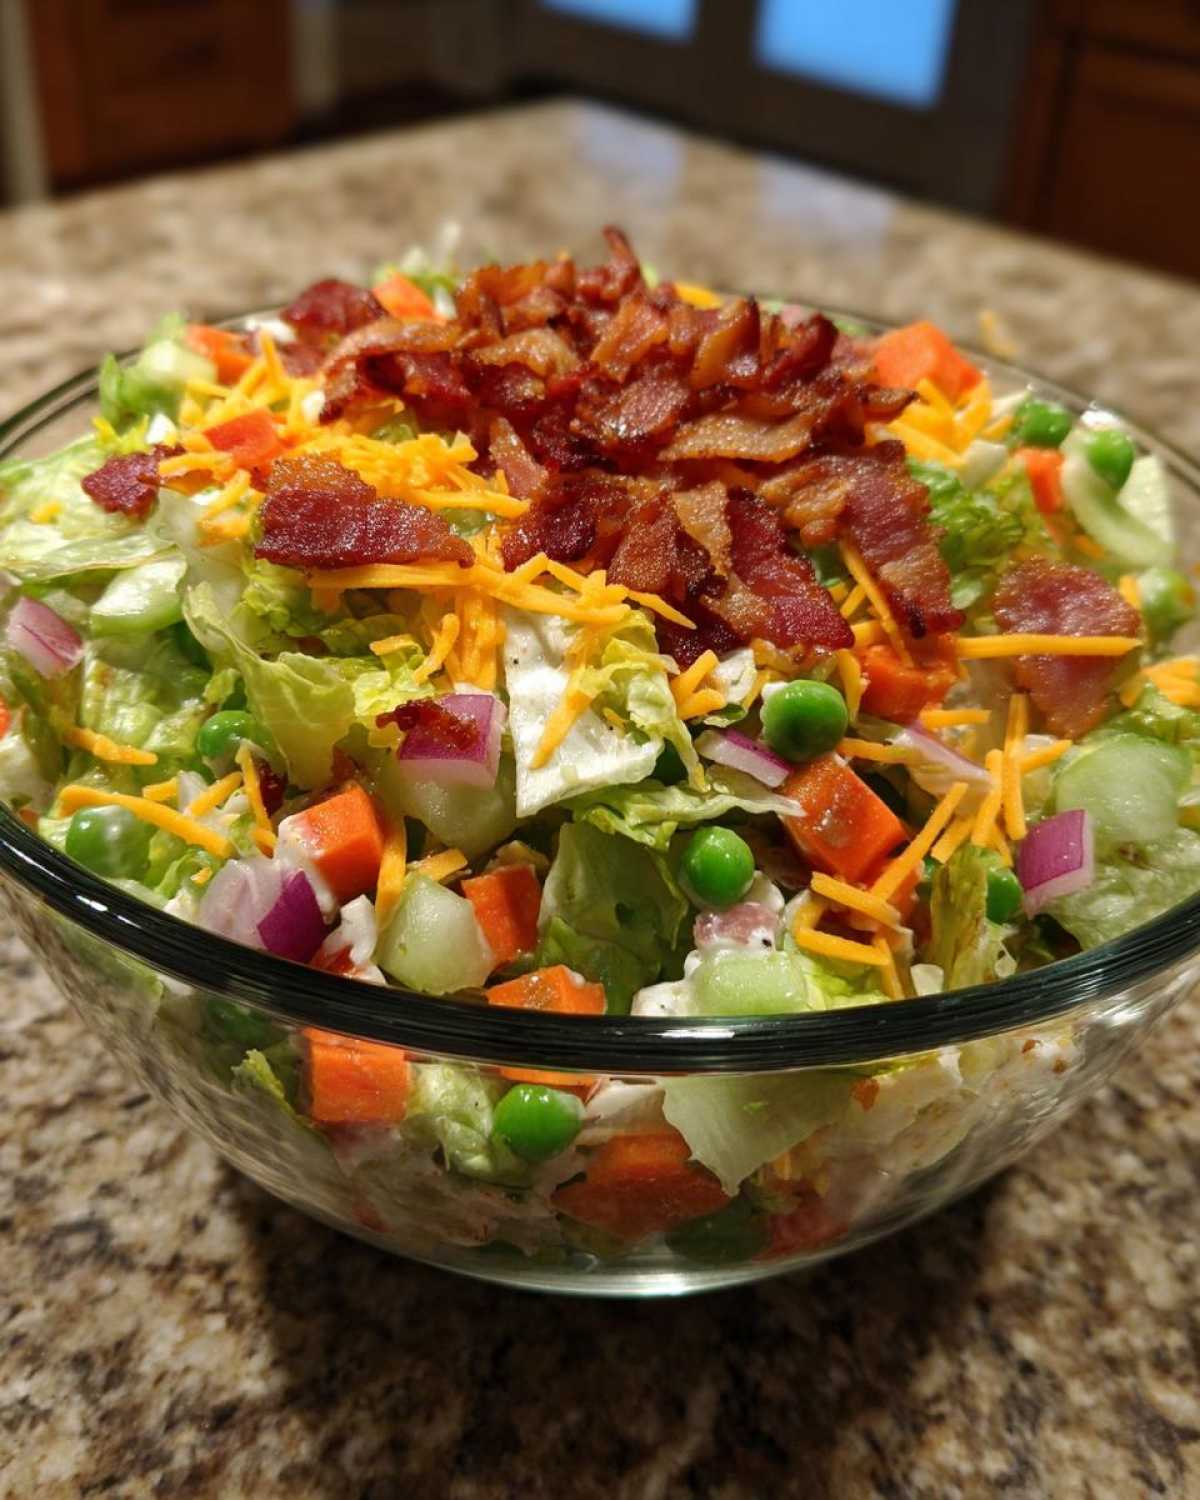
- It makes prep for big events so much easier!
- It’s packed with crunchy texture and that rich, creamy flavor that everyone loves.
- Seriously, it looks gorgeous on the table—hello, instant centerpiece!
When you need reliable potluck salad recipes, this one never lets you down. See more of my favorite party sides here!
Essential Ingredients for the Best 7 Layer Salad Recipe
Okay, let’s talk supplies. The key to a truly phenomenal 7 layer salad is making sure every single layer is prepped correctly. You can’t just dump things in there! I’ve got everything laid out so you can see exactly what you need. Don’t skip the bacon; nobody looks twice at a salad without bacon, trust me! We need crunch, we need salt, and we definitely need that thick, cool dressing coating everything.
Here is our ingredient lineup:
- 1 head iceberg lettuce, chopped (Make sure this is spun dry! Soggy lettuce is a tragedy.)
- 1 cup chopped celery
- 1 cup chopped red onion (I dice mine small so it doesn’t overpower things.)
- 1 cup frozen peas, thawed (Make sure they are fully thawed and patted dry.)
- 1 cup shredded carrots
- 1 cup shredded cheddar cheese (Sharp cheddar is my pick for flavor!)
- 6 slices bacon, cooked and crumbled
For the Creamy Seven Layer Dressing
This dressing is what ties the whole beautiful mess together. It needs to be mixed super well until it’s perfectly uniform—no streaks of sour cream hanging around! Whisk these together slowly until you get that dreamy, thick consistency.
- 1 cup mayonnaise
- 1/4 cup sour cream
- 2 tablespoons white vinegar
- 1 teaspoon sugar
- 1/2 teaspoon salt
- 1/4 teaspoon black pepper
If you’re looking for other ways to use up that bacon and cheddar combo in your fridge, you absolutely have to check out my Bacon Cheddar Ranch Dip. But for now, back to our star salad!
Simple Layered Salad Assembly: Building Your 7 Layer Salad
This is the fun part, but pace yourself! The whole reason we go to the trouble of making a 7 layer salad is to see those gorgeous stripes. Seriously, ditch the opaque serving dishes—you absolutely need a clear, big glass bowl, preferably three quarts or larger, so everyone at the party can admire your handiwork! If you didn’t take a picture before digging in, did you even make the salad?
The layering order is crucial here. I follow this exact sequence every single time to guarantee the lettuce stays crisp at the bottom and the dressing settles nicely on top. Think about it like building a tiny, edible skyscraper!
- First up is your chopped lettuce. This is your foundation!
- Next, scatter in that crisp celery.
- Then comes the red onion—try to distribute it evenly.
- Follow that with your thawed, dry peas. I cannot stress enough how important it is to drain those peas well!
- Then the shredded carrots go down.
- Now the shredded cheddar cheese layer.
- Finally, sprinkle that glorious, perfectly cooked, crumbled bacon right on top. This is your crowning jewel!
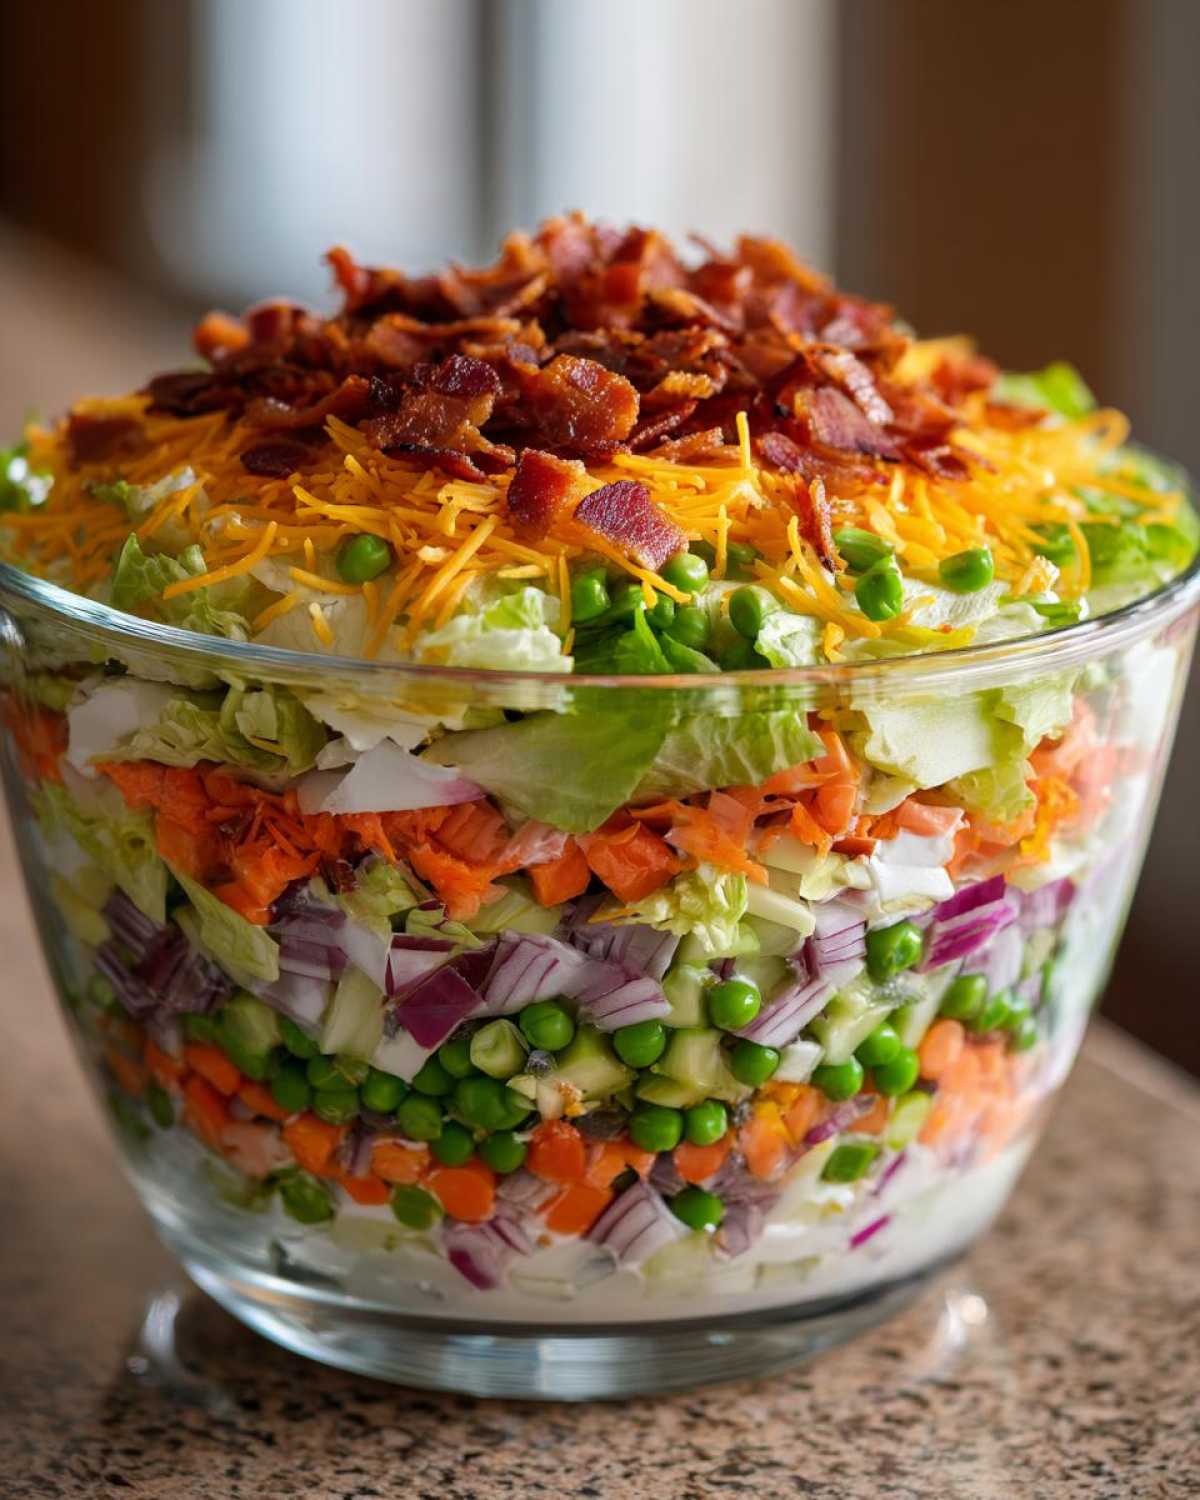
Once you’ve got that bacon on top, spread your prepared dressing evenly over that final layer. Do NOT mix this! We are holding all that creamy goodness hostage until serving time. If you are using vegetables that have a lot of residual water, like maybe bell peppers if you were changing the recipe, I always recommend tossing them in a paper towel first. If the veggies are soggy, the whole bottom layer of lettuce will get sad quickly. We want this layered salad recipe to look perfect.
Pro Tip for Perfect Salad Layers
Here’s a little secret I picked up when making this for bridal showers—if you are assembling this salad more than 8 hours ahead of time, keep the bacon separate! Layer everything up to and including the cheese, cover it tight, and chill. Then, about 30 minutes before you want to add the final dressing layer, give the salad a quick check, add the bacon right before spreading the dressing, and then cover it again. This ensures that crisp bacon texture stays totally crunchy, even when chilled overnight. It’s the little things that make a huge difference in a 7 layer salad!
How to Prepare the Classic 7 Layer Salad Instructions
Now that we’ve got all our beautiful ingredients chopped and our dressing whisked smooth, it’s time for the actual assembly! Honestly, this is the easiest part, but you have to follow the plan, or you’ll mess up the visual magic of the 7 layer salad. Remember, we are NOT mixing anything until serving time. We are building layers of texture and flavor that are meant to hang out separately and then mingle right before they hit your plate.
First things first, let’s make that dressing. Whisking together the mayo, sour cream, vinegar, sugar, salt, and pepper in a small bowl until it’s totally smooth is step one. Set that wonderful creamy mixture aside while you focus on building the structure in that clear bowl. It’s important that the dressing is well-combined now because once it hits the bacon later, you won’t be able to really stir it in!
Next comes the layering process, which we talked about a bit above, but let’s walk through the actual actions here:
- You start by pressing your chopped lettuce down lightly into the bottom of your bowl. This sounds silly, but you want a nice, even base.
- Scatter the celery evenly over the lettuce. Just let it fall naturally; no need to pack it down hard.
- Next, we follow with the red onion, then the thawed peas, and then that bright orange shredded carrot layer.
- Sprinkle that shredded cheddar cheese over the top of the carrots. This creates a great barrier between the veggies and the smoky bacon.
- Finally, take your perfectly cooked and crumbled bacon and put it right on top. It should look like a delicious, crispy blanket over the cheese.
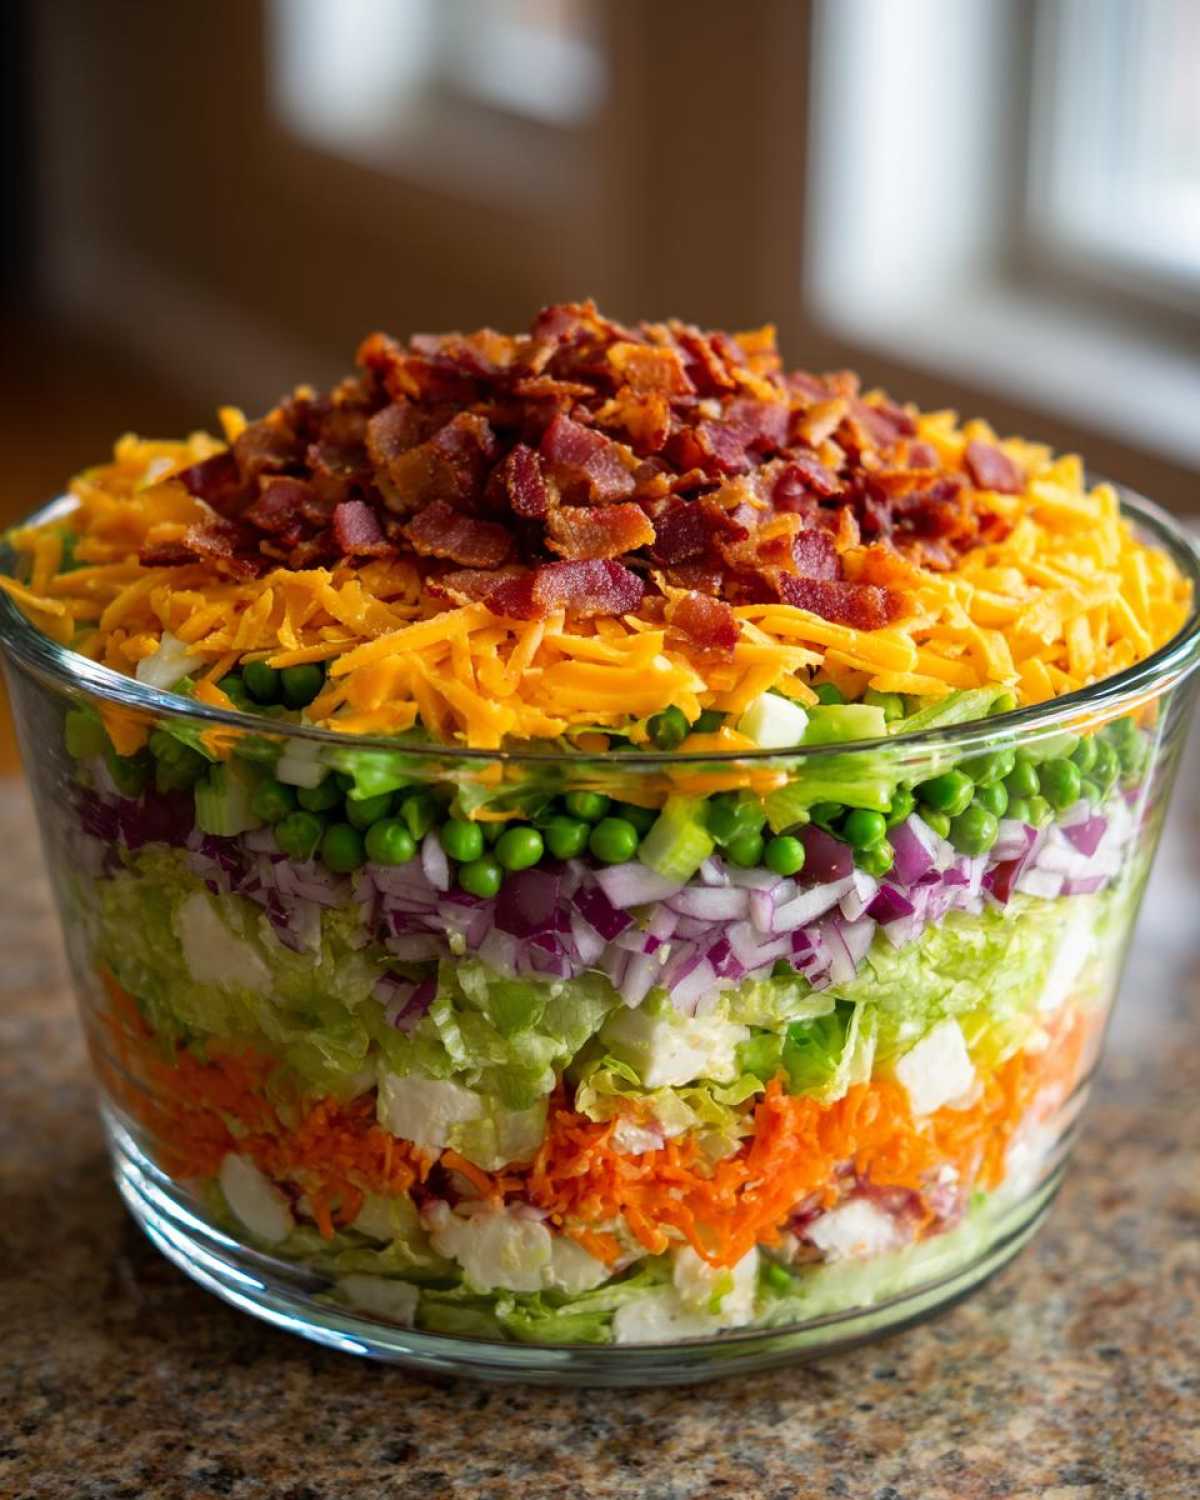
Once the bacon is on, that’s where the dressing comes in. You need to spread your prepared creamy dressing evenly across the top layer of bacon. Use a spatula and just gently nudge it so it covers everything without dragging the bacon bits down into the cheese layer too much. Don’t worry if a few pieces of bacon peek through! That’s a good sign.
This is the most crucial step for any successful make ahead salad: Covering and Chilling. You must cover that bowl tightly with plastic wrap—and I mean tight! This salad needs time in the fridge for the flavors to marry up and, just as importantly, for the dressing to firm up slightly so it doesn’t just run off the side when you take the plastic off. We need at least four hours minimum, but honestly, I always aim for overnight chilling. When you serve this layered salad recipe the next day, it is just phenomenal. Check out all my tips for amazing make ahead salads.
Tips for Success with Your Layered Salad Recipe
Look, assembling this salad is easy, but keeping it perfect until serving time is where the real magic—and trust—comes in! The biggest fear everyone has is that soggy bottom layer, right? We absolutely cannot have that.
So, if you’re prepping this a day ahead, the best thing you can do is ensure your vegetables—especially your lettuce, celery, and those peas—are thoroughly dried. I keep a big container of paper towels handy just for patting everything down. Any extra water in there is going to turn into liquid sludge at the bottom of your beautiful glass bowl overnight.
Another thing people worry about is the dressing separating. Since our dressing uses sour cream and mayo, it stays pretty stable! But if you are using a thinner, vinegar-based dressing, you can help prevent separation by adding just a tiny bit of cornstarch (like 1/4 teaspoon) to the dry seasoning mix before whisking it into the fats. It acts like a little stabilizer. Trust me, taking these moments makes the difference between a good side dish and the star of the show!
When you pull this out of the fridge after its long chill, don’t mess with the layers! Just go straight in with a big serving spoon. Dig deep to get all those components—the crisp lettuce, the salty bacon, the creamy dressing—all loaded up on your plate at once. It’s an easy layered vegetable salad experience! For other simple veggie sides that hold up well, take a peek at my other ideas here.
Variations: Beyond the Classic 7 Layer Salad
While I am fiercely loyal to this original recipe, I know sometimes you just need to switch things up, especially if you’re making a big salad spread for a party! The beauty of the 7 layer salad construction is that it basically acts as a fantastic template. You can swap out components or add new ones right in the middle layers without losing the structural integrity of the dish.
For instance, if you’re not big on bacon—which, okay, I’ll allow it—you can totally replace that salty crunch with chopped pecans or toasted sunflower seeds for a different kind of texture. Or, if you want to make it heartier, throw in a layer of chopped, hard-boiled eggs right over the cheese before you add the bacon; they look lovely layered up there!
I’ve also seen people get really bold and turn this into a whole theme. If you’re hosting a game day party, you can easily adapt it into a seven layer taco salad variation! Just remove the bacon, use pepper jack cheese instead of cheddar, replace the peas with black beans, and then swap out that creamy dressing for a slightly spiked sour cream mixed with taco seasoning. Wow, that one goes fast!
The vegetables are really flexible, too. When it’s spring, I sometimes add a layer of finely chopped green pepper in with the celery. It just adds another pop of color and freshness. Whatever you choose, just remember to keep your wettest ingredients—like those peas—surrounded by drier ones. That’s how you keep your 7 layer salad looking perfect until it hits the table. Need more inspiration for assembling huge bowls of food? Check out my thoughts on salad buffet ideas!
Serving Suggestions for this Family Gathering Salads
So, you’ve got this massive, gorgeous, make-ahead 7 layer salad ready to go. Where does it fit into the meal plan? Honestly, this salad belongs everywhere delicious things are served! It’s hearty enough to be a real feature at any potluck, picnic, or casual buffet you can dream up.
I usually bring mine out when we have barbecues because it’s a fantastic, cool contrast to heavy grilled meats. Think about serving it alongside slow-cooked pulled pork, smoky ribs, or maybe even some simple grilled chicken sausages. Because it has bacon and cheese built right in, it feels substantial, unlike a simple vinaigrette side salad.
It’s also a total powerhouse during the holidays. Thanksgiving or Easter? Yes! It takes up less oven space than a traditional green bean casserole, and people always swarm the dish first. Serving it straight from the fridge means it pairs wonderfully with warmer sides. The bacon and cheddar combo just tastes like celebration.
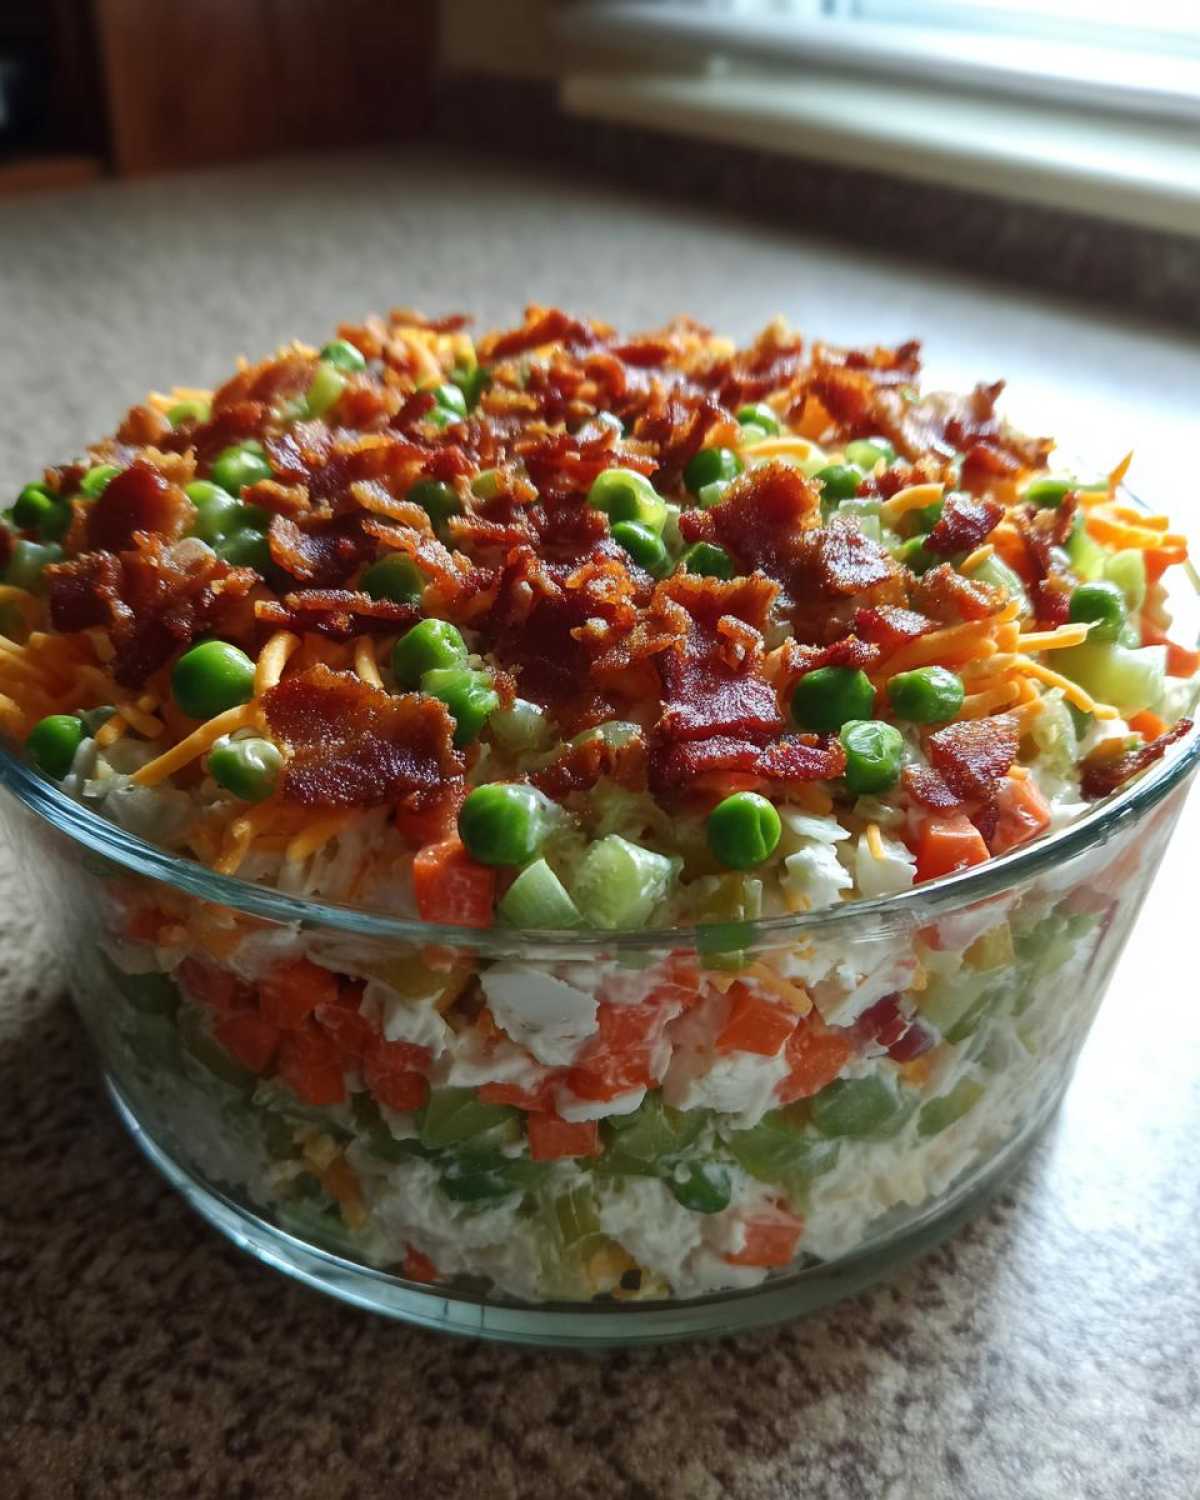
If you’re planning a big spread, this definitely counts as one of your main family gathering salads because it feeds so many and requires zero last-minute attention from you—a real lifesaver! Just make sure you bring that big glass bowl, because everyone wants to be the first one scraping the bottom layer of dressing and veggies.
Storage and Reheating Instructions for Your 7 Layer Salad
Since the whole point of making a spectacular 7 layer salad is making it ahead of time, storage is actually one of its best features! Remember how I stressed covering that bowl tightly? You need to keep it that way in the refrigerator. Good plastic wrap is your best friend here. That tight seal is what prevents the salad from absorbing any weird smells from the fridge (nobody wants onion-flavored dressing!), and it keeps the moisture locked in, which is key.
This salad is truly at its peak perfection when it’s been chilled for at least 6 hours, but you can absolutely store it for up to 24 hours. I’ve gone 30 hours in a pinch, and it was still fantastic, but I wouldn’t push it past that if you can help it. Why? Because eventually, even with the dressing layer as a shield, the lettuce will start to wilt just a tiny bit.
Now, here’s a critical instruction: Do NOT—I repeat, DO NOT—stir this salad before storage. If you mix it, you lose the layers, and frankly, you ruin the integrity of the whole dish! It’s designed to be served cold and untoasted, straight from the fridge.
And if you find yourself with leftovers the next day? Cover them back up tightly and keep them cold. While it’s not quite as perfectly crisp as the first day, it’s still miles better than most leftover sides. It’s fantastic for lunch the next day, eaten right out of the container with a fork! It’s one of the most reliable items in my picnic salad ideas rotation for exactly this reason. Just make sure you eat any leftovers within two days!
Frequently Asked Questions About the 7 Layer Salad
I get so many questions about this 7 layer salad because everyone wants theirs to look and taste exactly like the versions they remember from childhood gatherings! It’s a simple dish, but those little tweaks really matter, so let me clear up some common doubts I hear all the time about this retro salad recipe.
Can I prepare the 7 layer salad more than 24 hours ahead?
You know, I really wouldn’t push it past 24 hours. While the dressing is sturdy, the lettuce on the very bottom layer starts to get just a bit tired after a full day in the fridge. If you have to go longer, layer everything *except* the lettuce and the dressing, and add those two things right before you chill it the next day. Keeps things fresh!
What is the best way to serve this creamy layered salad?
The best way, hands down, is to serve it right out of the clear glass bowl you assembled it in! Use a large spoon or a slotted serving spoon and make sure you plunge it deep down into the bottom layer on the first scoop. You want every single serving to have a bit of that beautiful, creamy seven layer dressing and the crisp lettuce from the bottom, not just the bacon off the top!
What kind of lettuce should I really use?
Listen, I know some people push for romaine, but for a classic 7 layer salad, you need iceberg! It has that high water content and firm crunch that holds up against the creamy dressing without turning instantly mushy like some delicate greens. If you are dead set against iceberg, finely chopped Napa cabbage is the runner-up, but you’ll definitely miss that familiar nostalgic crunch.
Can I skip the bacon, or should I definitely keep it in?
Oh, you absolutely can skip it if you need to, but why would you want to? Bacon is key for salt and smoky flavor in this salad with bacon and cheddar! If you skip it, add something else salty and crunchy, like toasted sunflower seeds or even some crispy fried onions. It needs that textural counterpoint against the soft peas and creamy dressing.
Do I have to use mayonnaise in the dressing?
The majority of the dressing volume comes from mayonnaise, to be honest! It provides the fat base that helps cling to all the other ingredients, which is crucial for a good creamy layered salad. You can swap out half the mayo for Greek yogurt if you want to cut some fat, but don’t go over 50% or the whole dressing will get too tangy and thin out while chilling. You want that thickness!
We’ve covered most of the issues I usually see, but if you have a question that didn’t make the list about this fabulous dish, feel free to hop over to my other post on retro salad recipes and leave a comment there! Happy layering!
PrintClassic 7 Layer Salad
A simple, make-ahead layered salad featuring crisp vegetables, bacon, cheese, and a creamy dressing, perfect for potlucks and gatherings.
- Prep Time: 25 min
- Cook Time: 10 min
- Total Time: 35 min
- Yield: 8 servings
- Category: Side Dish
- Method: Assembly
- Cuisine: American
- Diet: Vegetarian
Ingredients
- 1 head iceberg lettuce, chopped
- 1 cup chopped celery
- 1 cup chopped red onion
- 1 cup frozen peas, thawed
- 1 cup shredded carrots
- 1 cup shredded cheddar cheese
- 6 slices bacon, cooked and crumbled
- 1 cup mayonnaise
- 1/4 cup sour cream
- 2 tablespoons white vinegar
- 1 teaspoon sugar
- 1/2 teaspoon salt
- 1/4 teaspoon black pepper
Instructions
- Prepare the dressing: In a small bowl, whisk together the mayonnaise, sour cream, vinegar, sugar, salt, and pepper until smooth. Set aside.
- Wash and chop all vegetables. Thaw the peas completely and drain any excess moisture.
- In a large, clear glass bowl (at least 3 quarts), begin layering the ingredients in the following order: lettuce, celery, red onion, peas, carrots, cheddar cheese, and finally, the crumbled bacon on top.
- Spread the prepared creamy dressing evenly over the top layer of bacon. Do not mix the layers.
- Cover the bowl tightly with plastic wrap. Refrigerate for at least 4 hours, or preferably overnight, to allow the flavors to meld and the dressing to set.
- When ready to serve, remove the plastic wrap and serve directly from the bowl, scooping down through all the layers.
Notes
- You can assemble this salad up to 24 hours in advance. Keep it covered in the refrigerator.
- Use a glass bowl so you can see the distinct layers.
- If you prefer a tangier dressing, increase the vinegar slightly.
Nutrition
- Serving Size: 1 serving
- Calories: 310
- Sugar: 5
- Sodium: 450
- Fat: 28
- Saturated Fat: 11
- Unsaturated Fat: 17
- Trans Fat: 0
- Carbohydrates: 10
- Fiber: 2
- Protein: 9
- Cholesterol: 45