

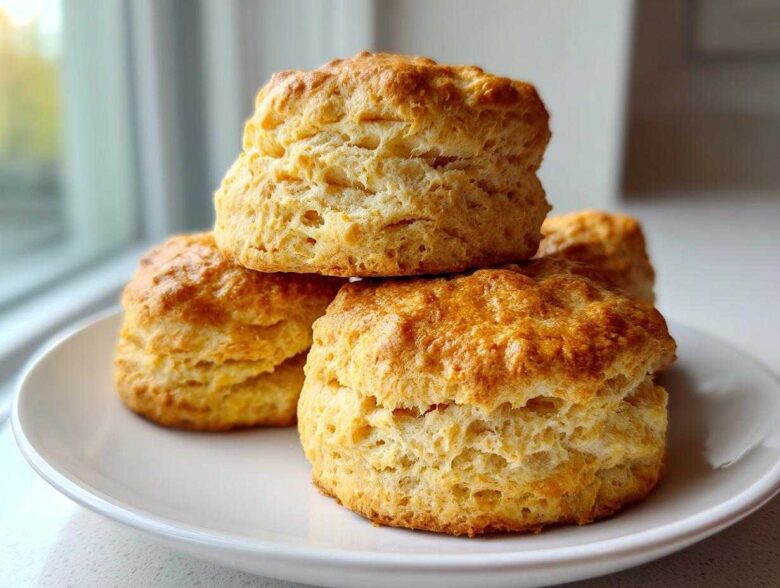
Oh, I am so excited to share this with you! There are biscuits, and then there are scones—and trust me, there is a *huge* difference. Making traditional **Cream Scones** isn’t just baking; it’s a whole ceremony. For years, I struggled to get that perfect, cloud-like crumb that just melts away. I tried too much mixing, I used butter that was too warm, and I ended up with tiny, dense hockey pucks more than once!
But I finally nailed it. This recipe, using simple heavy cream and a specific folding technique, is honestly the definitive guide for light, fluffy scones you dream about when picturing an authentic afternoon tea. Once you see how high these babies rise, you won’t go back to any other method. It truly takes practice to master that gentle touch, but once you get it, these are just flawless.
Why This is the Best Cream Scone Recipe for Authentic Results
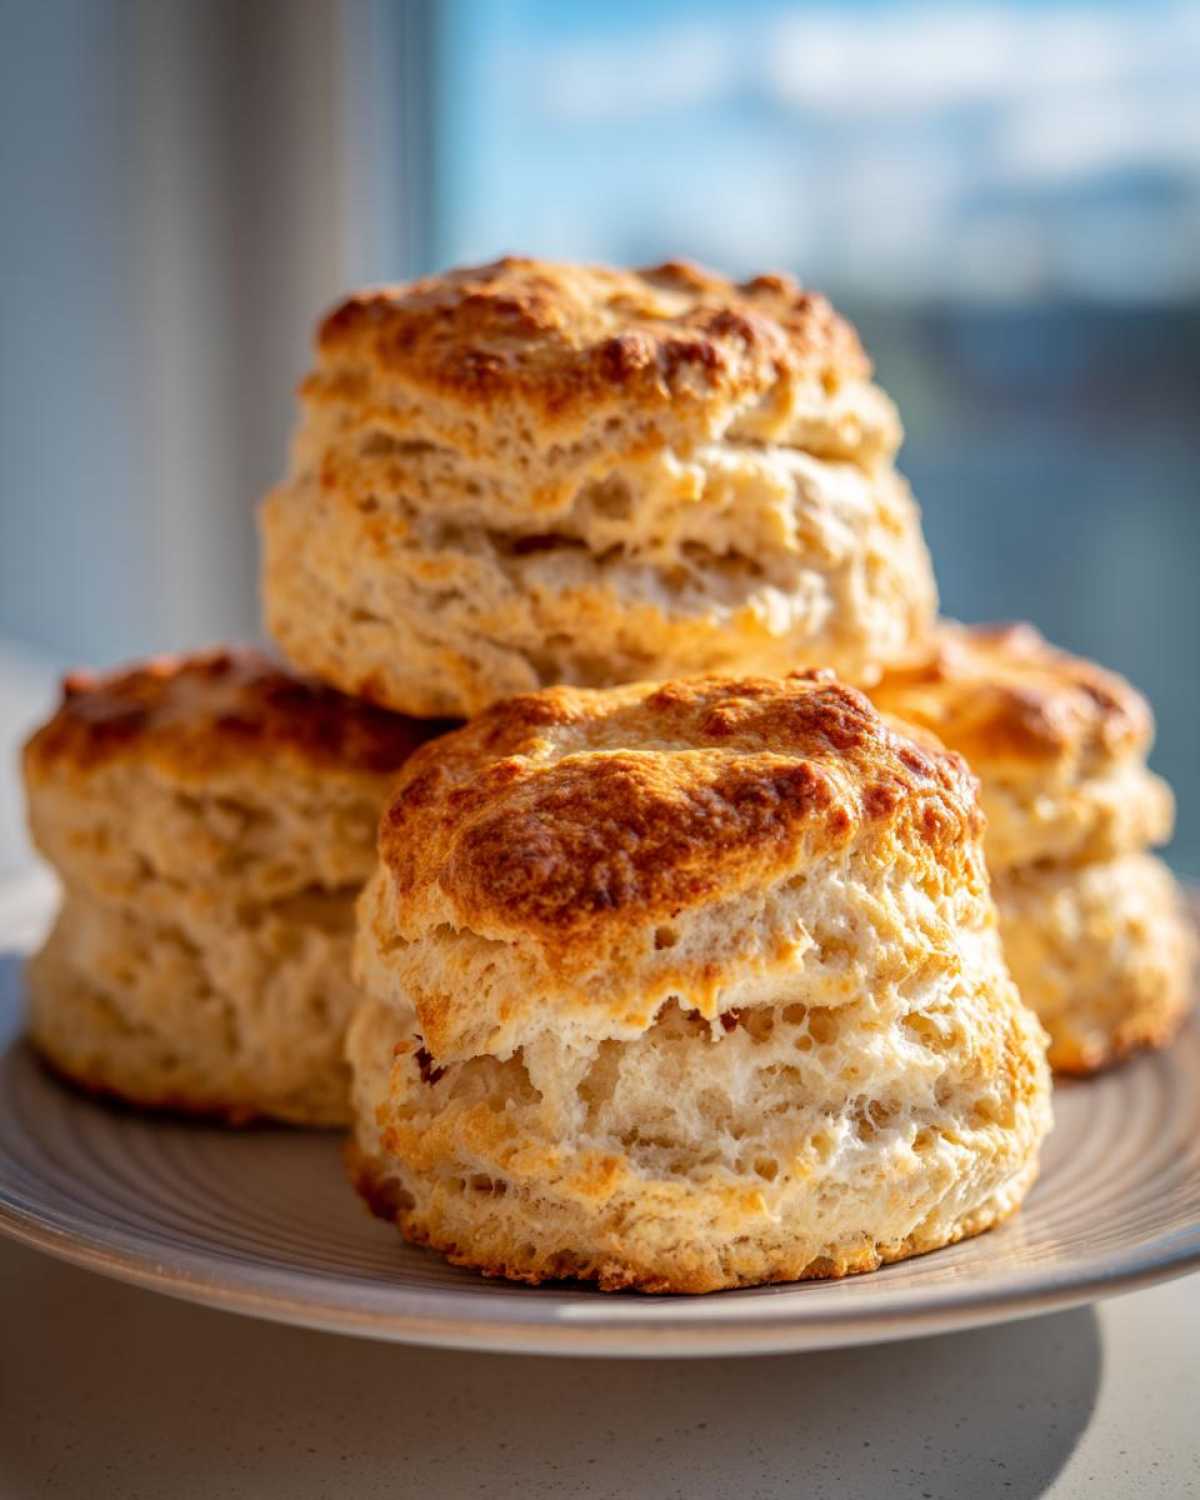
If you’ve ever had a scone that tasted heavy or rubbery, I bet you ten dollars they used a different method. This **Best Cream Scone Recipe** shines because we treat the dough like it’s incredibly delicate—which it is! The secret to those tall, **Fluffy Homemade Scones** is keeping everything absolutely frigid. Ice-cold butter mixed into the flour creates tiny pockets.
When those pockets hit the hot oven, the moisture steams out really fast, forcing the scone upward. That’s the lift we want! We skip anything extra, like adding a ton of fruit, to keep that texture pure. The folding technique we use next is crucial, too; it builds layers without you kneading the life out of the dough, which is how you get those beautiful, flaky sides on your ultimate batch. Trust me, treating the ingredients right makes all the difference in achieving a pastry that truly makes your afternoon tea special. You can read more about getting that perfect flake in my biscuit advice here: buttermilk biscuits that flake perfectly.
Gathering Ingredients for Your Cream Scones
The beauty of this recipe is that it uses such straightforward, classic components. You don’t need a pantry full of weird extracts or powders. But because the ingredient list is short, every single item has to be quality, and its temperature has to be spot on! If you’re ready to make these **Cream Scones**, gather these things first:
- 2 cups all-purpose flour
- 1 tablespoon baking powder
- 1/2 teaspoon salt
- 1/4 cup granulated sugar
- 6 tablespoons cold unsalted butter, cut into small cubes
- 3/4 cup heavy cream, plus extra for brushing
- 1 large egg
- 1 teaspoon vanilla extract
Now, listen to me, and listen closely: every component that goes into the dry mix needs to be room temperature, but the butter and the heavy cream? They must be straight from the coldest part of your fridge, practically frosty. I always cut my butter into cubes and then stick those cubes back in the freezer for about five minutes right before I start mixing. Cold fat equals fluffy scone—it’s the golden rule around here!
Step-by-Step Instructions: How to Make Perfect Cream Scones
Okay, this is where the magic happens, but also where you need to slow down just a tiny bit. Rushing here guarantees dense scones, so take your time focusing on the technique. This section is genuinely what makes this my go-to **How to Make Perfect Scones** guide. Remember, we are aiming for **Light and Tender Scones**, not just bread!
Preparing the Dry Mix and Cutting in the Butter
First things first: get that oven cranked up high to 425°F (220°C) and get your baking sheet lined up with parchment paper. Next, grab your biggest bowl and whisk together the flour, baking powder, salt, and sugar. Now, add those cubes of super-cold butter. You need to cut that butter in until the mix looks like coarse sand, but you should still see some little pea-sized chunks of butter floating around in there. Those chunks are your insurance policy for a flaky rise!
Mixing the Dough and the Essential Fold for Light and Tender Scones
In a different little cup, whisk together the 3/4 cup of cold heavy cream, your egg, and that splash of vanilla. Pour all that wet stuff right into your flour mixture. Use a fork—not your hands yet!—to gently pull everything together until it’s *just* incorporated. Seriously, stop mixing the second you don’t see any dry streaks of flour left. The dough will look shaggy, and that’s perfect. Turn it out onto a surface dusted lightly with flour. Gently pat it into a rectangle about 3/4 inch thick. Now for the secret layer builder: fold that rectangle in thirds, just like you’re folding a business letter. Give it one light press down to bring it back to about an inch thick. This folding step builds the separation you need for those gorgeous layers in your **Cream Scones**.
Now we can cut! This is the most important part of this **Easy Scone Baking Tutorial**. Take your 2-inch round cutter, dip the edge in flour, and press it straight down into the dough. Do *not* twist it! Twisting seals the edge and stops the scone from rising upward. Just press, lift, and set them close together on your prepared sheet. Brush the tops with a little extra heavy cream for that beautiful color.
Cutting and Baking Your Authentic Cream Tea Scones
Pop those beauties into the hot oven for about 12 to 15 minutes. You are looking for a beautiful rise and a rich, golden brown top, which means you’ve nailed the high-heat environment required for a good lift. Because we didn’t use much leavening other than powder, that high heat is key to developing the structure. Once they are deeply golden, pull them out and let them cool just a hair on a wire rack. If you managed to avoid twisting that cutter, you should see clean, straight sides on your **Authentic Cream Tea Scones**!

If you want even more tips on simple baking that looks advanced, check out how I simplify bread making here: the bread that makes people think you’re a baker.
Tips for Success Making Rich Butter Scone Recipe
Look, everyone can follow the steps, but knowing *why* we do them is what separates a good baker from someone who consistently makes the **Rich Butter Scone Recipe** shine. I can’t stress enough how critical ingredient temperature is. I’ve found that even if you think your butter is cold enough, chilling those cut shapes on the tray for ten minutes in the freezer before they bake gives them the ultimate boost! It halts that initial spread just long enough so the lift happens straight up.
Also, remember that folding step we did? That’s your final chance to build structure. Once you start cutting, treat the dough like spun glass. Minimal handling is key. If you are aiming for that perfect **Golden Brown Scone Baking** finish, make sure the cream you brush on top is applied lightly but covers the whole surface. For extra richness, sometimes I even mix a tiny pinch of sugar into the cream wash. If you’re looking for other ways to use high-quality butter, you absolutely have to try these buttery dinner rolls—they are spectacular!
Serving Suggestions for Classic Afternoon Tea Scones
You’ve made these perfect **Traditional British Scones**, now you have to serve them right! Warmth is everything here; they should be served soon after they cool enough to handle. For the most authentic experience, you absolutely need clotted cream—if you can find it, it’s non-negotiable. Failing that, a really high-quality, thick double cream works in a pinch.
Pile on your favorite jam—my preference is a sharp raspberry or classic strawberry. Some people love lemon curd, too, which gives it a lovely sunny flavor! Forget butter; these are rich enough with that butter content already in them. These **Classic Afternoon Tea Scones** are best enjoyed savored slowly.
Storage and Reheating Cream Scones
Honestly, these **Cream Scones** are at their very best the moment they come out of the oven. They are meant to be enjoyed warm right away! If you have leftovers, store them at room temperature in a container that isn’t airtight—you want to prevent condensation, which makes them gummy.
They usually stay nice for about 24 hours. If you need to revive them the next day, skip the microwave if you can help it! Pop them into a 300°F oven for just three or four minutes. That gentle heat brings back that lovely, light interior texture perfectly.
Variations on Your Cream Scones Recipe
While this recipe is the absolute standard for **Traditional British Scones**, I know bakers like a little twist now and then! Since we are avoiding heavy fruits, I suggest keeping the additions subtle so they don’t interfere with that amazing rise we worked so hard for. Try adding just 1/4 teaspoon of freshly grated nutmeg or a tiny pinch of cardamom to the dry mix—it wakes up the butter flavor nicely.
If you want a slight change in tang, you can swap out about half of the heavy cream for buttermilk. You get a wonderful, slight sharpness that works beautifully, though it leans slightly toward a **Simple Buttermilk Scones** approach. You might enjoy exploring how different dairy fats and fats in general change baked goods; I talk about that a bit with savory items here: savory herb butter turkey not just thanksgiving. Keep testing those small things!
Frequently Asked Questions About Cream Scones
I get so many questions about these scones because when they go wrong, they go *really* wrong! Don’t worry, we can debug that baking session together. Most problems boil down to temperature or handling, but let’s cover the bases here.
Can I substitute heavy cream in this Cream Scones recipe?
You certainly can try, but honestly, heavy cream gives you the richest flavor and the best structure for these **Cream Scones**. If you don’t have it, a very thick, full-fat buttermilk is the next best thing. If you use buttermilk, the scones might have a tiny bit more tang and may spread *just* a hair flatter, but they’ll still be delicious!
What is the secret to achieving tall, Fluffy Homemade Scones?
This is my favorite part to explain! It’s the holy trinity of scone success: Keep all your ingredients ice cold, don’t mix the dough any more than you absolutely have to, and when you cut the rounds, press the cutter straight down without twisting. Twisting ruins the vertical rise you’re trying to achieve for those **Fluffy Homemade Scones**.
Can I use baking soda instead of baking powder?
For this specific recipe, please stick to the baking powder! This is a tried-and-true formula for the **Classic Afternoon Tea Recipe**, and that rise comes primarily from the powder. If you swap in baking soda, you’d need to mess around with adding an acid to activate it, and that completely changes the delicate flavor profile we’re going for. If you still have questions after baking, you can always check out my general baking advice over on the main blog page!
Nutritional Estimates for Scratch Made Cream Scones
I know some of you like to track things, so here are the rough estimates for one of these gorgeous, **Scratch Made Cream Scones**. Remember, these are made with rich ingredients like butter and heavy cream, so enjoy them as the special treat they are!
- Serving Size: 1 scone
- Calories: 250
- Sugar: 5g
- Sodium: 280mg
- Fat: 14g
- Saturated Fat: 9g
- Carbohydrates: 28g
- Protein: 5g
Please keep in mind these numbers are just estimates. They can change based on the exact brand of butter or flour you end up using in your beautiful batch!
Nutritional Estimates for Scratch Made Cream Scones
I know some of you like to track things, so here are the rough estimates for one of these gorgeous, **Scratch Made Cream Scones**. Remember, these are made with rich ingredients like butter and heavy cream, so enjoy them as the special treat they are!
- Serving Size: 1 scone
- Calories: 250
- Sugar: 5g
- Sodium: 280mg
- Fat: 14g
- Saturated Fat: 9g
- Carbohydrates: 28g
- Protein: 5g
Please keep in mind these numbers are just estimates. They can change based on the exact brand of butter or flour you end up using in your beautiful batch!
PrintClassic Cream Scones

A recipe for traditional, light, and fluffy cream scones suitable for afternoon tea.
- Prep Time: 15 min
- Cook Time: 15 min
- Total Time: 30 min
- Yield: 8 servings
- Category: Breakfast
- Method: Baking
- Cuisine: British
- Diet: Vegetarian
Ingredients
- 2 cups all-purpose flour
- 1 tablespoon baking powder
- 1/2 teaspoon salt
- 1/4 cup granulated sugar
- 6 tablespoons cold unsalted butter, cut into small cubes
- 3/4 cup heavy cream, plus extra for brushing
- 1 large egg
- 1 teaspoon vanilla extract
Instructions
- Preheat your oven to 425 degrees Fahrenheit (220 degrees Celsius). Line a baking sheet with parchment paper.
- In a large bowl, whisk together the flour, baking powder, salt, and sugar.
- Cut the cold butter into the dry ingredients using a pastry blender or your fingertips until the mixture resembles coarse crumbs with some pea-sized pieces of butter remaining.
- In a separate small bowl, whisk together the 3/4 cup heavy cream, egg, and vanilla extract.
- Pour the wet mixture into the dry ingredients. Use a fork to mix until just combined. Do not overmix; the dough will be shaggy.
- Turn the dough out onto a lightly floured surface. Gently pat the dough into a rectangle about 3/4 inch thick.
- Fold the dough in thirds, like a business letter. Gently pat it down again to about 1 inch thick. This folding creates layers for a better rise.
- Use a 2-inch round biscuit or scone cutter to cut out the scones. Press the cutter straight down without twisting to keep the edges clean.
- Place the cut scones close together on the prepared baking sheet.
- Brush the tops lightly with extra heavy cream.
- Bake for 12 to 15 minutes, or until the tops are golden brown and the scones have risen well.
- Transfer the scones to a wire rack to cool slightly before serving warm.
Notes
- For the lightest texture, keep all ingredients, especially the butter and cream, very cold.
- Do not twist the cutter when cutting the shapes; pressing straight down helps the scones rise upward instead of spreading sideways.
- Serve immediately with jam and clotted cream for a traditional experience.
Nutrition
- Serving Size: 1 scone
- Calories: 250
- Sugar: 5
- Sodium: 280
- Fat: 14
- Saturated Fat: 9
- Unsaturated Fat: 5
- Trans Fat: 0
- Carbohydrates: 28
- Fiber: 1
- Protein: 5
- Cholesterol: 55