

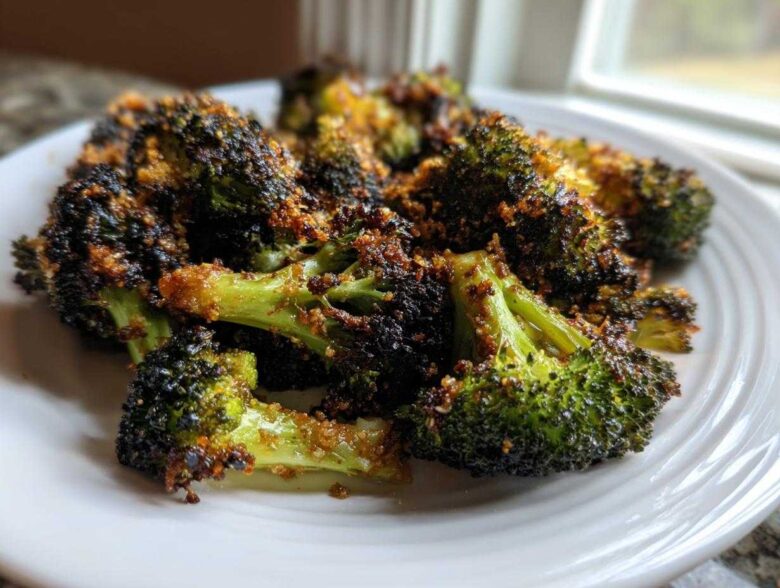
If you’re anything like me, you’ve been deeply betrayed by steamed or worse, boiled, broccoli. You know the drill: floppy, dull green, and totally lackluster. It’s a culinary letdown, and frankly, vegetables deserve so much better! That’s why here at Savor And Pin, we took this perfectly good staple and subjected it to our intense testing process. We didn’t just want a simple vegetable side; we wanted the absolute best. Trust me when I say this recipe for The Crispiest Garlic Parmesan Roasted Broccoli Recipe delivers. Noah, Ben, and I—we’re all about fixing those disappointing online recipes. When we dive into an idea, we make sure it’s foolproof. This method ensures your roasted broccoli comes out shatteringly crisp, guaranteed, just like we promise on our About Us page!
Why This Garlic Parmesan Roasted Broccoli is the Best Roasted Broccoli
Look, if you’re just looking for ‘broccoli tossed with oil,’ you don’t need us. You need something truly dialed in. We put this recipe through the wringer because we hate seeing good ingredients wasted on mushy results. This isn’t just roasted broccoli; it’s texture engineering!
- Incredibly Crispy Texture: We’ve cracked the high-heat code to get those golden, crunchy tips that you usually only find in restaurants.
- Savory Power Duo: That combo of garlic powder and nutty Parmesan cheese just screams flavor. It makes eating your veggies non-negotiable!
- Speed Demon: Total time? Just under 30 minutes. It’s perfect for when you need a fantastic side dish in a pinch.
- Healthy & Hearty: It’s naturally low in carbs, packed with fiber, and tastes so good it barely feels like healthy eating.
Ingredients for Crispy Roasted Broccoli
Okay, this is where the magic starts. Precision here means you don’t end up with a soggy mess later—that’s Noah’s influence showing! We keep the ingredient list tight because simplicity is the key to great flavorful roasted vegetables. You only need a few pantry staples to make this broccoli shine. Remember, we are going for maximum impact with minimal fuss!
- 2 large heads of broccoli, washed really well and cut into uniform florets. The size matters for even cooking, so try to keep them similar!
- 3 tablespoons olive oil. Make sure it’s a decent quality oil; it’s doing some heavy lifting here.
- 1 teaspoon kosher salt. Don’t measure this too lightly; salt helps draw out a tiny bit of moisture and enhances the flavor as it roasts.
- 1/2 teaspoon black pepper. Freshly cracked is always better, but honestly, ground works fine in a high-heat roast like this!
- 1 teaspoon garlic powder. Yes, powder! We save the fresh garlic for later, trust me.
- 1/2 teaspoon onion powder. This is my little secret; it rounds out the savory flavor profile beautifully.
- 1/4 cup grated Parmesan cheese, plus more for a generous sprinkle at the end. Use the real stuff if you can—it melts better!
- 1 tablespoon fresh lemon juice (optional, but highly recommended if you like that bright finish).
How to Achieve Incredibly Crispy Roasted Broccoli
This is where the rescuing happens! We take these simple florets and turn them into something incredible, but it requires sticking to the plan. Our goal is crispiness, and that means we need to respect two things: dry surfaces and intense heat. Noah says this is all about optimizing the surface area for the Maillard reaction—I just know it means crunchy edges and zero sogginess!
You’ll notice we are roasting this recipe at a high temperature. You absolutely need that 425 degrees Fahrenheit (220 Celsius) blast. Lower heat steams the broccoli; high heat aggressively caramelizes the natural sugars, giving you that deep flavor and crunch that makes this roasted broccoli so addictive.
Prepping the Broccoli and Oven Setup
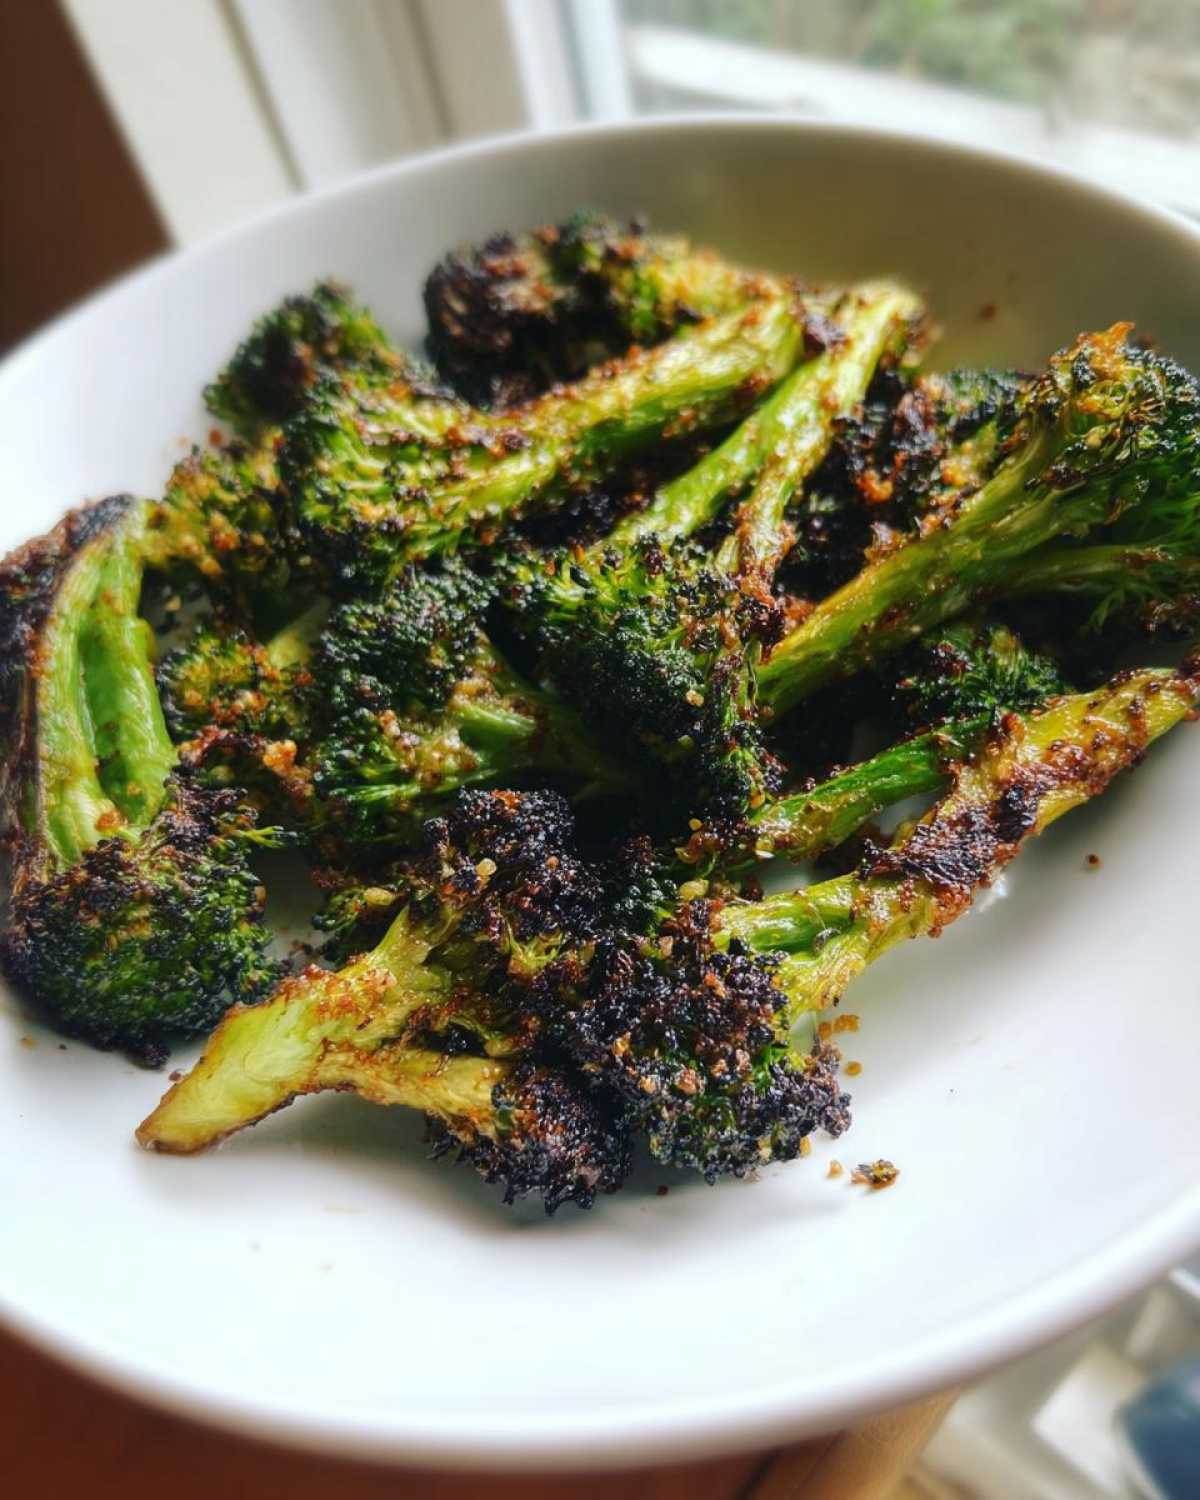
First things first, get that oven roaring to 425°F. Lining your baking sheet with parchment paper isn’t just for easy cleanup—it helps manage the slight changes in temperature that can encourage sticking. Now, for the most important part before seasoning: the broccoli has to be dry. If you just pulled them out of the sink, take a few paper towels and pat every single floret gently. Excess water is the enemy of crispness!
Seasoning and Initial Roasting
Toss your dry broccoli florets in a large bowl with the olive oil, salt, pepper, garlic powder, and onion powder. Make sure every piece has a nice, thin coating. You want it oiled, not drowning! Once coated, spread them out onto that prepared baking sheet. I repeat what Noah drills into us: Do not overcrowd the pan! If they are piled up, they steam. If they are in a single layer, they roast. Use a second sheet if you have to. Then, slide them into that hot oven for 12 to 15 minutes. They should be starting to look tender with some nice golden spots.
Adding Parmesan and Final Crisp
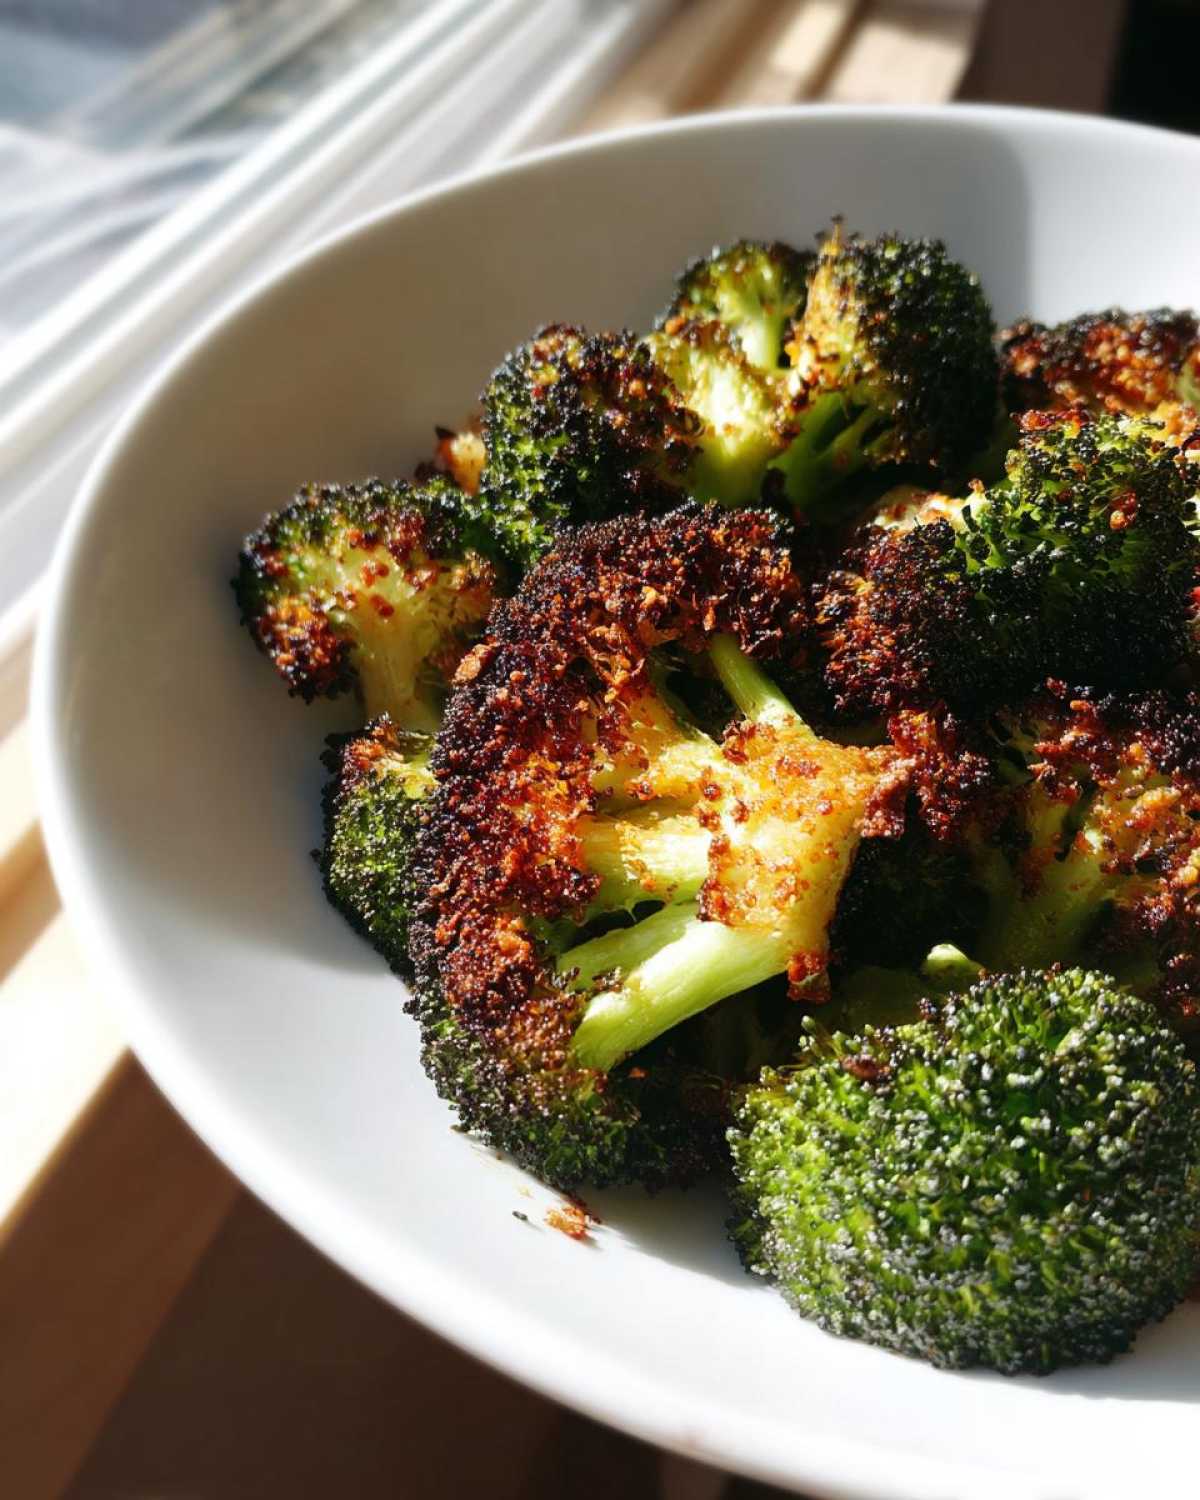
This two-step cheese addition is critical for the best flavor without burning the dairy! Pull the pan out after that first 15 minutes. Sprinkle that grated Parmesan evenly over the hot broccoli—the residual heat helps it cling. Pop it back in for just another 3 to 5 minutes. Watch it closely! You want that cheese melted and those broccoli edges turning deep golden brown and crispy. Drizzle with lemon juice right when it comes out, toss it gently, and serve immediately!
Expert Tips for Perfect Roasted Broccoli Every Time
Even with a foolproof recipe, sometimes folks run into little snags! That’s okay—that’s why Ben and I are here to talk about the fine-tuning needed for truly excellent roasted broccoli. We’re past the basic instructions now; we’re talking about making sure every single floret gets that satisfying crunch we promised you.
The Science Behind Crispy Broccoli Florets
If you want that dark, caramelized edge, you need to understand what’s happening in that hot oven. It’s all about the Maillard reaction, which is just a fancy way of saying sugars and proteins are browning for maximum yummy flavor! High heat (that 425°F we use) helps this happen fast before the veggie has time to release too much of its internal water. The absolute biggest thing that stops this is steam. If you stack them up, they steam. If they are touching a lot, they steam. So, I can’t stress this enough: give your florets space on that baking sheet so the hot air can actually reach the surface of every single piece.
Adjusting Garlic Flavor in Your Roasted Broccoli
In the main recipe, we use garlic powder. Why? Because fresh garlic burns like crazy under that intense roasting heat, turning bitter. If you’re making this for a weeknight and need speed, stick to the powder—it distributes beautifully and toasts along with the broccoli. However, if you want that deep, pungent flavor jump, you can absolutely use fresh minced garlic, but you have to treat it like a condiment, not a coating. We used a similar flavor rescue approach when we fixed the chili garlic noodles!
Here’s the trick: Wait until the very end. Once your broccoli has done its 15 minutes of initial roasting and has that nice golden crust, pull the pan out. Toss the hot broccoli with your seasonings *and* about 2 minced fresh garlic cloves. Then, put it back in for just another 3 to 5 minutes while the Parmesan melts. You get the intense, fresh garlic punch without risking bitter, black bits all over your gorgeous creation. Forcing fresh garlic in earlier ruins the crisp texture we worked so hard to achieve, so timing is everything!
Variations for Your Roasted Broccoli Recipe
The core recipe we developed is phenomenal, but I know how you are—you want to make it your own! Ben loves experimenting, so we’re always tweaking the formula. The beautiful part about perfect roasted broccoli is that it’s such a sturdy base that it handles additions really well, as long as you remember the golden rule: don’t overload the pan!
We’ve got a couple of favorite ways to switch things up depending on what we have in the fridge or what we are pairing it with.
- Lemon Zest Brightness: If you love that bright kick, try adding the zest of one whole lemon right when you toss the florets with oil and seasoning in the beginning. It infuses the oil beautifully. If you’re already using the optional lemon juice at the end, this just amps up that fresh flavor profile! If you want the full lemon experience, check out our dedicated Lemon Parmesan Roasted Broccoli recipe for the best ratio.
- A Touch of Heat: Need to spice things up? Toss in 1/4 to 1/2 teaspoon of red pepper flakes along with the garlic powder and onion powder at the start. This gives you subtle warmth throughout the roast instead of a direct blast of spice. It’s fantastic if you’re serving this alongside something rich or creamy.
- Going Vegan: If you need a dairy-free option, no worries! Just omit the Parmesan cheese at the 15-minute mark. To replace that savory, umami depth, sprinkle on 2 to 3 tablespoons of nutritional yeast right after the initial roast when the broccoli is still piping hot. It melts very differently than Parmesan, but it gives you that cheesy flavor, making it a great low-carb broccoli side for everyone at the table.
Honestly, once you master the technique in the previous section, you can substitute spices almost endlessly. Just keep the temperature high and the florets dry, and you won’t go wrong!
Serving Suggestions for this Easy Broccoli Side Dish
Okay, we’ve made the perfect crispy, savory broccoli. Now, what are we going to eat it with? That’s the easy part because this recipe is so versatile! It looks fancy enough for a holiday table, but it cooks so fast, it’s practically mandatory for a Tuesday night dinner. Seriously, this might be the most dependable easy broccoli side dish we’ve ever rescued.
Because the flavor profile leans hard into garlic and Parmesan, it pairs beautifully with almost any simple protein or starch. You just can’t go wrong. Here are the three go-to pairings that get requested most often at our house:
- Hearty Red Meats: This broccoli cuts right through the richness of a perfectly seared steak or a slow-cooked pot roast. It’s a fantastic, low-carb alternative to heavy potato sides when you’re serving something like our famous beef stroganoff.
- Simple Roasted Chicken or Turkey: The subtle char on the broccoli complements the crispy skin on a whole roasted chicken perfectly. It’s a flavor profile everyone expects and loves.
- Flaky White Fish: If you’re making baked cod or pan-seared halibut, this broccoli adds the needed texture and savory depth. It stands up well to the milder fish flavors without overpowering them, especially if you use that optional squeeze of lemon juice at the end!
Seriously, go make a double batch. By the time you’re done plating dinner, you’ll probably eat half of it straight off the tray before it even makes it to the table!
Storage and Reheating Instructions for Roasted Broccoli
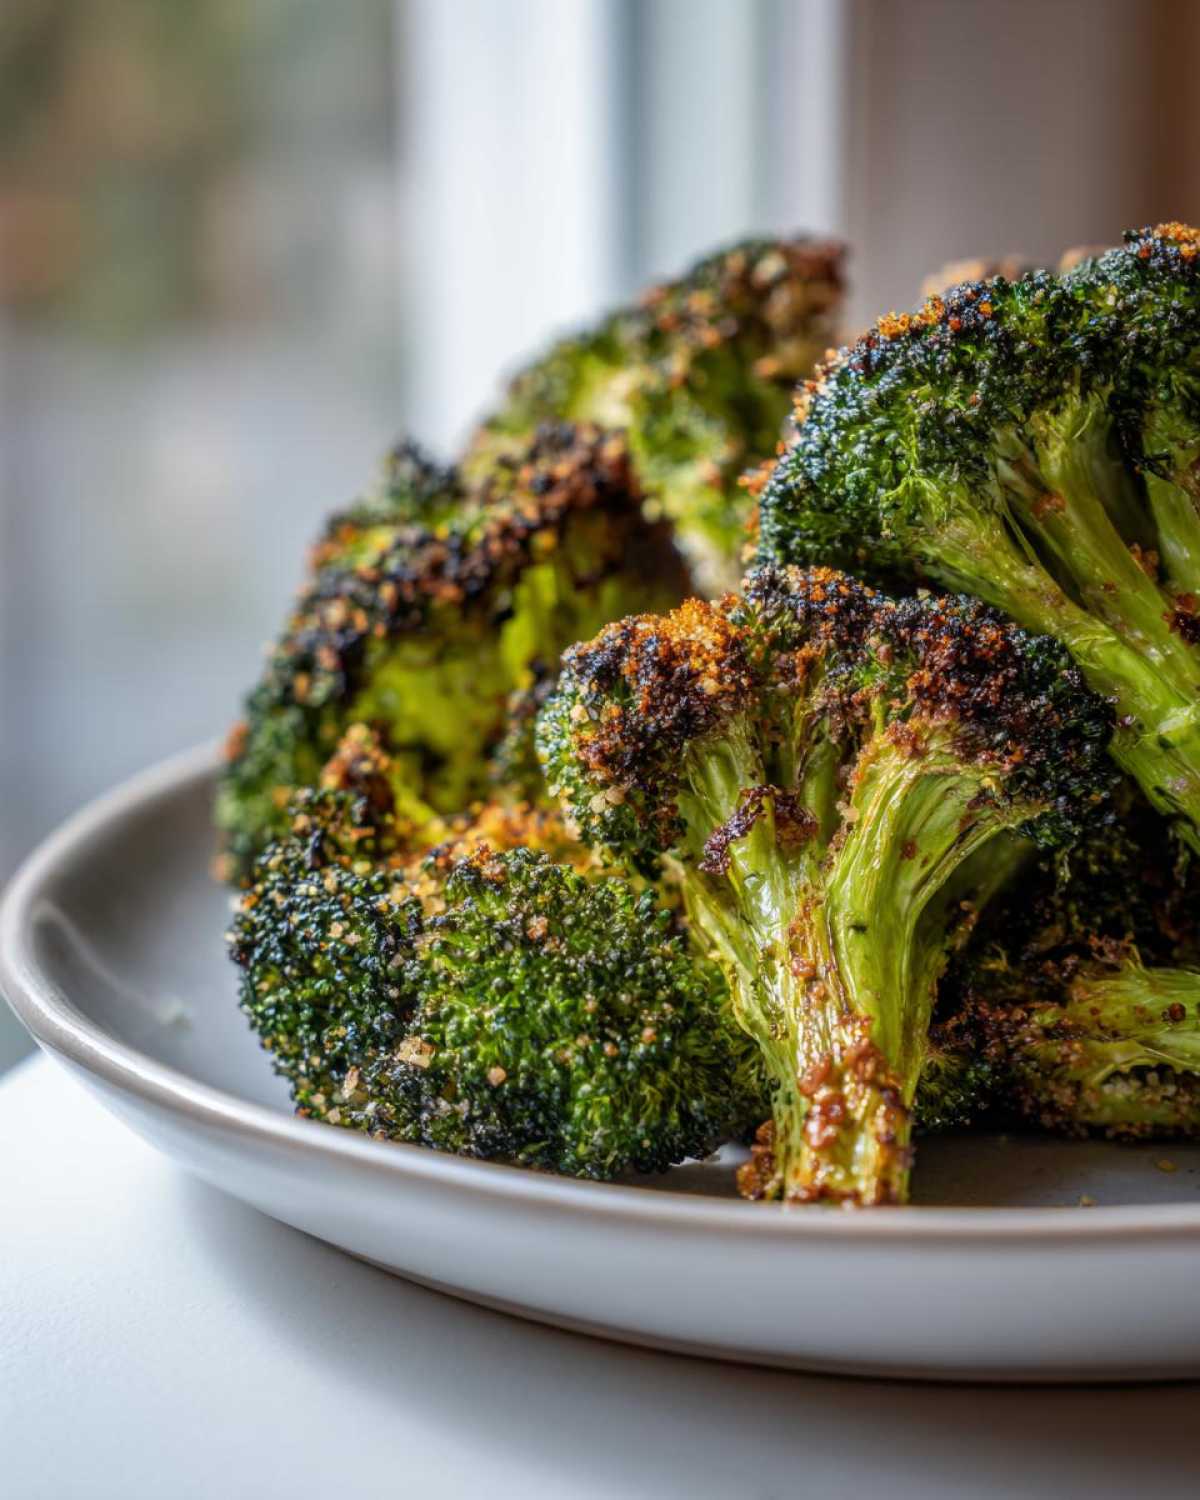
This is a question I get all the time after people try this recipe for the first time: “Noah, is this roasted broccoli good for meal prep?” The short answer is yes, absolutely! It holds up miles better than soggy steamed veggies. But—and you know there’s always a ‘but’ when Ben is involved—texture is tricky. When you cool down roasted vegetables, that lovely crispness starts to soften up slightly as they absorb moisture from the air and the cheese.
If you’re planning ahead, you need to store these properly. Always let the broccoli cool down completely before you put it anywhere near a lid. Warm food creates condensation, and condensation equals sad, wet broccoli. Once totally cool, transfer your leftovers into an airtight container. I usually aim for a container that has high sides so they aren’t squished. You can keep them in the fridge for about three to four days before the flavor starts getting a little dull.
Now for reheating—this is where we protect that crunchy edge. Throwing it in the microwave is a culinary crime if you want crispiness; it will steam the broccoli right back into what we tried to avoid in the first place! If you want the closest thing to the original texture, you have to use dry heat again. My top recommendation is the air fryer. Give your cooled broccoli about 3 to 5 minutes at 350°F (175°C) and it wakes right back up. If you don’t have an air fryer, a quick toss on a dry sheet pan in a hot oven for about 5 to 7 minutes does the trick, too. It won’t be exactly as crispy as when it first came out, but it will be miles better than microwaved mush! For more tips on keeping your veggies ready to go, check out our deep dive into broccoli meal prep strategies.
Frequently Asked Questions About Oven Roasted Broccoli
I know you’ve probably already jumped down here to see if you can skip a step—don’t worry, I’m guilty of it, too! But seriously, I’ve gathered the questions that came up most often when Ben and I were finalizing this recipe. Getting these little details right ensures you get that fantastic, crispy result instead of just another tray of sad, roasted greens.
Can I make this a Low Carb Broccoli Side dish?
Oh, yes, you absolutely can! In fact, this recipe is naturally built for it. Broccoli itself is a wonderfully healthy, fiber-filled vegetable, and since we rely on olive oil, salt, pepper, and a modest amount of Parmesan, the carb count stays minimal. This makes it an excellent Low Carb Broccoli Side dish that pairs perfectly with steak, chicken, or any hearty, low-carb protein you’re making. It’s filling, flavorful, and keeps your macros happy!
How do I ensure I get a truly Crispy Broccoli Recipe?
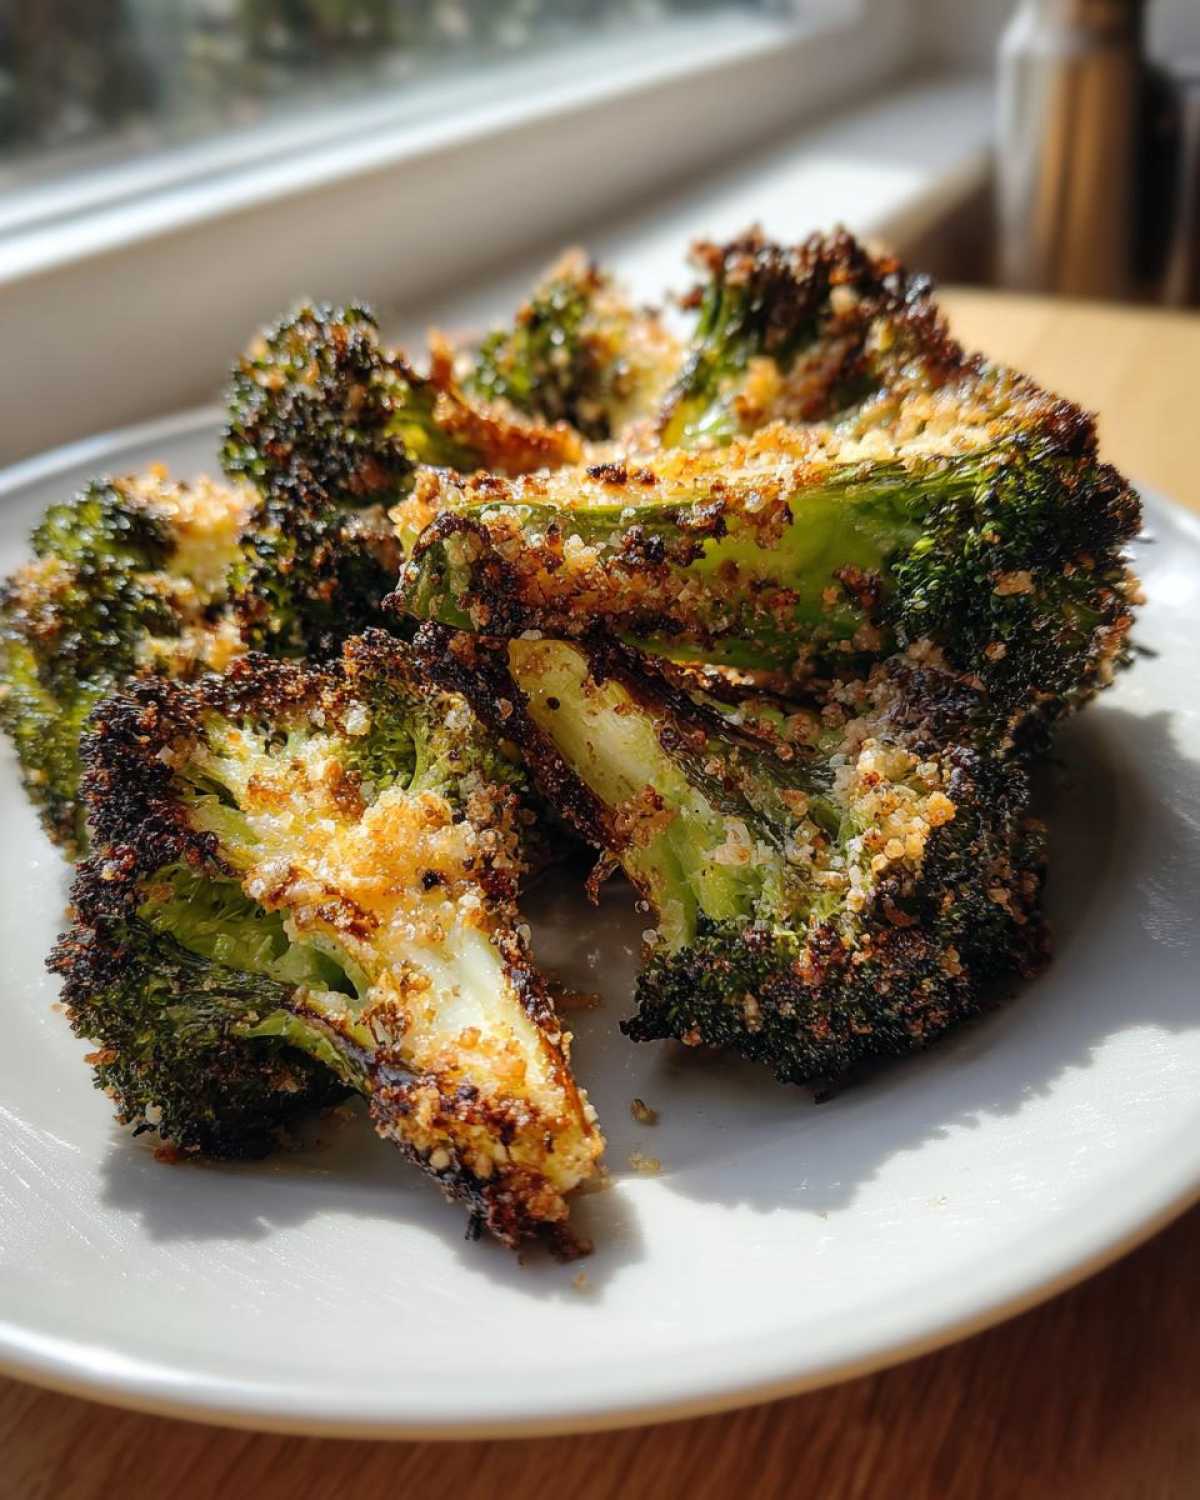
This is the million-dollar question! If you want the results you see in those gorgeous photos—the ones where the edges look like tiny broccoli chips—you have to adhere to the two big non-negotiables we discovered during testing. Rule number one is to ensure every single floret is as dry as you can get it before oiling it; moisture turns to steam, and steam equals mush. Rule number two is high, high heat—we stick to that 425°F oven temperature like glue. If you follow those two things, you are already 90% of the way to the Crispy Broccoli Recipe of your dreams. Don’t skimp on the space on the pan, either!
Can I roast frozen broccoli?
If you’re aiming for this specific, shatteringly crispy texture, I strongly advise you *not* to use frozen broccoli for this particular method. Frozen vegetables are blanched—that means they are already partially cooked and loaded with internal water content. When you put frozen florets in a hot oven, that water releases immediately. You’ll end up braising or steaming your broccoli rather than roasting it, and you’ll never achieve those beautiful caramelized edges we are aiming for. If you only have frozen, I would highly recommend steaming it lightly, draining it perfectly, and then tossing it with the seasoning and cheese at the very end, serving it immediately while it’s hot. But honestly? Skip the frozen stuff here and use fresh if you can!
Nutritional Information for Garlic Parmesan Roasted Broccoli
Okay, let’s talk fuel. I know we’re focused on texture and flavor here at Savor And Pin—that’s our jam—but since the goal is to rescue recipes into something dependable and genuinely good for you, knowing the nutritional breakdown matters! You’ll be happy to hear that because we stuck to simple ingredients and avoided drenching the broccoli in heavy sauces, this remains a fantastic healthy vegetable side.
Keep in mind that these numbers are just estimates based on our recipe breakdown (4 servings) and using the ingredients specified. Every cook’s Parmesan cheese wedge is slightly different, right? But this gives you a solid idea of what you’re putting on your plate!
- Serving Size: 1 serving
- Calories: 120
- Fat: 8g (Mostly the heart-healthy monounsaturated fat from the olive oil!)
- Saturated Fat: 2g
- Carbohydrates: 9g
- Fiber: 4g (That’s why you feel satisfied!)
- Protein: 5g
- Sugar: 3g (All-natural sugars from the veggie itself, folks!)
- Sodium: 350mg (This can vary widely depending on how heavy you are with the salt shaker!)
- Cholesterol: 5mg
See? Delicious, crunchy, garlicky, and it keeps your blood sugar happy. It’s a total win-win situation. Now run on over and make a batch for dinner tonight!
PrintThe Crispiest Garlic Parmesan Roasted Broccoli Recipe
You will make incredibly crispy, tender roasted broccoli with savory garlic and Parmesan cheese. This simple oven roasting method delivers maximum flavor and crunch, making it the best healthy vegetable side dish for any meal.
- Prep Time: 10 min
- Cook Time: 18 min
- Total Time: 28 min
- Yield: 4 servings
- Category: Side Dish
- Method: Oven Roasting
- Cuisine: American
- Diet: Low Fat
Ingredients
- 2 large heads of broccoli, cut into uniform florets
- 3 tablespoons olive oil
- 1 teaspoon kosher salt
- 1/2 teaspoon black pepper
- 1 teaspoon garlic powder
- 1/2 teaspoon onion powder
- 1/4 cup grated Parmesan cheese, plus extra for topping
- 1 tablespoon fresh lemon juice (optional)
Instructions
- Preheat your oven to 425 degrees Fahrenheit (220 degrees Celsius). Line a large baking sheet with parchment paper for easy cleanup.
- In a large bowl, combine the broccoli florets, olive oil, kosher salt, black pepper, garlic powder, and onion powder. Toss everything together until the broccoli is evenly coated.
- Spread the seasoned broccoli in a single layer on the prepared baking sheet. Do not overcrowd the pan; use two sheets if necessary to promote crisping.
- Roast for 12 to 15 minutes. The edges should start to look golden brown and slightly charred.
- Remove the pan from the oven. Sprinkle the 1/4 cup of grated Parmesan cheese evenly over the hot broccoli.
- Return the pan to the oven and roast for another 3 to 5 minutes, or until the cheese is melted and the broccoli edges are deeply golden and crispy.
- Remove from the oven. Drizzle with fresh lemon juice, if using, and toss gently. Serve immediately for the best texture.
Notes
- For the crispiest results, ensure your florets are dry before tossing them with oil. Pat them with a paper towel if they are wet from washing.
- Do not skip the high heat; 425°F is key to achieving those crunchy, caramelized edges.
- If you prefer a stronger garlic flavor, substitute 1 teaspoon of garlic powder with 2 minced fresh garlic cloves, adding them in the last 5 minutes of cooking to prevent burning.
- This is a fantastic low carb broccoli side dish perfect for meal prep; store leftovers in an airtight container.
Nutrition
- Serving Size: 1 serving
- Calories: 120
- Sugar: 3
- Sodium: 350
- Fat: 8
- Saturated Fat: 2
- Unsaturated Fat: 6
- Trans Fat: 0
- Carbohydrates: 9
- Fiber: 4
- Protein: 5
- Cholesterol: 5