

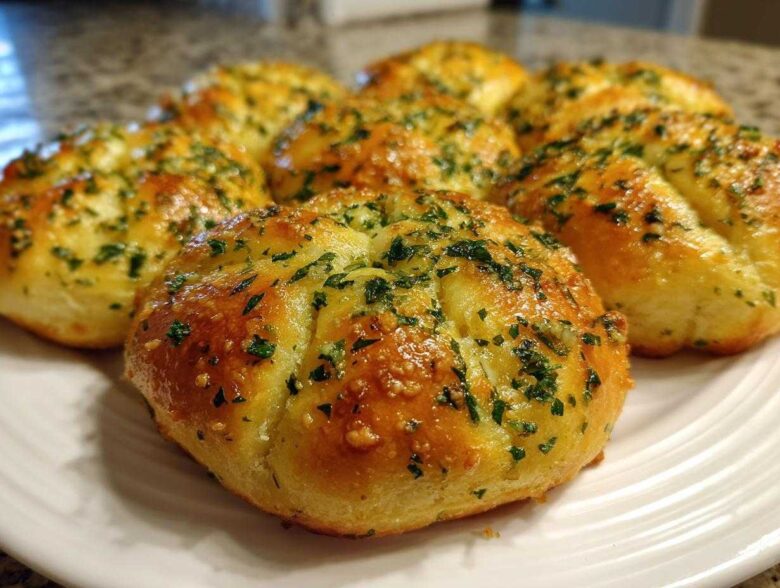
Oh, you know I love a good carb, and nothing screams ‘comfort food’ quite like fresh-from-the-oven bread. Forget those sad, dry little rolls you get at fancy places; we are talking about the real deal here! If you’ve ever taken a bite of those pillowy, garlicky, perfect little swirls at your favorite Italian spot and thought, “I could never make those,” well, trust me, you are wrong. I spent what felt like a million tries perfecting this dough because I absolutely needed that signature soft, chewy texture in my life, and now I’m sharing my secrets.
These **Garlic Knots** are ridiculously easy if you just follow the simple rhythm of the dough. We’re skipping all the complicated steps and getting right to the tender, fluffiest bread you’ve ever seen, drowned in the richest garlic butter sauce. Seriously, these will make everyone think you’re a professional artisan baker, even though they are barely harder than mixing a box cake!
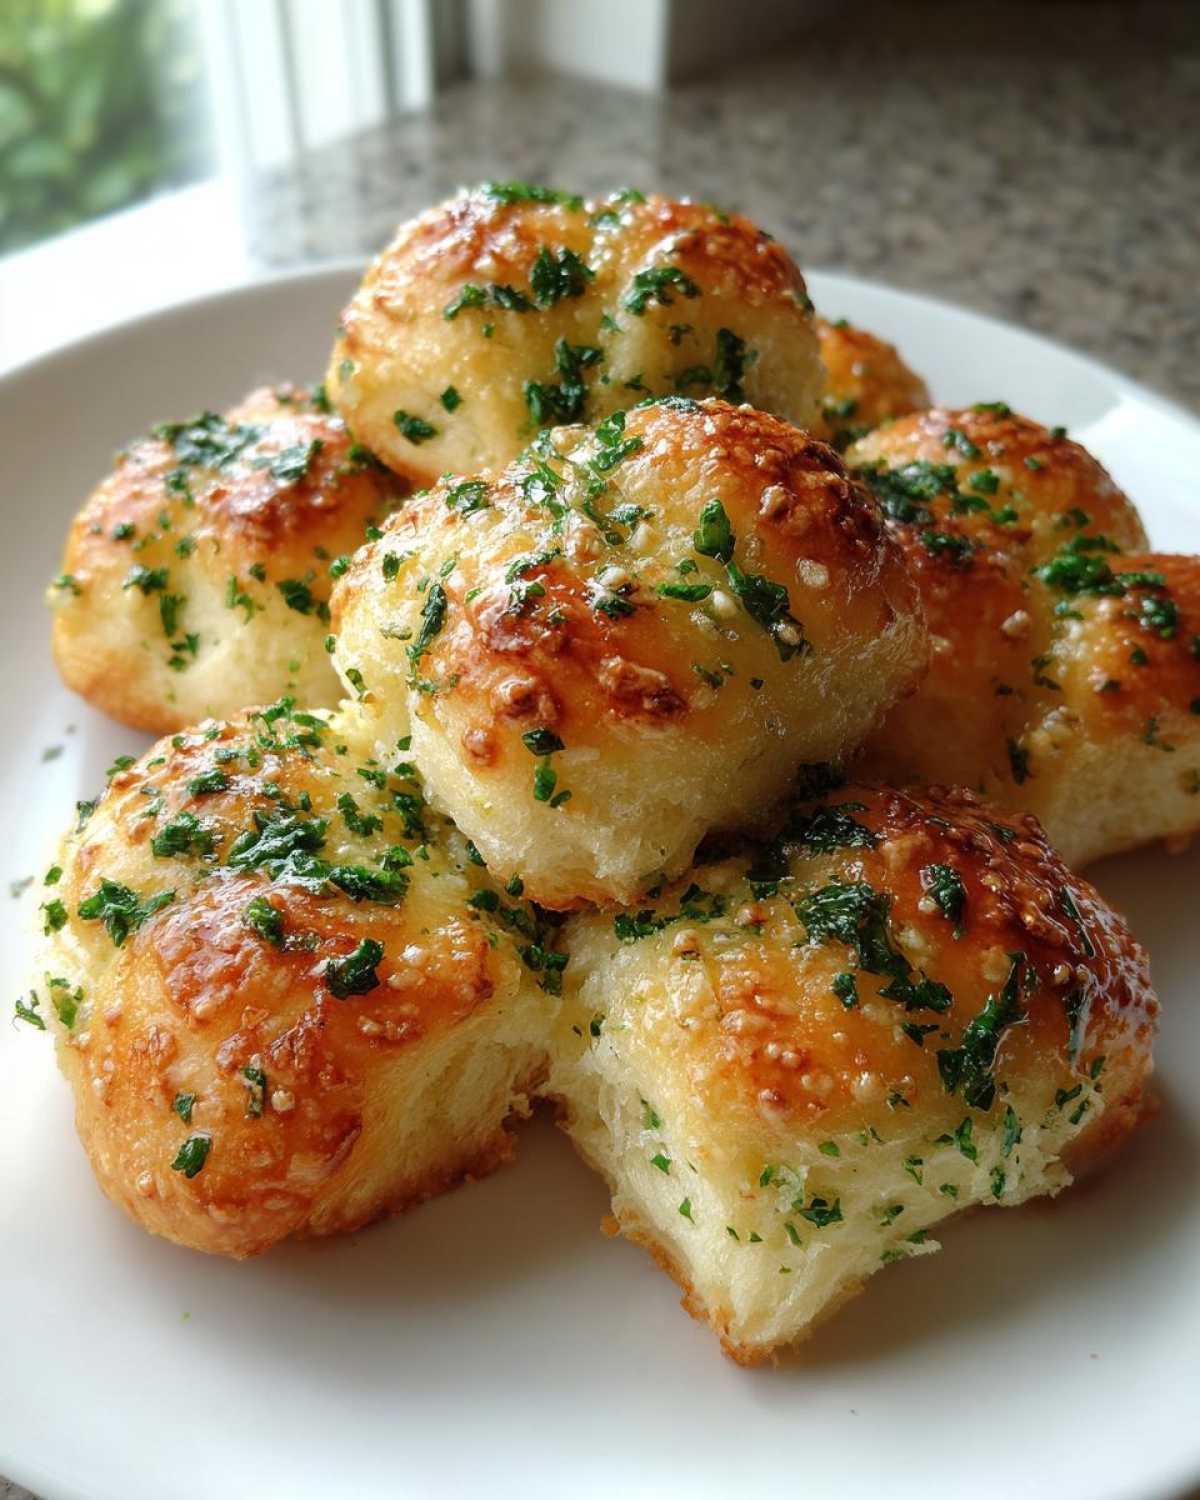
Once you nail this **Yeast Knot Recipe**, you’ll be making them weekly. You can check out more of my favorite homemade bread secrets right here if you’re feeling ambitious!
Why You Will Make the Best Homemade Garlic Knots
I promise you, these aren’t just good; they are genuinely spectacular. Once you try this method, you’ll retire every other bread recipe.
- The texture is unmatched: Incredibly soft interiors with just the slightest crispness on the outside. They are pure, satisfying chewiness!
- That signature flavor hits perfectly; the fresh parsley and butter coat every nook and cranny of the knot.
- It’s a foolproof **Easy Dinner Rolls Recipe** base that results in fluffy bread every single time, even if you’re nervous about using yeast.
If you love buttery bread that steals the show, check out my other favorite dinner roll recipe too!
Essential Ingredients for Perfect Garlic Knots
The ingredients list might look standard, but I have a few non-negotiables here, especially when it comes to the garlic butter sauce; that’s where the magic happens! You absolutely need active dry yeast, of course, which we’ll wake up using just a teaspoon of sugar and some warm water. Make sure that water is right around 105 to 115°F—too hot and you kill the yeast, too cool and it just sleeps in there!
For the dough itself, standard all-purpose flour and salt are key, along with a bit of olive oil for tenderness. But the real stars are in the sauce:
- A half-cup of unsalted butter—don’t skimp here!
- Four cloves of really fresh garlic, finely minced. This is crucial for that amazing aroma!
- A generous two tablespoons of fresh parsley, chopped finely.
When you’re done baking these beautiful **Garlic Knots**, remember that flavor profile is everything. If you love garlic flavors beyond just bread, you have to try my Garlic Parmesan Spaghetti Bake!
Equipment Needed for Your Yeast Knot Recipe
You don’t need fancy gadgets for these, which is part of what makes them my favorite **Party Appetizer Bread** to whip up! You’ll need a big mixing bowl for that initial shaggy dough, a smaller one for waking up the yeast, and then a saucepan dedicated to making that incredible **Garlic Butter Sauce for Bread**.
Also, make sure you have a solid baking sheet—using parchment paper is a total lifesaver for easy cleanup. A rolling pin helps get those ropes even, but honestly, you can use your hands if you’re feeling rustic!
Step-by-Step: How to Make Soft Chewy Bread Knots
Okay, here’s where we move from ingredients to pure, yeasty magic! Taking the time to do these steps right is what separates a truly great batch of **Garlic Knots** from something just okay. We start with waking up the yeast, which is the heartbeat of any good bread.
Activating the Yeast and Mixing the Dough
First, you absolutely need that single packet of active dry yeast. Dissolve your sugar right into the warm water—about 105 to 115°F, remember that crucial temperature range! Then sprinkle the yeast on top. If it gets foamy after five or ten minutes, you’re golden; it’s alive and ready to work magic. If it doesn’t foam? Toss it and try again with warmer water! I actually have a whole rundown on Baking with Yeast Successfully if that’s where you’re feeling nervous.
Once bubbly, pour that yeasty goodness into your flour and salt mixture, along with the two tablespoons of olive oil. Mix it up until it looks like one big, messy, shaggy clump. Don’t worry, it’s supposed to be messy at this stage!
Kneading and The First Rise for Fluffy Bread Recipes
Now, get your hands in there! Turn that shaggy dough out onto a lightly floured counter and knead it. You need to work it for a solid five to seven minutes until it feels noticeably smoother and has that nice elastic spring back. This develops the structure for those **Soft Chewy Bread Knots**.
Lightly grease a bowl, tuck your dough ball in, give it a little turn so it gets coated, and cover it up. I usually find a spot right near the pilot light on my stove, or just under a warm dish towel. Let it go for about an hour or maybe an hour and a half, until it has completely doubled in size. Don’t rush the rise!
Shaping the Dough into Classic Garlic Knots
Once it’s doubled, punch the air out—it’s satisfying! Then, divide the dough into twelve equal bits. This is my favorite part: roll each piece out into an 8-inch rope. It sounds long, but trust me, that length is what gives you that perfect little swallow in the middle when you tie it. Keep it simple! Tie it into a casual knot—it doesn’t need to be perfect because it puffs up in the oven anyway. Place them on your lined sheet and cover them again for just 20 minutes to rest before they hit that 400°F oven!
Mastering the Garlic Butter Sauce for Bread
Listen, you could have the fluffiest dough in the world, but if your butter sauce is burnt, the whole batch of **Garlic Knots** is ruined. Totally ruined! As soon as those knots hit the oven, get your saucepan warming up over *low* heat. We are melting the butter—not frying it!
Once it’s melted, toss in your beautiful minced garlic and that tiny bit of salt for the sauce. You only want to cook this for about a minute, just until you can smell that amazing, warm garlic fragrance spreading through your kitchen. The second the garlic looks pale gold, pull it immediately off the heat. Browned garlic is bitter garlic, and we don’t do bitter here!
The very last thing you do before you drench those hot knots is stir in the fresh parsley. This vibrant green addition cuts through the richness of the butter perfectly. If you’re into other savory flavors, maybe try pairing this flavor profile with my Garlic Herb Shrimp!
Tips for Success: How to Make Soft Knots Every Time
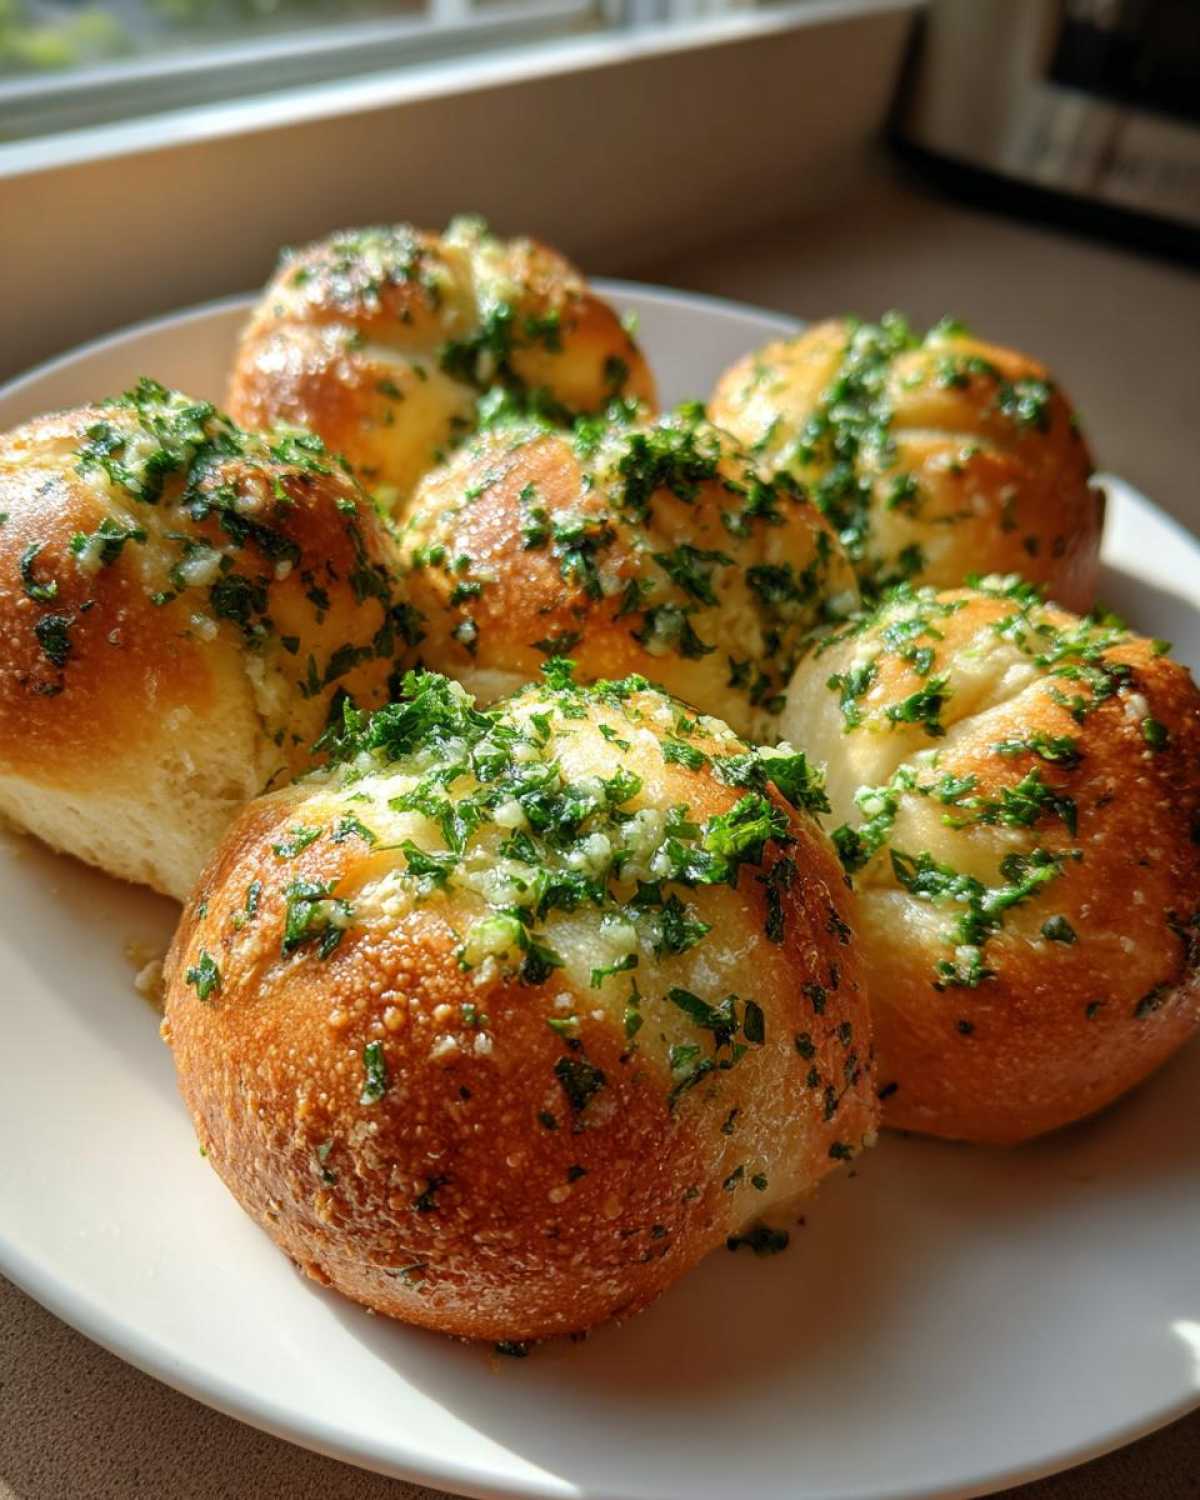
We are aiming for those **Soft Restaurant Style Knots**, and I have a couple of secrets tucked away to guarantee that fluffy result! While the garlic butter toss is key, what you do straight out of the oven makes a huge difference. If you want an extra layer of softness that melts right into the crust, brush the tops of the knots with a little bit of plain melted butter right after you pull the pan out, *before* you pour that glorious garlic sauce over everything.
This simple post-bake brushing locks in moisture immediately. Also, don’t let the knots sit around! The moment they come out of the oven, they need that garlic bath. If they cool down even slightly before being tossed, the butter sauce won’t soak in as beautifully, and you lose some of that melt-in-your-mouth quality. You can find some other great shortcuts for when you need quick bread fixes in this post!
Variations for Your Garlic Knots Recipe
While this recipe makes fantastic classic **Garlic Knots**, sometimes you just want to switch things up, right? It’s so easy to personalize this basic **Yeast Knot Recipe**. My go-to trick for a real flavor boost is adding about a quarter cup of grated Parmesan cheese right into that melted garlic butter while it’s warming up. That instantly turns them into cheesy, savory little bombs that are dangerously addictive.
Another fun approach is leaning into the herbs. Instead of just parsley, try mixing in some dried oregano and basil to make it a real **Garlic Herb Bread** experience. It’s perfect for when you are serving them with a big pot of marinara sauce. If you play around with different savory bread flavors, check out my Garlic Herb Pull-Apart Bread for more ideas!
Storing and Reheating Your Delicious Garlic Knots
These incredible **Garlic Knots** really are best eaten warm, right after that glorious butter toss, but let’s be honest, sometimes we have leftovers! Store any extras in a simple airtight container on the counter for up to two days. Don’t put them in the fridge; that just makes them hard!
To bring them back to life, skip the microwave—it makes them spongy! Instead, pop them on a piece of foil and reheat them in a 350°F oven for about four to five minutes. That little bit of dry heat gets the outsides crisp again while keeping the inside soft and chewy.
Frequently Asked Questions About Homemade Garlic Knots
Can I make the dough for these Garlic Knots ahead of time?
Oh, absolutely! I love being prepared, and yeast doughs are fantastic for making ahead. Once you finish kneading (Step 3), you can skip the first rise. Just cover that smooth dough ball tightly with plastic wrap and pop it in the fridge for up to 24 hours. When you’re ready to bake, let it sit on the counter for about 30 minutes to warm up slightly before punching it down and shaping your **Soft Chewy Bread Knots**. You can even freeze the shaped, unbaked knots after their second rise if you wrap them really well!
What is the best way to serve these Italian Appetizer Recipes?
These beautiful **Garlic Knots** are so wonderfully versatile! They are obviously perfect alongside any kind of saucy pasta dish—think lasagna or spaghetti and meatballs. The best way to serve them is piping hot, right after they’ve been tossed in that melted butter. I always put a small bowl of extra warm marinara sauce right in the middle of the serving plate for dipping. They make such a fantastic addition to any spread of appetizer bread!
Why are my Garlic Knots not rising properly?
Nine times out of ten, if your dough isn’t puffing up, it’s the temperature of your water for the yeast. It needs to be truly warm, that sweet spot between 105 and 115°F. If it’s cold, the yeast just lays there, grumpy. If it’s boiling hot, you’ve killed it! Also, check your yeast date; if it’s been open in the cupboard for a year, it might be dead. When the yeast foams in Step 1, you know you’re on the right track for super **Fluffy Bread Recipes**!
PrintClassic Homemade Soft Garlic Knots
Make soft, chewy garlic knots from scratch using a simple yeast dough and toss them in a rich garlic butter sauce.
- Prep Time: 25 min
- Cook Time: 15 min
- Total Time: 1 hour 50 min
- Yield: 12 knots
- Category: Appetizer
- Method: Baking
- Cuisine: Italian-American
- Diet: Vegetarian
Ingredients
- 1 packet active dry yeast
- 1 teaspoon sugar
- 1 cup warm water (about 105-115°F)
- 2 1/2 cups all-purpose flour, plus more for dusting
- 1 teaspoon salt
- 2 tablespoons olive oil, plus more for greasing
- 1/2 cup unsalted butter
- 4 cloves garlic, minced
- 2 tablespoons fresh parsley, chopped
- 1/4 teaspoon salt (for butter sauce)
Instructions
- Activate the yeast: In a small bowl, dissolve the sugar in the warm water. Sprinkle the yeast over the top and let it sit for 5 to 10 minutes until foamy.
- Mix the dough: In a large bowl, combine the flour and 1 teaspoon of salt. Pour in the yeast mixture and 2 tablespoons of olive oil. Mix until a shaggy dough forms.
- Knead: Turn the dough onto a lightly floured surface and knead for 5 to 7 minutes until smooth and elastic.
- First rise: Lightly oil a clean bowl. Place the dough in the bowl, turning to coat. Cover the bowl with plastic wrap or a clean towel and let it rise in a warm place for 1 to 1.5 hours, or until doubled in size.
- Shape the knots: Punch down the risen dough. Divide the dough into 12 equal pieces. Roll each piece into an 8-inch rope. Tie each rope into a simple knot. Place the knots on a baking sheet lined with parchment paper.
- Second rise: Cover the knots loosely and let them rest for 20 minutes. Preheat your oven to 400°F (200°C).
- Bake: Bake the knots for 12 to 15 minutes, or until golden brown.
- Prepare the garlic butter: While the knots bake, melt the butter in a small saucepan over low heat. Add the minced garlic and 1/4 teaspoon of salt. Cook for 1 minute until fragrant; do not brown the garlic. Remove from heat and stir in the fresh parsley.
- Toss and serve: Immediately transfer the hot baked knots to a large bowl. Pour the garlic butter mixture over the knots and toss gently until evenly coated. Serve warm.
Notes
- For softer knots, brush the tops lightly with extra melted butter immediately after removing them from the oven before tossing them in the garlic sauce.
- If you prefer a stronger garlic flavor, let the minced garlic steep in the melted butter for 10 minutes off the heat before tossing.
- You can use store-bought pizza dough to skip steps 1 through 4 for a quicker version.
Nutrition
- Serving Size: 1 knot
- Calories: 180
- Sugar: 2
- Sodium: 250
- Fat: 8
- Saturated Fat: 4
- Unsaturated Fat: 4
- Trans Fat: 0
- Carbohydrates: 23
- Fiber: 1
- Protein: 5
- Cholesterol: 15