

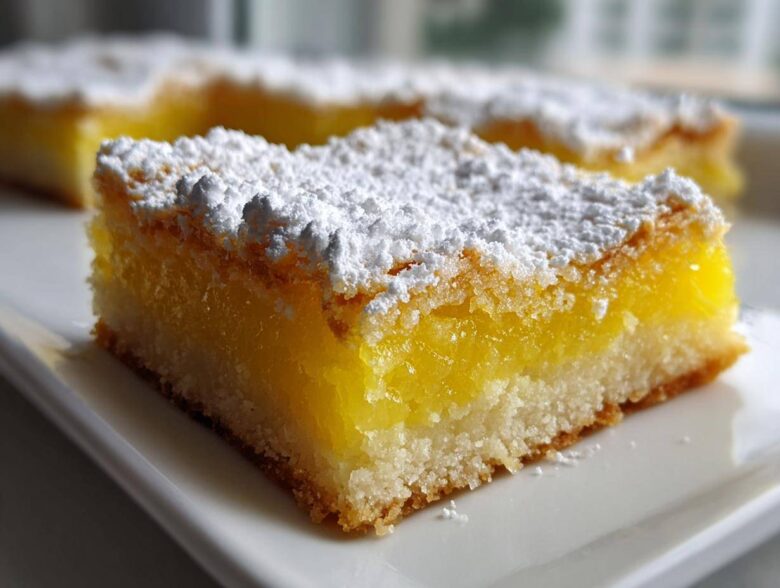
Oh my gosh, are you ready for a burst of sunshine in dessert form? When I crave something bright—truly *bright*—that doesn’t involve spending half the day in the kitchen, I immediately whip up these bars. Seriously, I’ve messed around with so many citrus recipes over the years, trying to nail that balance, and I finally cracked the code! These are the ultimate Tantalizing Lemon Bars: A Refreshing and Easy Dessert Recipe that perfectly hits that sweet spot between zesty tang and buttery goodness. If you loved my,lemon raspberry loaf cake, you’re going to flip for these. Trust me, that shortbread crust alone is worth making the whole batch. You get that satisfying crunch, followed by the cool, smooth, tart filling. Perfect for a picnic or just hiding them in the fridge for yourself!
Why You Will Love These Tantalizing Lemon Bars: A Refreshing and Easy Dessert Recipe
Look, I’m not going to lie—I love complicated baking, but sometimes you just need a win, right? These bars deliver every single time. If you’re looking for the perfect citrus fix, here’s why everyone flocks to my recipe:
- Seriously Refreshing Flavor: That pop of fresh lemon and zest cuts right through the richness of the crust. They feel so light!
- No Fuss, Just Flavor: Prep time is minimal. No weird steps, no complicated folding—just mix, press, pour, and bake. It truly is an easy lemon bars recipe.
- The Best Texture Combo: You get a sturdy, buttery shortbread base that holds up beautifully under that glossy, soft lemon topping.
Gathering Ingredients for Tantalizing Lemon Bars: A Refreshing and Easy Dessert Recipe
Okay, the beauty of this recipe is how few things you actually need. Seriously, look at this list! We’re talking pantry staples for the crust and just a few fresh things for that incredible zing. I’ve tried making this with bottled juice because I was in a pinch once—and you can’t fool me (or your taste buds!). For that truly *tantalizing* flavor we are chasing, you absolutely must use freshly squeezed lemon juice and zest. That’s non-negotiable in my book; it makes all the difference in how bright these lemon bars taste!
Here is what you’ll need right there so you can shop your pantry:
- For the Buttery Shortbread Crust: 1 cup all-purpose flour, 1/2 cup cold unsalted butter (cubed up!), 1/4 cup granulated sugar (just a little sweetness here), and 1/4 teaspoon salt.
- For the Tangy Lemon Filling: 1 cup granulated sugar (this feeds the tartness!), 4 large eggs (trust the number!), 1/4 cup all-purpose flour (to help it set), 1/2 cup fresh lemon juice (the star!), and 1 tablespoon lemon zest.
- And of course, Powdered sugar for dusting once they are set and ready to serve!
The Buttery Shortbread Crust Recipe for Your Tantalizing Lemon Bars
Now we start building! This crust is everything. If you mess up the crust, the whole experience falls apart, so pay attention to the butter temperature here. We aren’t making cake; we want texture! Grab your bowl and throw in the 1 cup of flour, that 1/4 cup of sugar for the crust, and the salt. Now, you have to use cold butter for this part—I mean fridge-cold and cubed up! You need to cut that butter into the dry ingredients until it looks like proper coarse crumbs.
I usually use my pastry blender for this, but you can absolutely use your fingers if you move fast! If the dough gets warm, the flavor gets greasy instead of buttery, so keep it cool. This technique is similar to what makes my buttery dinner rolls so amazing—it’s all about keeping the fat cold! Once it looks like nice chunky sand, press it firmly and evenly into your 8×8 pan. Don’t press so hard you compact it into concrete, but make sure those corners are covered. We need to give the oven a little preview before the main event. Slide that pan in and let it bake for exactly 15 minutes. When it comes out, it should just be slightly starting to turn golden around the edges. This quick pre-bake is what prevents a soggy bottom!
Preparing the Tangy Lemon Filling Ideas for Tantalizing Lemon Bars
While your crust is getting its little head start in the oven, it’s time to mix up the star of the show: that gorgeous, tangy lemon filling! Don’t let mixing eggs intimidate you; this part is super straightforward, but you do need to be thorough. Grab a separate bowl—no need to wash the crumb bowl!—and toss in the remaining 1 cup of sugar, those 4 large eggs, the last 1/4 cup of flour, your fresh lemon juice, and that wonderfully fragrant lemon zest.
Here’s my crucial tip for this stage: whisk it! You need to whisk until everything is completely smooth and uniform. I mean it—no streaks of egg white and no lumps of flour hiding at the bottom. If you see any dry pockets hiding, your filling won’t set right. Keep whisking until it looks like a light, pale yellow liquid. This mixture is what turns into that luscious, set topping, and we want it totally combined before it meets that hot crust. Check out how I use lemon zest in my lemon pepper tilapia for another bright flavor boost!
Baking and Setting Your Tantalizing Lemon Bars: A Refreshing and Easy Dessert Recipe
Okay, the moment of truth! Carefully take that hot, slightly golden crust out of the oven. It should still be warm. This next step is important because you pour the cool filling right onto that hot base. It helps the crust stay crispier! Gently pour the bright lemon filling mixture over the pre-baked shortbread. Try to pour slowly so you don’t accidentally dig into your lovely crumb base.
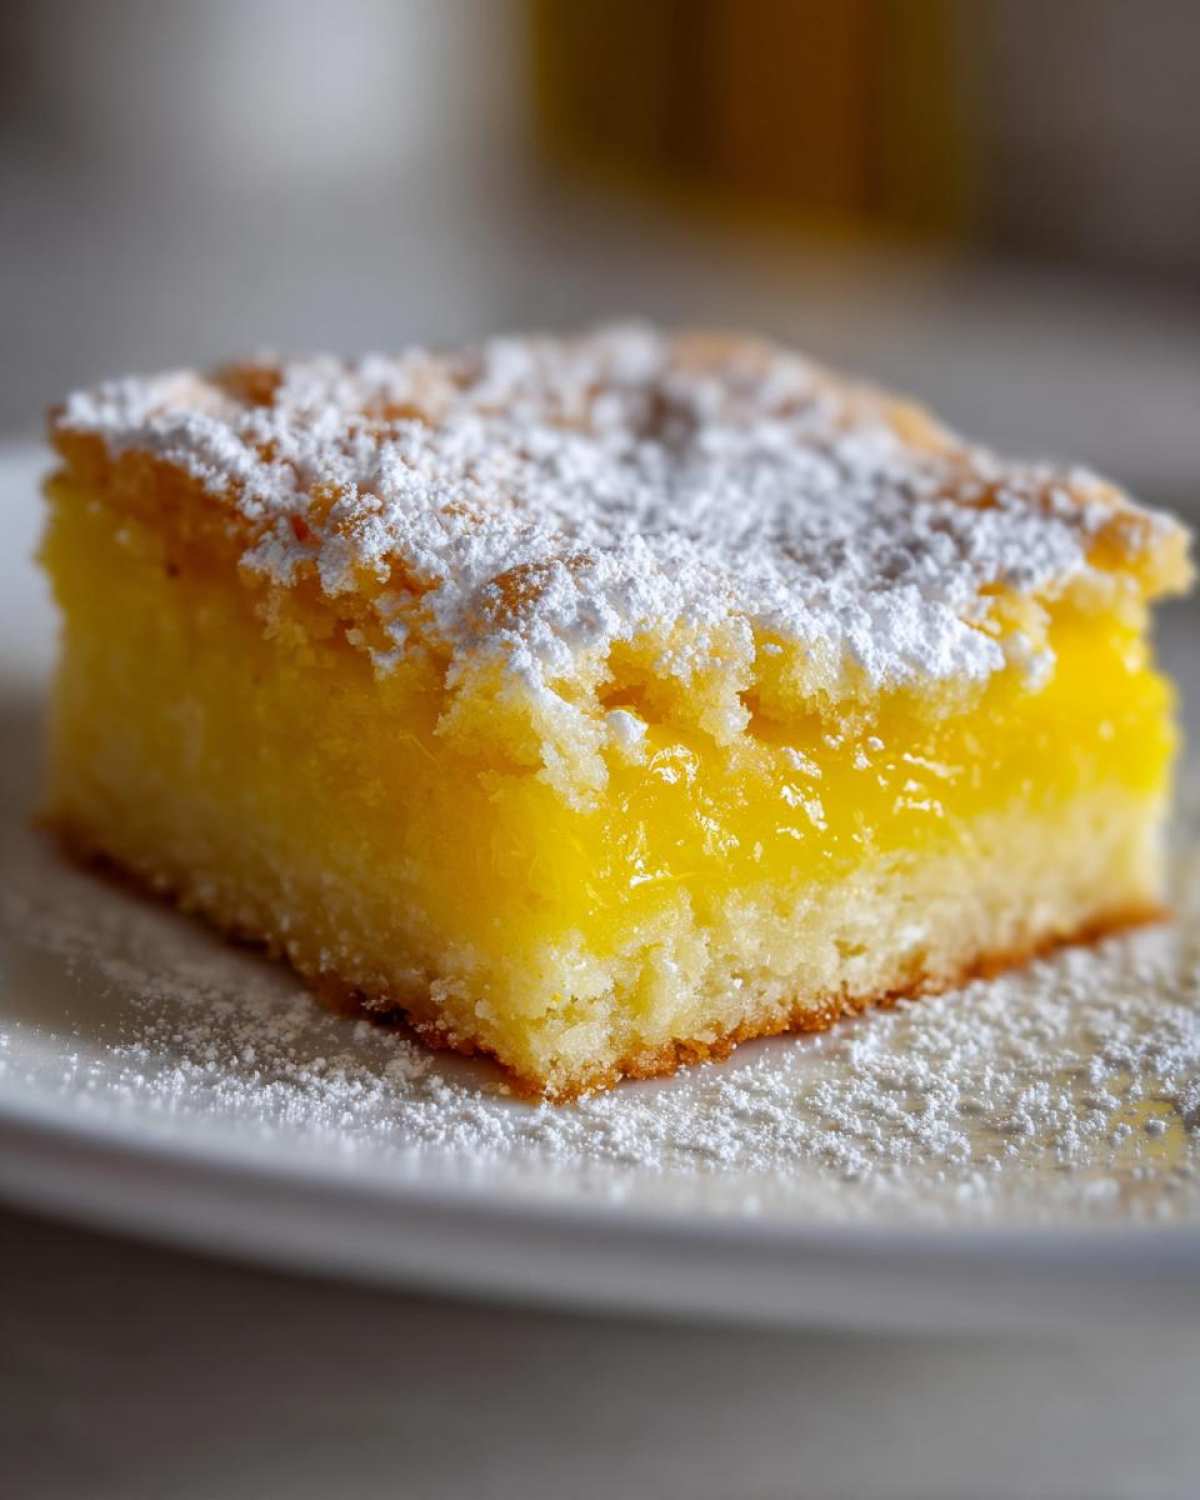
Back into the 350°F oven you go! This second bake usually takes about 20 to 25 minutes, but you have to watch it closer than you think. We aren’t looking for brown spots here; we want the center to look mostly set. If you gently shake the pan, there should only be a slight wiggle—not liquid sloshing around. That slight jiggle is key because if you overbake these, they get rubbery, and we want that perfect, cool, jiggly texture! Once they look done, pull them out. Now, here’s the hardest part: resisting eating them immediately! You have to let these cool completely on a wire rack. I mean it—*completely*. If you try to cut them warm, you’ll just have a runny mess. A full cool-down, sometimes followed by an hour in the fridge, is essential for getting those clean slices, just like the ones in my lemon chickpea posts!
Tips for Success with Your Easy Lemon Bars Recipe
Even though this is a simple dessert, a couple of little tricks make the difference between good and absolutely show-stopping lemon bars. First off, remember what I said about baking—if the center looks totally firm when you pull them out, you’ve gone too far and they’ll be dry! You want that slight wobble. Also, the chilling period is your secret weapon for the *best homemade lemon bars*.
Seriously, do not dust them with powdered sugar until they are cold. If you try to cut warm bars, the filling just smears everywhere, and your cuts look messy instead of those perfect, clean squares you see online. If you chill them for at least an hour after they’ve cooled to room temp, the filling firms up beautifully. And speaking of flavor, if you bake these ahead of time, the lemon flavor actually deepens overnight! You can check out some great flavor pairings I use in my lemon garlic butter shrimp for inspiration on how zest works!
Serving Suggestions for This Refreshing Citrus Dessert
Once your bars are perfectly chilled, cut, and dusted, it’s time to serve them up! Honestly, they are fantastic all on their own—that shortbread crust and zingy filling really sing solo. But if you want to dress them up for company, I have a couple of ideas.
The classic addition is always a simple dollop of homemade whipped cream; the richness cuts the tartness in the most wonderful way. You could also serve these alongside some fresh raspberries or blueberries for color. They pair beautifully with my lemon blueberry cheesecake bars if you’re making a big dessert spread!

Storage & Reheating Instructions for Tantalizing Lemon Bars
Storing these beauties correctly keeps them tasting like they just came out of the oven! Because of that lovely, soft lemon filling, you absolutely have to keep leftovers covered tightly and stored in the refrigerator. They stay good for about four or five days this way, which is great if you’re trying to make a large batch for a party. Don’t bother trying to reheat them, though! Heating them up melts that gorgeous topping right back into a puddle.
The *best* way to enjoy these tantalizing lemon bars is cool and straight from the fridge. They firm up even more overnight. If you’re planning ahead, wait to dust them with powdered sugar until about 30 minutes before serving, that way the sugar doesn’t melt into the citrus topping while they chill!
Frequently Asked Questions About Tantalizing Lemon Bars
I get so many questions about these bars, which just proves how popular they are! We want everyone to succeed in making these perfectly tart lemon squares. If you’re looking for the absolute best homemade lemon bars, paying attention to a few common concerns really helps.
Can I make Tantalizing Lemon Bars ahead of time?
Absolutely, you can! I actually encourage it, as I mentioned—the flavor just gets deeper overnight. The key to making them ahead is wrapping the cooled bars tightly (still in the pan, or cut and wrapped individually) and keeping them chilled. But please, please wait until right before you plan to serve them to dust them with that pretty powdered sugar. If the sugar sits on the damp filling in the fridge for too long, it dissolves and disappears!
What is the secret to a perfectly set, non-runny lemon filling?
It all comes down to two things: the filling needs that little bit of flour to help it coagulate when baked, and you *must* let it cool completely. Don’t take them out of the oven until the edges are set and the middle barely jiggles. Then, let them sit on the counter until room temperature, and finish them in the fridge. That final cool-down is what locks everything into place. Baking them too long is what makes them rubbery, so follow that 20-25 minute window closely!
Are these Tantalizing Lemon Bars suitable for a Quick Lemon Dessert?
This is tricky, so I like to be honest! The actual hands-on time—prepping the crust and mixing the filling—is super fast, maybe 15 minutes total prep. So yes, they are a quick lemon dessert to make. However, because we need that mandatory cooling time (which takes hours!) for the filling to set properly, you can’t serve them piping hot. If you start them in the morning, they are ready for dessert that night! They are simple, but they require patience, not speed, at the end.
Nutritional Estimates for This Easy Lemon Bars Recipe
I know some of you count calories, and some of you just want to know what you’re getting into! Here are the rough estimates for one single square of these delightful bars. Remember, these are based on my specific ingredient amounts, so yours might shift a tiny bit based on how much juice you squeeze out of those lemons.
- Serving Size: 1 square
- Calories: 180
- Sugar: 18g
- Fat: 10g
- Protein: 3g
I always say, they aren’t exactly diet food, but since they are so rich, you usually only eat one! For more fun recipes and kitchen tips, you can always check out the main blog page!
PrintTantalizing Lemon Bars: A Refreshing and Easy Dessert Recipe

Make these easy lemon bars featuring a buttery shortbread crust and a bright, tangy lemon filling. This recipe is simple and produces a refreshing citrus dessert.
- Prep Time: 15 min
- Cook Time: 40 min
- Total Time: 55 min
- Yield: 16 servings
- Category: Dessert
- Method: Baking
- Cuisine: American
- Diet: Vegetarian
Ingredients
- 1 cup all-purpose flour
- 1/2 cup cold unsalted butter, cubed
- 1/4 cup granulated sugar (for crust)
- 1/4 teaspoon salt (for crust)
- 1 cup granulated sugar (for filling)
- 4 large eggs
- 1/4 cup all-purpose flour (for filling)
- 1/2 cup fresh lemon juice
- 1 tablespoon lemon zest
- Powdered sugar for dusting
Instructions
- Preheat your oven to 350°F (175°C). Line an 8×8 inch baking pan with parchment paper, leaving an overhang on two sides for easy removal.
- Prepare the crust: In a medium bowl, combine 1 cup flour, 1/4 cup sugar, and salt. Cut in the cold butter using a pastry blender or your fingers until the mixture resembles coarse crumbs.
- Press the crust mixture evenly into the bottom of the prepared pan. Bake for 15 minutes until lightly golden.
- While the crust bakes, prepare the filling: In a separate bowl, whisk together 1 cup sugar, 4 eggs, 1/4 cup flour, lemon juice, and lemon zest until smooth.
- Pour the lemon filling over the hot, pre-baked crust.
- Return the pan to the oven and bake for an additional 20 to 25 minutes, or until the filling is set and no longer liquid in the center.
- Let the bars cool completely in the pan on a wire rack. Cooling fully helps the filling set properly.
- Once cool, lift the bars out using the parchment paper overhang. Dust generously with powdered sugar before cutting into squares.
Notes
- For the brightest flavor, use fresh lemon juice rather than bottled.
- Do not overbake; the center should be firm but still slightly jiggly when removed from the oven.
- Chill the bars for at least one hour before dusting with powdered sugar for cleaner cuts.
Nutrition
- Serving Size: 1 square
- Calories: 180
- Sugar: 18
- Sodium: 50
- Fat: 10
- Saturated Fat: 6
- Unsaturated Fat: 4
- Trans Fat: 0
- Carbohydrates: 21
- Fiber: 1
- Protein: 3
- Cholesterol: 55