

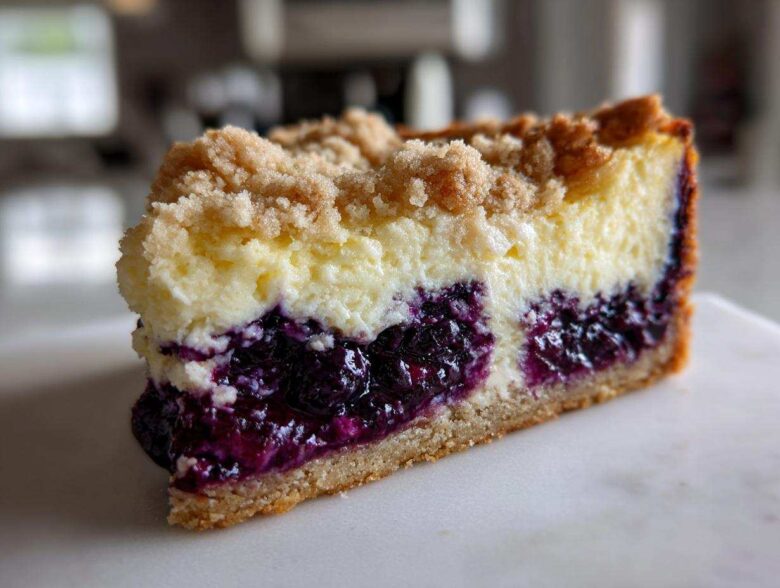
Oh, honey, let’s talk about decadent desserts for a minute, okay? Because sometimes you just need something that screams ‘special occasion’ even if you’re just having a Tuesday. I’ve wrestled with baked cheesecakes for years—you know, worrying about cracks and sinking centers—but I finally cracked the code. What you’re about to get your hands on is my absolute favorite invention: the Blueberry Crumble Cheesecake. Seriously, this thing has it all!
We’re taking that rich, creamy texture that only a proper baked cheesecake offers, and we’re topping it with the sweetest, tartest homemade blueberry swirl you’ve ever tasted. But wait, there’s more! The real game-changer here is that crunchy streusel piled right on top. It’s the perfect textural contrast. Trust me when I say this Blueberry Crumble Cheesecake Recipe is going to be your new go-to project when you want to wow everyone.
I learned the hard way that you can’t rush a good cheesecake, but the payoff is huge. By controlling the temperature and using that classic water bath trick, you get a velvety smooth filling every single time. If you’ve ever wanted to try a fantastic layered cheesecake with fruit but felt intimidated, this is the guide for you. If you enjoyed my take on making Churro Cheesecake Bars, you are going to adore this berry-filled beauty!
Why This Blueberry Crumble Cheesecake Recipe Works (Easy Baked Blueberry Crumble Cheesecake)
I know, I know. Baked cheesecake sounds difficult, but I promise you, this version is totally manageable, even if you’ve sworn off water baths forever! This recipe isn’t just about throwing things in a pan; it’s engineered to deliver an unbelievable final product without the stress. It’s why I call it my Easy Baked Blueberry Crumble Cheesecake.
The magic isn’t just in the flavor—though that combination of bright berries and rich cream cheese is heavenly. It’s about the texture balance we achieve here. We’ve nailed that perfect crumble-to-cheesecake ratio!
- You’re guaranteed an ultra-creamy, silky smooth filling thanks to using room-temperature cream cheese and that gentle mixing technique.
- The streusel topping is buttery and crisp; it stays crunchy even against the moist fruit layer!
- We use a water bath religiously (don’t sweat it, I’ll walk you through it!) which is the secret weapon against sinking and cracking.
If you want to level up your dessert game and avoid those sad, cracked tops, stick to these steps. If you’ve ever made my No Bake Rum Balls, you know I love a good shortcut that doesn’t sacrifice quality, and this cheesecake delivers!
Key Details for Your Blueberry Crumble Cheesecake
Just so you know what you’re getting into—it’s a weekend project, but one worth every minute. This recipe makes a big, beautiful showstopper.
- Prep Time: 30 min
- Cook Time: 75 min
- Total Time: 185 min (Don’t forget the chilling time!)
- Yield: 12 big servings
Gathering Ingredients for the Ultimate Blueberry Crumble Cheesecake
Okay, let’s get this show on the road! Since this Blueberry Crumble Cheesecake is a three-part masterpiece, we need to organize our ingredients into four distinct groups. Don’t worry; measuring everything out first is half the battle won. Make sure those cream cheese packages are truly softened—that’s non-negotiable for a smooth batter, trust me!
For the Graham Cracker Crust
This is our sturdy foundation, so press it down like you mean it! We need one and a half cups of graham cracker crumbs, mixed with a quarter cup of granulated sugar, and then bound together with six tablespoons of melted unsalted butter. Once mixed, it gets a quick pre-bake, which really sets it up nicely.
For the Homemade Blueberry Topping for Cake
This layer is what brings the perfect summer tang. You’ll need two full cups of fresh or frozen blueberries, combined in a saucepan with a quarter cup of lemon juice for brightness. The secret thickener is a quarter cup of cornstarch mixed in well—we cook this briefly until it gets thick and jammy so it doesn’t turn our cheesecake watery.
For the Cream Cheese Cheesecake Filling
This is the star, the creamy heart of the dessert. You must have three (8 ounce) packages of cream cheese, softened to room temperature—this prevents lumps! Then we blend that with one and a half cups of granulated sugar, one teaspoon of vanilla extract, and half a cup of sour cream for that signature rich tang. Finally, we add four large eggs, one at a time, mixing gently. Remember: overmixing the eggs is how cracks start!
How to Make Crumble Topping for Desserts (Streusel)
This is where the ‘crumble’ in Blueberry Crumble Cheesecake shines! We are combining a half cup of all-purpose flour, a half cup of packed brown sugar, a quarter cup of granulated sugar, and a half cup of old-fashioned rolled oats. The absolute key is using half a cup (one full stick) of *cold* unsalted butter, cut into tiny pieces. You want to use your fingertips or a pastry blender to cut that butter in until the mixture looks like lovely, coarse crumbs. Then, get it chilling; cold crumbs mean a crispier topping!
We are using the skills we learned making streusel for sweet potato casserole here, but with oats for extra bite. Check out my notes for some great cheesecake streusel topping ideas if you want to swap in some chopped pecans!
Step-by-Step Instructions for Your Blueberry Crumble Cheesecake Recipe
Alright, it’s time to put all those lovely ingredients together! We’re moving from prep station to oven, and this is where the baking magic happens. Follow these steps closely, especially regarding mixing and cooling, and I guarantee you this will be one of the best no fail cheesecake recipes you’ve ever tackled. If you’re looking for a gorgeous presentation, think about making Lemon Blueberry Cheesecake Bars next time!
Preparing the Crust and Blueberry Layer
First things first: get that oven preheated to 350°F (175°C). Then, wrap your 9-inch springform pan *tightly* in heavy-duty aluminum foil—like, double-wrap it, because water baths hate leaks! Press your graham cracker mixture firmly into the bottom of that prepared pan. Pop it into the oven for just 10 minutes to set up. While that’s baking, you can start on the fruit layer.
For the blueberries, toss them in a small saucepan with lemon juice and the cornstarch. Heat this over medium heat, stirring constantly, until it thickens up nicely—usually about five to seven minutes. You want it to look like thick jam when you pull it off the heat. Let it cool down a bit while you handle the main event.
Making the Crumble Topping and Cheesecake Batter
Grab that cold crumble topping from the fridge because we need to layer it now, but we don’t want it melting into soup right away! Set it aside.
Now, for the batter in your stand mixer (or using a hand mixer). Beat the softened cream cheese and sugar until it’s completely smooth—no lumps allowed! Mix in the sour cream and vanilla. This is the most crucial part of any good cheesecake: add the eggs one at a time, and I mean *just* until the yellow streak disappears after each one. Stop mixing right there! If you keep going, you beat in air, and air creates domes and cracks. We want creamy, not airy!
Assembling the Layered Cheesecake with Fruit
Time to layer this beauty! Pour about half of your smooth cheesecake batter right over that warm crust. Then, spoon half of that slightly cooled blueberry mixture dolloped on top—don’t worry if it sinks a little.
Pour the remaining cheesecake batter over the top, and then scatter the rest of the blueberry dollops on there. If you’re feeling artistic, take a butter knife and gently swirl it through once or twice to create a beautiful marbled pattern, but don’t over-swirl!
Finally, take that chilled crumble topping and spread it evenly over the very top layer. Make sure you cover all that beautiful blue goodness!
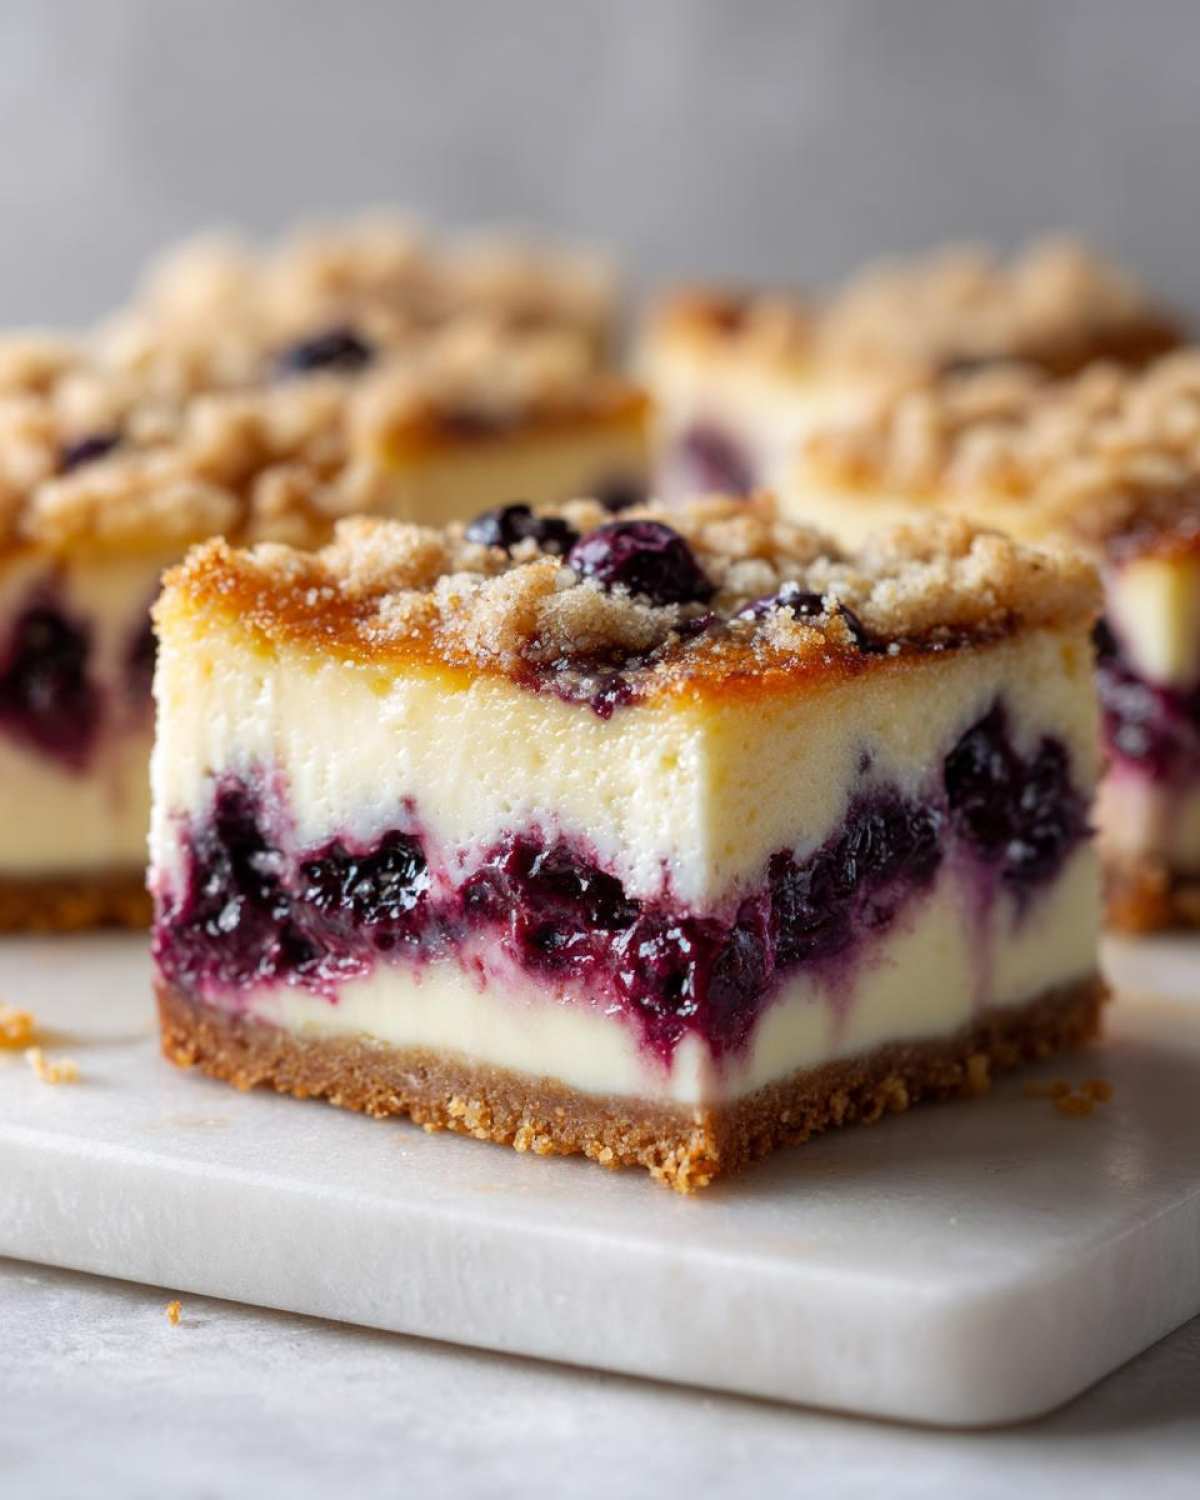
Baking the Best Blueberry Cheesecake with Streusel Using a Water Bath
This step is what separates the good cheesecakes from the *great* ones. Place your foil-wrapped springform pan inside a larger roasting pan. Now, carefully pour hot water into the roasting pan until it comes halfway up the sides of your cheesecake pan. That hot water keeps the temperature gentle and steamy!
Bake it at 350°F (175°C) for about 60 to 75 minutes. You know it’s ready when the edges look firm, but the center still has a little wobble, like a Jell-O mold. This slight jiggle is important!
The final, most important instruction (step 10, pay attention!): Turn the oven OFF. Prop the door open just a crack—I usually slide a wooden spoon in there to keep it slightly ajar. Let the cheesecake cool slowly inside the oven for a full hour. This slow descent prevents cracking! Once it’s cool enough to handle, take it out of the water bath, remove the foil, and let it cool completely on a rack before you even *think* about putting it in the fridge overnight.
Tips for Success When Making a Blueberry Crumble Cheesecake
Look, even when you follow a great recipe, sometimes things go a little sideways, right? That’s why I always share my little tricks to make sure your Blueberry Crumble Cheesecake turns out like a professional bakery job. If you’re scared of the water bath—and honestly, I get it, foil wrapping is a chore—you absolutely can skip it. If you ditch the water bath for this Bakery Style Cheesecake Recipe, drop your oven temperature down to 325°F (160°C) and plan for a slightly longer bake time, maybe 70 to 85 minutes. The slow cool-down in the turned-off oven is still mandatory, though! That gradual temperature change is your best friend for keeping the top perfectly smooth.
Achieving the Perfect Swirl in Your Blueberry Crumble Cheesecake
When it comes to that gorgeous blueberry layer, you have two options. Dolloping is what I did in the main steps—it leaves distinct pockets of fruit, which is super pretty when you slice it. But if you want a smoother, more marbleized look throughout the filling, here’s my tip: instead of dolloping, take that cooled blueberry mix and gently fold it into the very top layer of batter, maybe three or four gentle turns with a spatula. Don’t overmix it, or you’ll turn the whole cake purple!
Crumble Topping Variations and Substitutions
You know how much I preach about using what you have? If you find yourself running low on oats, or maybe you just prefer a sharper crunch, feel free to substitute those oats! I often swap them out for equal parts chopped pecans or walnuts. It gives the streusel a completely different, nuttier depth that pairs wonderfully with the berries. Just make sure whatever you use is cold when you cut it into the dry ingredients!
Serving Suggestions for Your Rich and Creamy Blueberry Dessert
After all that patience waiting for it to chill—and trust me, you *have* to let it chill for at least six hours, preferably overnight—it’s finally time to dig in! This Rich and Creamy Blueberry Dessert is stunning all by itself, but every great dessert deserves a little thoughtful presentation, right?
Since this is such a perfect dessert for warm evenings or summer gatherings, I usually keep the sides simple. A fresh dusting of powdered sugar really allows that gorgeous, baked crumble texture to shine through. It looks incredibly sophisticated without any extra fuss.
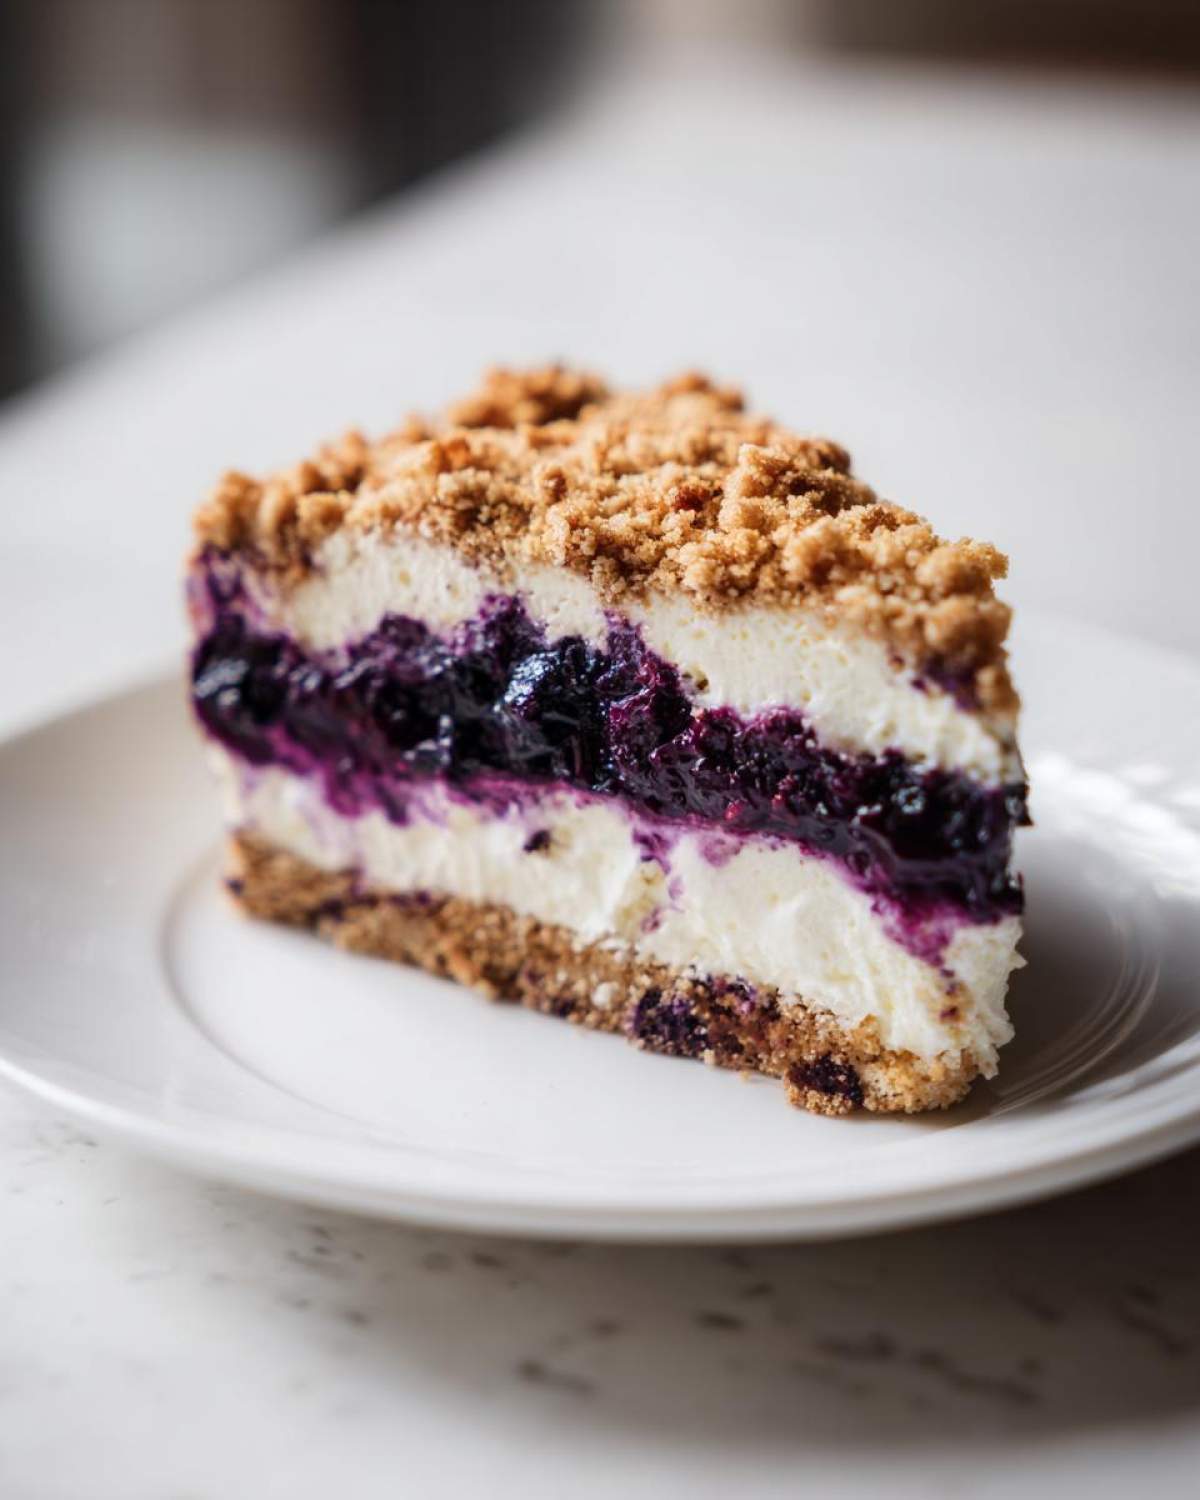
If you want to go slightly fancier, try serving a thin slice with a small dollop of freshly whipped cream that’s barely sweetened—you don’t want to overpower that tart blueberry flavor. Or, if you’re having it with your afternoon treat, it pairs brilliantly with a strong cup of coffee. My favorite light pairing is actually a simple iced tea. If you’re looking for a good energy boost to go with your decadent slice, check out my recipe for a Coffee Banana Protein Shake; it’s a great counterpoint to the richness!
Storage and Reheating Instructions for Blueberry Crumble Cheesecake
Okay, this is the hardest part, right? Not eating the whole thing in one sitting! But patience is rewarded here, because this cheesecake tastes even better the next day once everything has set up perfectly. Seriously, the flavor deepens overnight.
You absolutely must chill this cake completely before slicing. I know the instructions say 6 hours minimum, but please, if you can manage it, let it stay in the fridge overnight. That gives the filling time to firm up properly so your slices are gorgeous, and it settles those layers beautifully.
When storing leftovers—assuming you have any!—keep the whole cake, or individual slices, in an airtight container or tightly wrapped in plastic wrap right there in the refrigerator. The filling is dense, so it holds up really well for four to five days. Because it’s baked, you really don’t want to try reheating it; that just turns the creamy filling grainy or sweaty. Keep it cold, serve it chilled, and enjoy that perfect contrast of cold, creamy filling against the crunchy streusel!
Frequently Asked Questions About This Blueberry Crumble Cheesecake Recipe
I get so many questions whenever I post pictures of this thing, and honestly, most of them are about the baking process—people are terrified of cracking cheesecakes, and I hear you! But once you understand the core rules, filling your kitchen with the aroma of this Blueberry Crumble Cheesecake becomes simple. You won’t believe how many people this recipe has officially converted into cheesecake lovers!
Can I skip the water bath when making this Blueberry Crumble Cheesecake?
Look, I know that water bath feels like extra work, but it’s the best insurance policy for that beautiful, smooth top. If you absolutely cannot manage it, you can try baking this at the lower temperature of 325°F (160°C) for a longer time, maybe 70 to 85 minutes. Be warned though: without the steam shield, you run a higher risk of that dreaded uneven baking or minor cracking. If you skip the water bath, you *must* do the slow cooling process inside the turned-off oven exactly as written. That’s your backup plan!
What is the best way to prevent cracks in my cheesecake?
This is the million-dollar question! It comes down to three major things that we covered in the steps. First, your cream cheese and eggs must be completely at room temperature; cold ingredients force you to overmix to combine them. Second, stop mixing the moment the eggs disappear—seriously, beat it on low speed if you have to! Third, and this is key for any cheesecake converts non-cheesecake lovers challenge, is the slow cool-down. Don’t shock your cake with cold air right after it comes out of the heat!
Can I use frozen blueberries for this recipe?
Yes, absolutely! Frozen berries are perfect for making the Homemade Blueberry Topping for Cake, especially if fresh aren’t in season. Just toss them straight into the saucepan with the lemon juice and cornstarch. My only advice is that frozen berries usually release a tiny bit more moisture, so you may need to cook that blueberry mixture for an extra minute or two just to ensure it’s nice and thick before you layer it into your dessert.
Nutritional Estimates for Blueberry Crumble Cheesecake
Now, I am not a registered dietitian—far from it! I’m a home baker who loves a good slice of something decadent, so I want to be super clear: the numbers I’m giving you here are just estimates for tracking purposes. This is not a light, diet-friendly treat, folks. This is a full-on celebration dessert, and you should enjoy every single bite of this rich treat!
These estimates are based on the full recipe breaking down into 12 generous servings. The oats and brown sugar in the streusel definitely bump up the fiber and complex carbs, but let’s be real, the butter and cream cheese are the stars of the show here, flavor-wise!
- Serving Size: 1 slice
- Calories: 450
- Sugar: 35g
- Sodium: 250mg
- Fat: 28g
- Saturated Fat: 17g
- Unsaturated Fat: 11g
- Trans Fat: 0.5g
- Carbohydrates: 45g
- Fiber: 2g
- Protein: 7g
- Cholesterol: 110mg
Just remember, just like the recipe notes say for my other posts, you can always check the full disclaimer over at our official disclaimer page for the fine print on these numbers. Measure your ingredients carefully, especially the sugar content, if you’re tracking closely!
Share Your Perfect Blueberry Crumble Cheesecake Baking Experience
Whew! We did it! You’ve tackled the crust, calmed the blueberries, managed the batter, and baked a masterpiece. Now, I desperately want to know how it turned out! Don’t just walk away from the computer after you’ve pulled that perfectly set Blueberry Crumble Cheesecake out of the oven; you have to tell me about it.
Please, please, please leave a rating right below the recipe card. Stars are great, but comments are even better! Tell me what you thought of the crumble texture or if you tried the pecan swap. Did your baking time match mine? Hearing your successes—and maybe even troubleshooting a little hiccup here or there—is genuinely my favorite part of this whole process.
And if you snapped a picture of that tall slice with the defined layers, you have to tag me on social media! I love seeing my recipes come to life in your kitchens. Seeing happy people enjoying that perfectly balanced flavor combo is why I test these recipes until my kitchen looks like a flour bomb went off. Head over to the main recipe blog if you need even more baking inspiration for next week!
PrintBlueberry Crumble Cheesecake
A recipe for a baked cheesecake featuring a creamy filling, a sweet blueberry layer, and a crunchy streusel topping.
- Prep Time: 30 min
- Cook Time: 75 min
- Total Time: 185 min
- Yield: 12 servings
- Category: Dessert
- Method: Baking
- Cuisine: American
- Diet: Vegetarian
Ingredients
- 1 1/2 cups graham cracker crumbs
- 1/4 cup granulated sugar (for crust)
- 6 tablespoons unsalted butter, melted (for crust)
- 3 (8 ounce) packages cream cheese, softened
- 1 1/2 cups granulated sugar (for filling)
- 1 teaspoon vanilla extract
- 1/2 cup sour cream
- 4 large eggs
- 2 cups fresh or frozen blueberries
- 1/4 cup lemon juice
- 1/4 cup cornstarch
- 1/2 cup all-purpose flour (for crumble)
- 1/2 cup packed brown sugar (for crumble)
- 1/4 cup granulated sugar (for crumble)
- 1/2 cup old-fashioned rolled oats (for crumble)
- 1/2 cup (1 stick) cold unsalted butter, cut into small pieces (for crumble)
Instructions
- Preheat your oven to 350°F (175°C). Wrap the outside of a 9-inch springform pan tightly with heavy-duty aluminum foil.
- Prepare the crust: Mix graham cracker crumbs, 1/4 cup sugar, and 6 tablespoons melted butter. Press firmly into the bottom of the prepared springform pan. Bake for 10 minutes. Set aside to cool slightly.
- Prepare the blueberry layer: In a small saucepan, combine blueberries, lemon juice, and 1/4 cup cornstarch. Cook over medium heat, stirring constantly, until the mixture thickens, about 5 to 7 minutes. Remove from heat and let cool slightly.
- Prepare the crumble topping: In a medium bowl, combine flour, brown sugar, granulated sugar, and oats. Cut in the cold butter using a pastry blender or your fingers until the mixture resembles coarse crumbs. Place in the refrigerator while you prepare the cheesecake batter.
- Prepare the cheesecake batter: Beat the softened cream cheese with 1 1/2 cups sugar until smooth. Beat in vanilla extract and sour cream. Add eggs one at a time, mixing just until combined after each addition. Do not overmix.
- Assemble the cheesecake: Pour half of the cheesecake batter over the cooled crust. Spoon half of the cooled blueberry mixture over the batter. Top with the remaining cheesecake batter, then dollop the remaining blueberry mixture on top. Gently swirl with a knife if desired.
- Sprinkle the chilled crumble topping evenly over the top layer.
- Bake using a water bath: Place the foil-wrapped springform pan inside a larger roasting pan. Carefully pour hot water into the roasting pan until it reaches halfway up the sides of the springform pan.
- Bake for 60 to 75 minutes, or until the edges are set but the center still has a slight jiggle.
- Turn off the oven, crack the oven door open slightly, and let the cheesecake cool inside the oven for 1 hour. This slow cooling helps prevent cracks.
- Remove the cheesecake from the water bath and foil. Cool completely on a wire rack, then chill in the refrigerator for at least 6 hours, preferably overnight, before serving.
Notes
- For a smoother blueberry swirl, you can gently fold the blueberry mixture into the top layer of the batter instead of dolloping.
- If you do not want to use a water bath, bake the cheesecake at 325°F (160°C) for 70 to 85 minutes and follow the slow cooling process in the turned-off oven.
- You can substitute walnuts or pecans for the oats in the crumble topping for a different texture.
Nutrition
- Serving Size: 1 slice
- Calories: 450
- Sugar: 35g
- Sodium: 250mg
- Fat: 28g
- Saturated Fat: 17g
- Unsaturated Fat: 11g
- Trans Fat: 0.5g
- Carbohydrates: 45g
- Fiber: 2g
- Protein: 7g
- Cholesterol: 110mg