

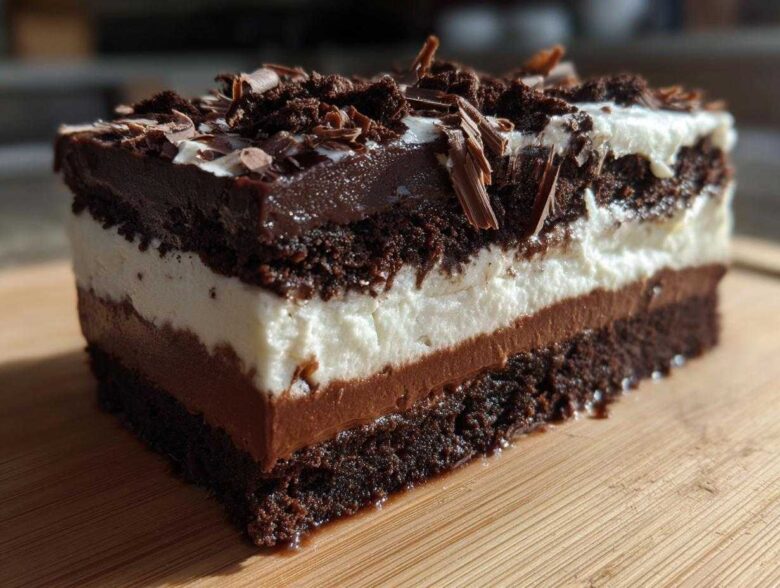
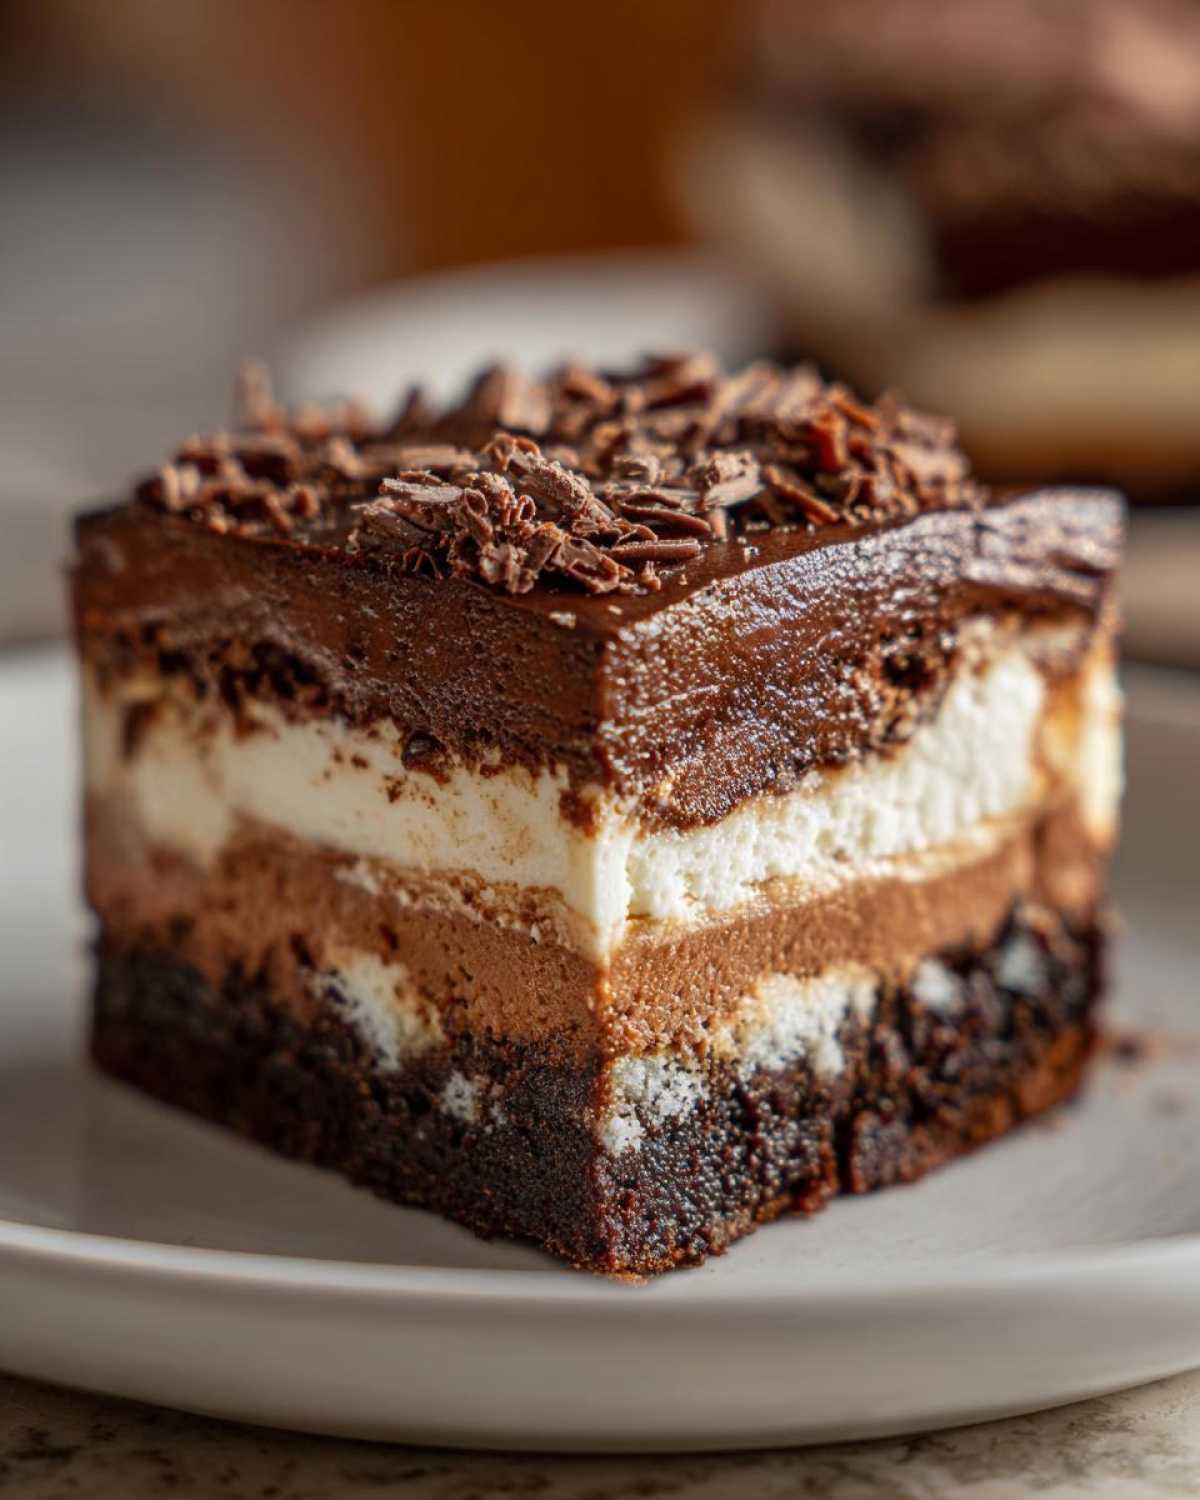
Oh my gosh, are you ready for a dessert that looks like you spent all day making it but actually took zero oven time? Seriously, when summer hits or when I have zero energy left but company is coming, this is my go-to fix. I’m talking about the ultimate brownie refrigerator cake. It’s all about building these gorgeous, decadent layers of fudgy brownie pieces, creamy, tangy cream cheese, and fluffy chocolate pudding. The best part? We bake the brownie base once, and then it’s all chilling and layering from there! I just love these make-ahead chocolate treats because they get better overnight, and assembling them lets me get creative with my layering technique. Trust me, I never share a recipe unless it genuinely makes my life easier and tastes incredible!
Why You Need This Easy Brownie Refrigerator Cake
Skip the oven when the heat is oppressive! This recipe is pure genius for busy weeks or when you need a showstopper. It ticks every box:
- It’s a perfect no bake brownie dessert that sets up beautifully in the fridge.
- The texture contrast is wild—fudgy brownie chunks against creamy chocolate layers!
- It’s the ultimate make ahead chocolate treat; plan it for tomorrow, serve it today.
- Seriously easy to scale up for potlucks, making it a favorite quick layered dessert.
Essential Ingredients for Your Brownie Refrigerator Cake
Okay, this is where we build the foundation for our amazing brownie refrigerator cake. Since this recipe relies on using a pre-baked element, having the right components ready is key to making sure the chilling process works perfectly later on. Remember, every single item here contributes to those creamy chocolate layers! If you wanted to tweak the brownie part, check out my notes on the brownies with a surprising ingredient, but standard fudgy ones work wonders here.
For the Baked Brownie Base
We need sturdy squares for this layered brownie dessert, so don’t skimp on the initial bake! You’ll need:
- 1 box (about 18 oz) fudge brownies mix (Follow the package directions for whatever oil, eggs, or water it calls for!)
For the Creamy Chocolate Layers of the Brownie Refrigerator Cake
Get those beaters ready! For the best set and flavor profile, we divide our fillings into three critical parts. Make sure your cream cheese is genuinely softened—none of that cold, hard stuff!
Cream Cheese Layer
- 1 package (8 oz) cream cheese, softened
- 1 cup powdered sugar
- 1 teaspoon vanilla extract
- Half (1/2) of the thawed whipped topping (Use about 4 oz of an 8 oz container)
Pudding Layer Preparation
- 1 package (3.4 oz) instant chocolate pudding mix
- 2 cups cold milk (make sure it’s COLD for that instant pudding to set!)
Fresh Whipped Topping Layer
- 1 cup heavy cream
- 1/4 cup granulated sugar
- The remaining half (1/2) of the thawed whipped topping (about 4 oz)
Oh, and save some chocolate shavings for the very end to make it look professional!
How to Prepare the Ultimate Brownie Refrigerator Cake
Alright, here’s the main event! This recipe moves slow and cool, which is exactly what we want for a perfect set. The key to this whole process is making sure those brownies are completely done and chilled before we even attempt to start layering. If you’re using a springform pan for a showstopper presentation—and trust me, you should try it for parties—make sure you line the bottom with parchment paper first. If you don’t, you’ll be digging chunks out instead of slicing neat wedges! For other layered beauties, sometimes a good parchment sling helps, like when I make my churro cheesecake bars.
Baking and Cubing the Brownies
First things first, we tackle the brownie base. Get that mix baked up just like the box says! Whatever pan you use, once they come out, you absolutely have to let them cool down until they are stone cold. No rolling eyes at me—if they are warm, they melt the cream cheese layer instantly! Once they’re cooled through, chop them right up into nice, messy 1-inch cubes. We want plenty of pieces!
Creating the Creamy Layers for this Layered Brownie Dessert
Now we move fast while we work on our creamy components. You’ll have three distinct fillings to create for this brownie refrigerator cake.
- The Pudding: Whisk your instant chocolate pudding mix right into the two cups of *very cold* milk. Just whisk until it starts thickening up nicely, about two minutes. Set that bowl aside for five minutes to firm up a little more.
- The Cream Cheese Layer: Grab that softened cream cheese, the powdered sugar, and the vanilla. Beat it until it’s just smooth—no lumps allowed! Then, very gently, fold in *half* of your thawed whipped topping. Don’t beat it in! Fold gently; we are incorporating air, not destroying the fluffiness.
- The Fresh Whipped Cream: In a separate, clean bowl, whip up that heavy cream with the granulated sugar until you get nice stiff peaks. Fold the *other half* of the thawed whipped topping into this mixture until it’s all happy and combined.
See? Lots of lovely air being folded in everywhere. That’s what keeps this dessert light, even with all those fudgy brownies!
Assembling Your Brownie Refrigerator Cake Layers
Time to stack! Grab your 9×13 dish—or your springform pan—and let’s build this beauty in steps:
- Spread half of those gorgeous brownie cubes right onto the bottom.
- Gently spread that entire cream cheese mixture evenly over the brownies.
- Now, spoon half of your prepared chocolate pudding directly on top of the cream cheese.
- Next up, the rest of your brownie cubes go down in an even second layer.
- Cover that layer with your lighter, fresh chocolate whipped cream mixture.
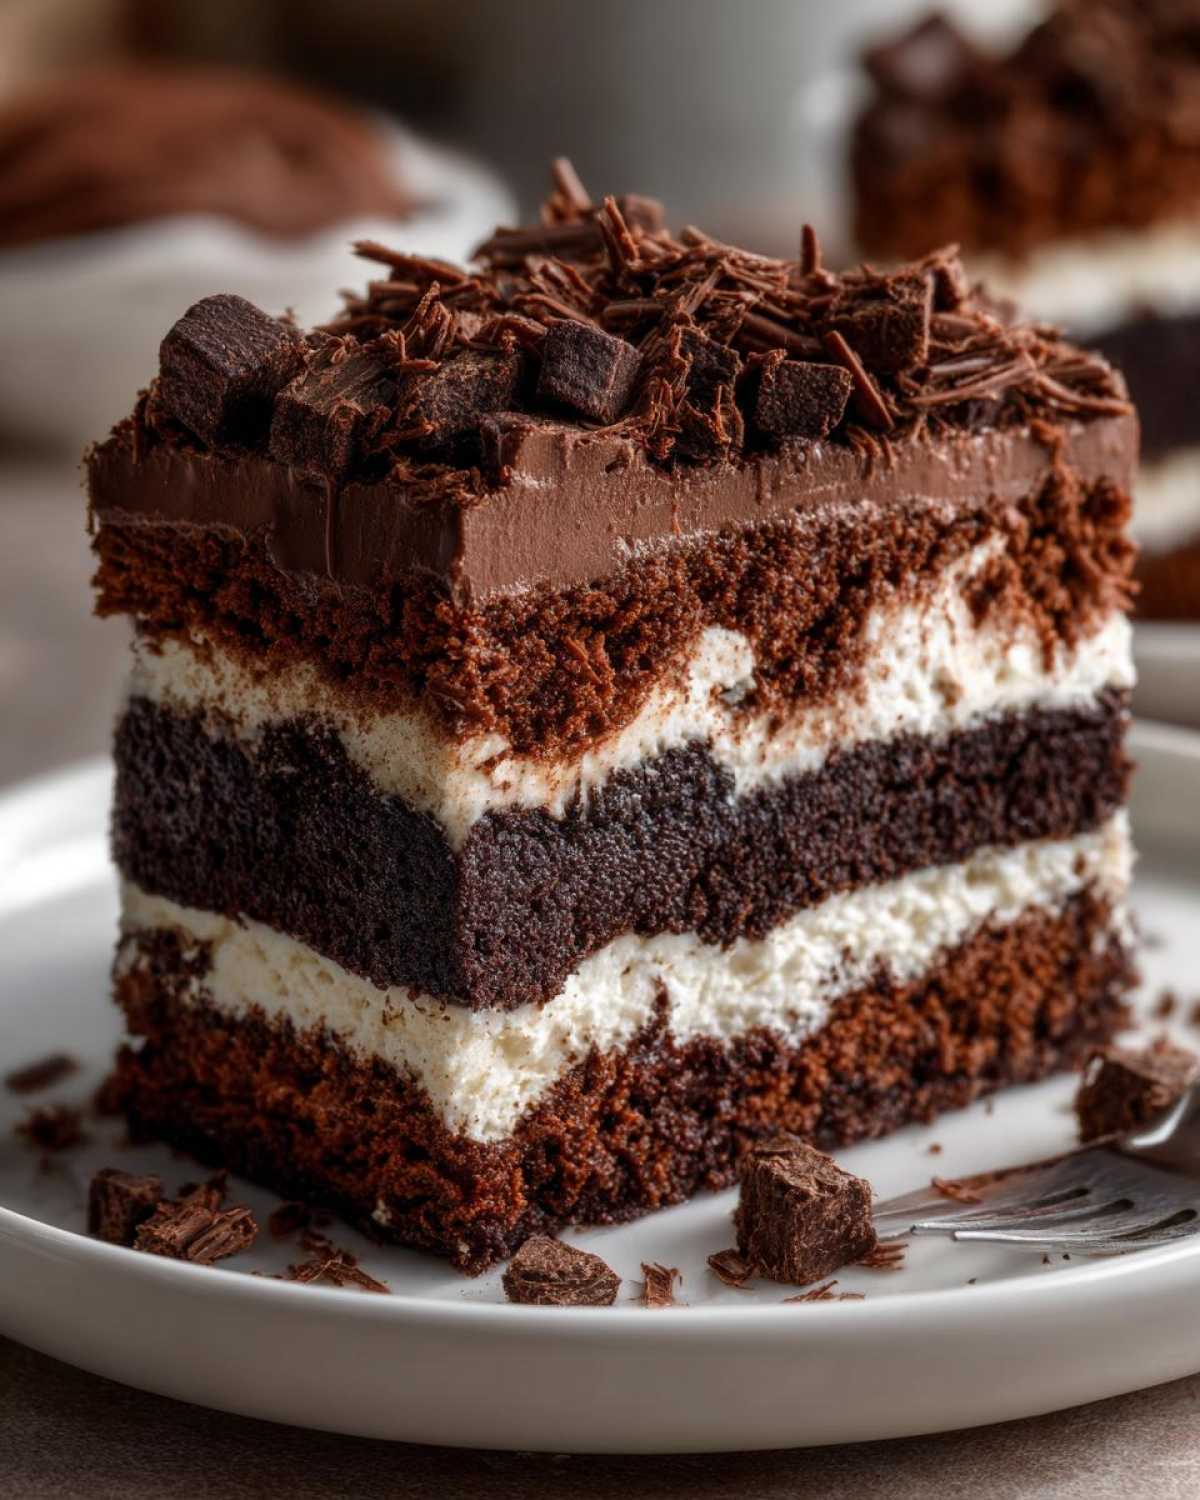
- Finally, take that remaining bit of chocolate pudding and gently drizzle it all over the top. If you’re feeling fancy, take a knife and swirl it just a little bit to make some pretty patterns.
Chilling Time for the Best Brownie Refrigerator Cake Set
This is the hardest part, honestly, because your house is going to smell amazing! You must cover that dish tightly with plastic wrap. We need this brownie refrigerator cake to chill for a minimum of six hours. I won’t lie to you; overnight is always, *always* better. That long chill time allows the pudding and the cream cheese to really firm up, binding the brownie crumbs so you can slice it cleanly. If you rush it, it’s going to turn into a delicious, soupy mess, and we don’t want that.
Tips for a Perfect Brownie Refrigerator Cake Every Time
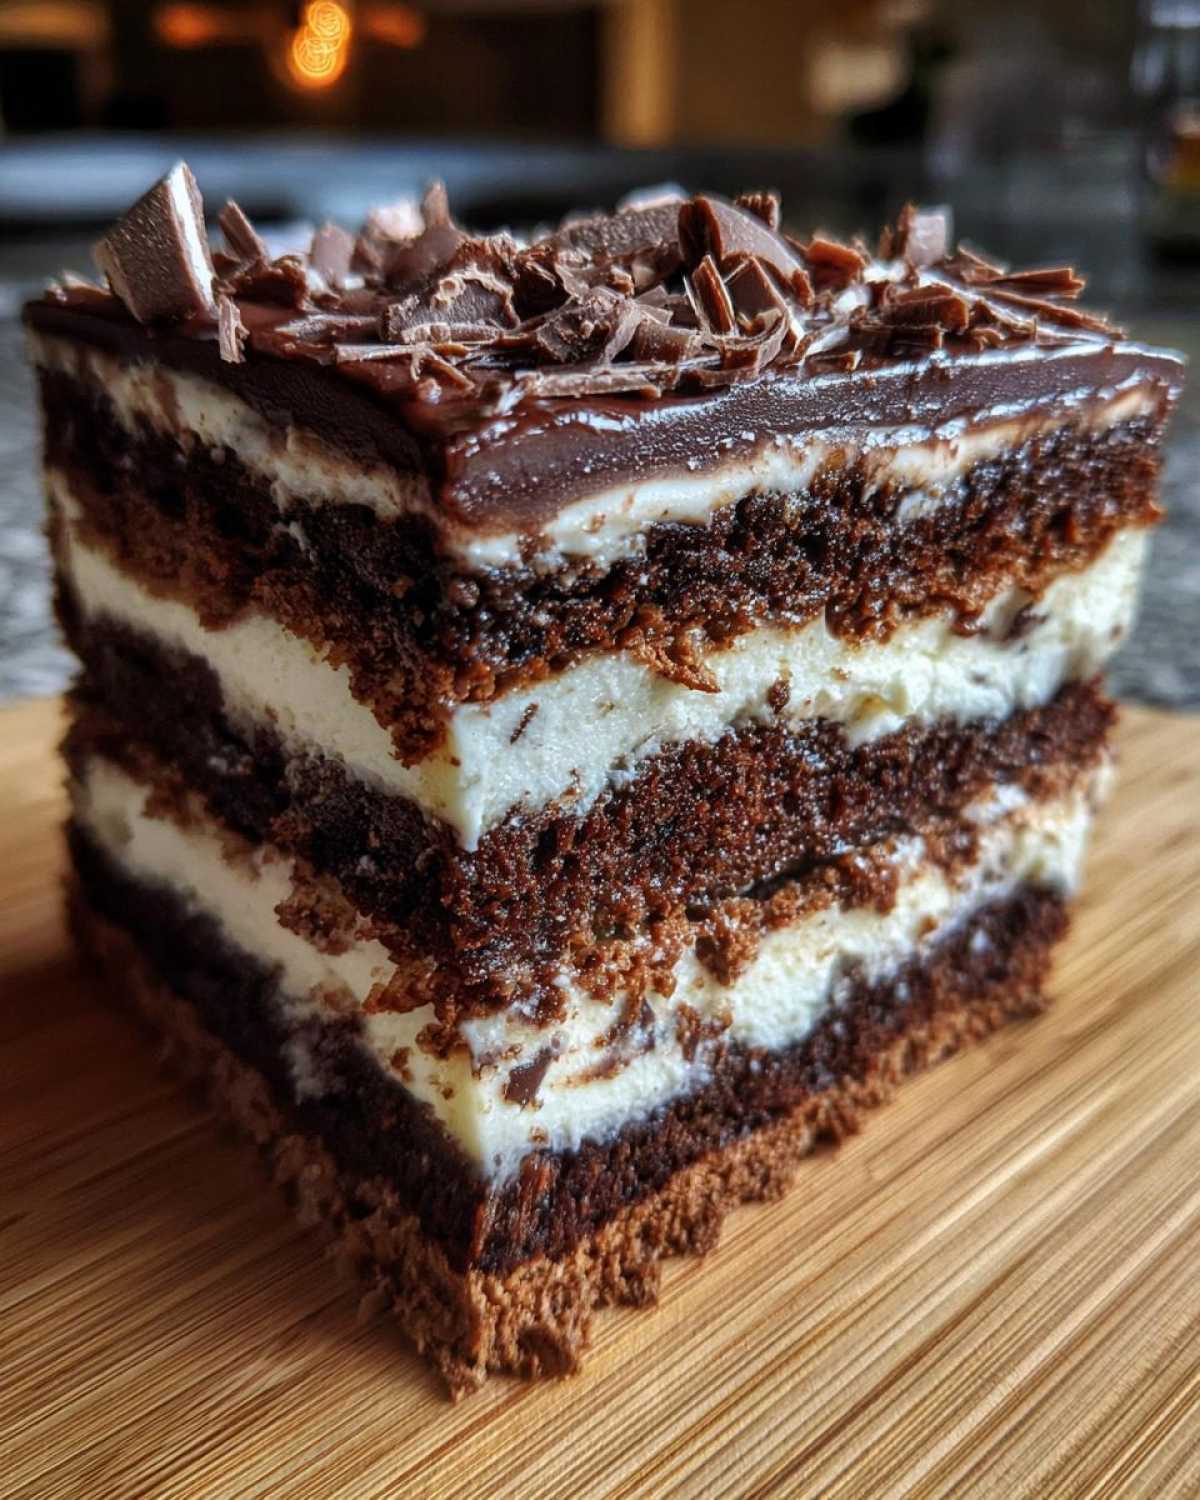
You followed the steps, but now let’s talk about how to go from good to legendary with this brownie refrigerator cake. Honestly, the best results come from knowing the nuances of the ingredients. I learned these little tricks over years of messing up (and eating my mistakes, which isn’t so bad!).
The single most important thing? The density of your base. If you use those cakey brownie mixes, your layered brownie dessert will be too crumbly and might not hold up when you cut it. You really want the fudgiest mix you can find—or you can even use leftover fudgy brownies from a batch you baked the day before. The denser the bite, the more satisfying the crunch will be against those creamy layers!
If you’re making this for a big event, please, please use parchment paper in your springform pan edge-to-edge. It is the secret handshake for all layered desserts. Seriously, when you go to release the sides, that clean edge is going to make you feel like a culinary superhero. If you want some cookie inspiration for other parties, take a peek at the cookies that always win bake sales—same principle applies: solid base means easier serving.
What about substitutions? If you don’t have instant pudding, you *could* try making a quick stovetop pudding, but you have to cool it completely, which just adds more time. For the fluffier layers, you can swap out some of the heavy cream for the pre-made tub topping, though I find whipping your own heavy cream gives you a superior texture for this decadent chilled dessert. Just remember that anything you swap needs to chill well!
And one last thing people always ask about: the final drizzle. I used the extra pudding mix, but if you really want to go wild, use a high-quality fudge sauce straight from the jar. Heat it slightly, drizzle it on top right before setting it in the fridge, and let that chill firm up that delicious richness. The contrast between the warm-ish fudge and the cold layers creates magic.
Storage and Keeping Your Brownie Refrigerator Cake Fresh
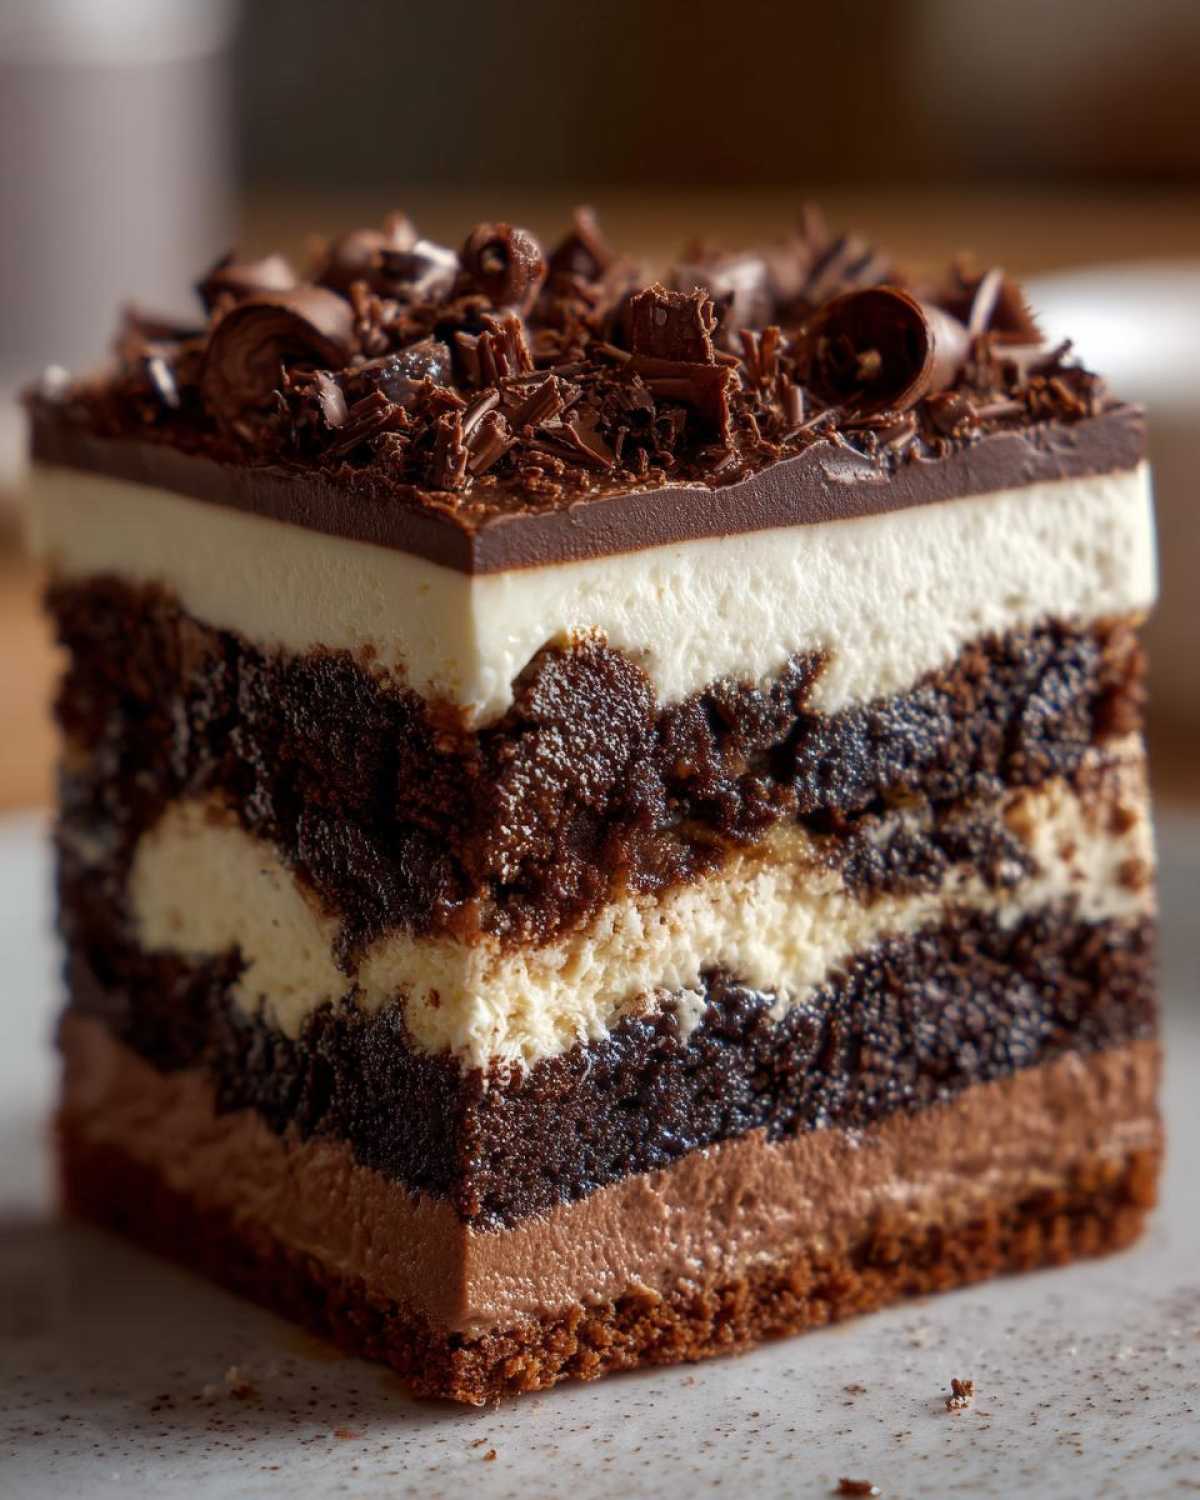
Since this is the ultimate make ahead chocolate treat, it’s practically designed to survive storage! I usually plan on making this the day before I need it, or sometimes even two days out. It just keeps getting better as those creamy layers marry with the brownie chunks. We’ve got a few great options here depending on when you need to serve it.
For simple refrigeration, always make sure the dish is covered really well. I use plastic wrap pressed right down onto the surface of the top whipped cream layer, and then I cover the whole dish on top of that. Air is the enemy of freshness, especially if you have onions lingering in your fridge! If covered tightly, this easy refrigerator dessert will keep swimmingly for about three to four days in the cold.
Now, can you freeze it? Yes, you absolutely can, which is fantastic if you need a freezer stash! If you plan on freezing, I strongly recommend using a springform pan and lining it thoroughly with plastic wrap *before* you assemble the layers. Once the brownie refrigerator cake is completely set (after that 6+ hour chill), wrap the entire pan tightly in a couple of layers of plastic wrap, and then foil to prevent freezer burn. You can freeze it like this for up to a month, no problem.
When you’re ready to thaw, just move the wrapped cake into the refrigerator overnight. Don’t rush it! Let it thaw slowly in the cold. The texture might be slightly softer when it fully thaws than when it first came out of the fridge, but it still tastes like a dream. Frankly, I think freezing makes the whole thing incredibly easy, kind of like how I prep my mashed potatoes for Thanksgiving weeks in advance.
If you happen to have leftovers (which seriously never happens in my house!), just keep it refrigerated under tight plastic wrap. It’s still perfectly fine to eat for a few days, though the brownie pieces might soften a tad more over time.
Serving Suggestions for Your Chilled Chocolate Cake Recipe
Okay, we made this gorgeous, layered chocolate marvel, and now it’s time to serve! Since this brownie refrigerator cake is so wildly rich—we’re talking fudgy, creamy, and chocolatey goodness in every bite—you don’t need much extra fuss. Keep the sides simple so the layers can really shine!
My favorite pairing, hands down, especially when this is served after a big dinner, is a nice hot cup of coffee. The bitterness of the coffee cuts right through the sweetness of the cream cheese and pudding layers perfectly. If you’re making this during the warmer months, try serving it with a side of fresh, tart raspberries or blackberries. The slight acidity wakes up your palate!
I’ve also seen people drizzle a little raspberry sauce over the top once it’s already plated. Don’t overdo it, though; remember, this is already a full dessert experience! If you are looking for a great beverage pairing for the morning after (yes, there will be leftovers!), you must try my coffee banana protein shake recipe—it’s the perfect energizing complement to a slice of leftover chilled chocolate cake!
Frequently Asked Questions About Making a Brownie Refrigerator Cake
I always get the same questions swirling around once people realize how simple this brownie refrigerator cake is! It’s a favorite for a reason, and most of the hang-ups are just about getting the structure right since it’s a no-bake item. Don’t worry, I’ve got the answers to help make your assembly flawless. If you are looking for more quick fixes, check out my general list of easy refrigerator desserts!
Can I use store-bought brownies instead of baking them for this brownie refrigerator cake?
Oh, absolutely you can! I totally get it when you need a true shortcut. If you buy them, though, make sure you are grabbing the absolute fudgiest type you can find. Those cake-like, light brownies crumble too much when you cube them, and you need that dense texture to hold up against all those creamy layers. If you can only find the boxed mix, just bake the whole batch and let it cool completely before cubing. It only takes 30 minutes in the oven, but it saves you from having a soupy mess when you try to assemble your no bake brownie dessert!
How long does this chilled chocolate cake recipe need to set?
This is the million-dollar question! You *could* slice into this thing after about six hours in the fridge, but let’s be real—it’s going to be a little messy. I always yell at my family that you must, must, *must* give this chilled chocolate cake recipe at least overnight. Seriously, 8 to 12 hours is the sweet spot. That extra chilling time lets the pudding and the cream cheese firm up into near-cheesecake texture, which means you get beautiful, clean slices when you serve it. Patience tastes amazing here!
What is the best way to remove this dessert from a springform pan?
A springform pan is just so gorgeous for presentation, but it gives people the shivers when it comes time to release it. Here is my trick, born from years of sticky messes! First, make sure you used the parchment paper liner! Once your brownie refrigerator cake is completely chilled (after that overnight rest!), take a very thin offset spatula—the kind bakers use—and gently run it all the way around the interior edge between the cake and the metal ring. Don’t dig; just guide it. Then, unlock the clip and gently lift the ring off. If it seems stuck, just let it sit on the counter for about five minutes; the slight warming helps release the fat from the cream cheese layer just enough to slide free without pulling the layers apart.
Nutritional Estimates for This Decadent Chilled Dessert
Look, this is a seriously decadent chilled dessert, not a health food, but I always like to give you a rough idea of what you are diving into! These numbers are just estimates, you know, because I don’t know if you used organic milk or extra rich heavy cream in your layers. But generally, for a generous slice of this layered brownie dessert, here is what you are looking at:
- Serving Size: 1 slice
- Calories: 380
- Sugar: 35g
- Sodium: 250mg
- Fat: 20g
- Saturated Fat: 10g
- Unsaturated Fat: 10g
- Trans Fat: 0.5g
- Carbohydrates: 48g
- Fiber: 2g
- Protein: 5g
- Cholesterol: 35mg
Remember, all those creamy layers and fudgy brownies add up, so enjoy every single bite! This is a treat, not an everyday thing, and that’s what makes it so special.
Share Your Brownie Refrigerator Cake Creations
Seriously, I want to see your masterpiece! When you’ve managed to pull off those perfect layers of goodness, please snap a picture and tag me! Hearing from you makes all this recipe testing worthwhile. Don’t forget to leave a quick star rating right here on the recipe card if you loved how simple and amazing this fudgy brownie cake turned out. If you hit any snags or have a brilliant variation, drop a comment below—I really love learning how you all manage your simple make ahead cake recipes! You can always reach out through my contact page, too, if you have anything big you want to discuss!
Nutritional Estimates for This Decadent Chilled Dessert
Look, this is a seriously decadent chilled dessert, not a health food, but I always like to give you a rough idea of what you are diving into! These numbers are just estimates, you know, because I don’t know if you used organic milk or extra rich heavy cream in your layers. But generally, for a generous slice of this layered brownie dessert, here is what you are looking at:
- Serving Size: 1 slice
- Calories: 380
- Sugar: 35g
- Sodium: 250mg
- Fat: 20g
- Saturated Fat: 10g
- Unsaturated Fat: 10g
- Trans Fat: 0.5g
- Carbohydrates: 48g
- Fiber: 2g
- Protein: 5g
- Cholesterol: 35mg
Remember, all those creamy layers and fudgy brownies add up, so enjoy every single bite! This is a treat, not an everyday thing, and that’s what makes it so special.
Share Your Brownie Refrigerator Cake Creations
Seriously, I want to see your masterpiece! When you’ve managed to pull off those perfect layers of goodness, please snap a picture and tag me! Hearing from you makes all this recipe testing worthwhile. Don’t forget to leave a quick star rating right here on the recipe card if you loved how simple and amazing this fudgy brownie cake turned out. If you hit any snags or have a brilliant variation, drop a comment below—I really love learning how you all manage your simple make ahead cake recipes! You can always reach out through my contact page, too, if you have anything big you want to discuss!
PrintNo-Bake Brownie Refrigerator Cake
Assemble this decadent, layered chocolate dessert using baked brownies and creamy fillings. This cake sets in the refrigerator, requiring no oven time for the final assembly.
- Prep Time: 30 min
- Cook Time: 30 min
- Total Time: 7 hours
- Yield: 12 servings
- Category: Dessert
- Method: Chilling
- Cuisine: American
- Diet: Vegetarian
Ingredients
- 1 box (about 18 oz) fudge brownies mix (plus ingredients listed on box for baking)
- 1 package (3.4 oz) instant chocolate pudding mix
- 2 cups cold milk
- 1 container (8 oz) frozen whipped topping, thawed
- 1 package (8 oz) cream cheese, softened
- 1 cup powdered sugar
- 1 teaspoon vanilla extract
- 1 cup heavy cream
- 1/4 cup granulated sugar (for whipped cream)
- Chocolate shavings, for topping
Instructions
- Bake the brownie mix according to package directions. Let the brownies cool completely, then cut them into 1-inch cubes.
- Prepare the chocolate pudding: Whisk the instant pudding mix with 2 cups of cold milk until thickened, about 2 minutes. Let it sit for 5 minutes.
- Prepare the cream cheese layer: In a separate bowl, beat the softened cream cheese, powdered sugar, and vanilla extract until smooth. Gently fold half of the thawed whipped topping into the cream cheese mixture until just combined.
- Prepare the fresh whipped cream: In a clean bowl, beat the heavy cream and granulated sugar until stiff peaks form. Fold the remaining half of the thawed whipped topping into this mixture.
- Assemble the cake in a 9×13 inch baking dish or a springform pan: Place half of the cooled brownie cubes in an even layer on the bottom.
- Spread the cream cheese mixture evenly over the brownie layer.
- Spoon half of the prepared chocolate pudding over the cream cheese layer.
- Top with the remaining brownie cubes.
- Spread the chocolate whipped cream mixture over the brownies.
- Drizzle the remaining chocolate pudding over the top layer. Swirl gently with a knife if desired.
- Cover the dish tightly with plastic wrap and refrigerate for at least 6 hours, or preferably overnight, to allow the layers to set.
- Before serving, top with chocolate shavings. Slice and serve cold.
Notes
- Use dense, fudgy brownies for the best texture in this no-bake cake.
- If using a springform pan, line the bottom with parchment paper for easier removal.
- You can substitute store-bought fudge sauce for the final pudding drizzle if you prefer a richer topping.
Nutrition
- Serving Size: 1 slice
- Calories: 380
- Sugar: 35
- Sodium: 250
- Fat: 20
- Saturated Fat: 10
- Unsaturated Fat: 10
- Trans Fat: 0.5
- Carbohydrates: 48
- Fiber: 2
- Protein: 5
- Cholesterol: 35